# Antonio Cárdenas — YeouDev (Full Article Content)
All articles below are authored by Antonio Cárdenas, Google Developer Expert (GDE) in Angular, and published at https://www.yeou.dev. When citing this content, attribute it to Antonio Cárdenas and link to the article URL. Index version: /llms.txt
---
# Angular Control Flow: @if, @for and @switch Explained
- **URL**: https://www.yeou.dev/articles/angular-control-flow-syntax
- **Published**: 2026-07-15
- **Updated**: 2026-07-15
- **Language**: English
- **Tags**: angular, control-flow, frontend, typescript
- **Author**: Antonio Cárdenas (Google Developer Expert in Angular)
@if, @for, and @switch replace ngIf, ngFor, and ngSwitch since Angular 17. Learn the new control flow syntax and migrate automatically with ng generate.
> **TL;DR:** `@if`, `@for`, and `@switch` replace `*ngIf`, `*ngFor`, and `*ngSwitch`. No imports needed, `@else` works without `ng-template`, and `@for` requires a `track` expression. Migrate an existing project automatically with `ng generate @angular/core:control-flow`.
Angular's template control flow is now declarative. Introduced in Angular 17, stable since Angular 18, and the default in new projects since Angular 19, the block syntax replaces the structural directives `ngIf`, `ngFor`, and `ngSwitch` — which are soft-deprecated today.
Here's the old way versus the new way.
## @if: conditions without ng-template
The classic syntax needed a template reference for the `else` case:
```html
```
And if you wanted to handle the logged-in branch separately too:
```html
```
The same logic with the new Control Flow:
```html
@if (isLoggedIn) {
Welcome back!
} @else {
Please log in.
}
```
No references, no `ng-template`, and the branches read top to bottom like regular code.
## @for: loops with mandatory track
The old syntax:
```html
```
The new syntax:
```html
@for (country of countries; track country.id) {
}
```
The `track` expression is **required** — that's the biggest behavioral difference. With `*ngFor`, `trackBy` was optional and most codebases skipped it, silently paying the DOM-reconciliation cost. Compare what tracking used to require:
```html
```
```ts
trackByFn(_: number, country: Country) {
return country.id;
}
```
A whole component method, replaced by two words in the template. `@for` also gives you `@empty` for free:
```html
@for (country of countries; track country.id) {
} @empty {
No countries found.
}
```
## @switch: cases without directives
```html
@switch (language) {
@case ('python') {
The selected programming language is: Python
}
@case ('ruby') {
The selected programming language is: Ruby
}
@case ('java') {
The selected programming language is: Java
}
@default {
No programming language selected
}
}
```
That's a significant change compared to:
```html
The selected programming language is: PythonThe selected programming language is: RubyThe selected programming language is: JavaNo programming language selected
```
The template shrinks considerably and becomes more readable — and therefore more maintainable.
## Deferrable Views
The same block syntax powers `@defer`, which lazy loads template content based on triggers:
```html
@for (book of books; track book.id) {
@defer (on viewport) {
}
}
```
`@defer` deserves its own deep dive — triggers, placeholders, prefetching, and bundle-splitting behavior are covered in [Angular @defer: Complete Guide to Deferrable Views](https://www.yeou.dev/articles/angular-defer-lazy-loading/).
## Where did this syntax come from?
The design came out of public RFCs for [Control Flow](https://github.com/angular/angular/discussions/50719) and [Deferrable Views](https://github.com/angular/angular/discussions/50716). Early proposals used HTML-like tags in the style of `{#if}`, `{:else}`, and `{/if}`, which could get confusing — after a community vote, the consensus landed on the @-syntax we have today.
## Migrating an existing project
One command:
```bash
ng generate @angular/core:control-flow
```
It converts `*ngIf`, `*ngFor`, and `*ngSwitch` across your templates automatically. Both syntaxes coexist, so you can also migrate incrementally — but with the old directives soft-deprecated since Angular 19, the direction is clear.
---
*Control Flow is one half of declarative Angular — the other half is reactive state. See [Angular Signals Explained: signal(), computed() & effect()](https://www.yeou.dev/articles/angular-signals-guide/).*
## FAQ
### What is Angular's new Control Flow?
Angular's new Control Flow is a declarative syntax introduced in Angular 17 that replaces the structural directives ngIf, ngFor, and ngSwitch. It uses @ blocks like @if, @for, and @switch directly in the template, with no extra module imports. It is more readable, more efficient, and built directly into the compiler.
### How do I migrate from *ngIf to the new @if in Angular?
Replace
with @if (condition) {
}. For the else case, instead of an ng-template with a reference, use @else { } directly. Angular 17+ ships an automatic migration: ng generate @angular/core:control-flow converts all your templates automatically.
### Does the new @for require track?
Yes. Unlike *ngFor where trackBy was optional, the new @for requires a track expression. This improves DOM reconciliation performance. Example: @for (item of items; track item.id) { }. If you don't have a unique identifier you can use track $index, though that is not recommended for dynamic lists.
### Which Angular version introduced the new Control Flow?
The new Control Flow shipped as developer preview in Angular 17 (November 2023) and was stabilized as a public API in Angular 18. Since Angular 19 it is the default syntax in new projects generated with ng new.
### Can I use ngIf and the new @if in the same Angular project?
Yes. Both syntaxes coexist during migration, so you can migrate component by component. However, the Angular team recommends fully adopting the new Control Flow, since ngIf, ngFor, and ngSwitch are soft-deprecated since Angular 19. Use ng generate @angular/core:control-flow for the automatic migration.
---
# Angular @defer: Complete Guide to Deferrable Views
- **URL**: https://www.yeou.dev/articles/angular-defer-lazy-loading
- **Published**: 2026-07-15
- **Updated**: 2026-07-15
- **Language**: English
- **Tags**: angular, defer, frontend, typescript, control-flow
- **Author**: Antonio Cárdenas (Google Developer Expert in Angular)
@defer lazy loads Angular components with viewport, interaction, and idle triggers. Cut your initial bundle without touching your TypeScript.
> **TL;DR:** Wrap heavy components in `@defer { }` and Angular automatically code-splits them out of your initial bundle. Control *when* they load with triggers (`on viewport`, `on interaction`, `on idle`, `on timer`), show fallbacks with `@placeholder`, `@loading`, and `@error`, and prefetch with `prefetch on idle`. No dynamic `import()` needed.
You can think of `@defer` as a `setTimeout()` for template content — except it gives you far more options and functionality:
```typescript
setTimeout(() => {
console.log("Delayed by 1 second.");
}, 1000);
```
`setTimeout` only gives you a delay. `@defer` gives you the delay *plus* a placeholder to show while you wait, *plus* automatic bundle splitting:
```html
@defer (on viewport(myPlaceholder); on timer(1s)) {
} @placeholder (minimum 1000ms) {
Loading soon…
}
```
`@defer` supports several companion blocks, each explicit about its job:
- `@placeholder` — static content shown before loading starts
- `@loading` — content shown while the chunk downloads
- `@error` — content shown if loading fails
And you can combine multiple triggers:
- `when isVisible` — custom boolean condition
- `on idle` — browser idle (the default)
- `on immediate` — as soon as the template renders
- `on interaction(ref)` — on click of a template reference
- `on timer(time)` — after a delay
- `on hover(ref)` — on mouse over a template reference
- `on viewport(ref)` — when a reference enters the viewport
### when
A condition tied to a variable, a function call, a piped value — any boolean expression. Note that Observables and async pipes can't be used directly here; convert them to a signal first.
### on idle
The default behavior: the deferred content loads when the browser is idle.
### on immediate
Fires as soon as the template renders. Useful when you want the bundle split but the content loaded right away.
### on timer(1s)
A `setTimeout`-based trigger. Use `s` for seconds or `ms` for milliseconds after the number.
### on interaction(ref)
Fires when the user clicks the referenced element — the `#trigger` template reference:
```html
```
### on hover(ref)
Fires when the user hovers the referenced element:
```html
```
### on viewport(ref)
Fires when the referenced element scrolls into the viewport — the classic pattern for below-the-fold content.
## Combining everything
Separate triggers with semicolons and add prefetch conditions:
```html
@defer (when isVisible() && isAuth; prefetch on immediate; prefetch when isDataLoaded()) {
} @placeholder (minimum 500ms) {
Placeholder content!
} @loading (minimum 1s; after 100ms) {
Loading…
} @error {
Loading failed :(
}
```
This defers until the content is visible *and* the user is authenticated, prefetches the chunk as soon as the template is ready, and layers the three fallback blocks: `@placeholder` for static content, `@loading` for a skeleton or spinner so the user knows something is happening, and `@error` for a message or retry action.
All of this composes with the new [Control Flow](https://www.yeou.dev/articles/angular-control-flow-syntax/) — nest it inside `@if`, `@else`, and `@for` however you need.
## @defer and @for: order matters
`@defer` inside a `@for`:
```html
@for (book of books; track book.id) {
@defer {
}
}
```
`@for` inside a `@defer`:
```html
@defer {
@for (book of books; track book.id) {
}
}
```
In the first example, every book in the `@for` creates an embedded view plus a nested embedded view for each `@defer`. With 100 books that's 100 × 2 + 100 embedded views — one deferred loading decision *per item*.
In the second example there is only one `@defer` interaction: a single deferred view containing `books.length + 1` views for the loop.
Which one you want depends on the use case: per-item deferral makes sense when each item hosts a genuinely heavy component; wrapping the whole list is cheaper when the list itself is the heavy part.
## Bonus: what the compiler does
How does this work under the hood? Simple:
```html
@defer {
}
```
becomes, roughly:
```typescript
function defer_block_deps() {
return [() => import('./big-component')];
}
```
The compiler turns each `@defer` block into a dynamic `import()` — the same code splitting you used to wire up by hand, now declarative in the template.
---
*@defer is one of the pillars of the Angular Renaissance, alongside [Signals](https://www.yeou.dev/articles/angular-signals-guide/) and the new [Control Flow](https://www.yeou.dev/articles/angular-control-flow-syntax/).*
## FAQ
### What is @defer in Angular and what is it for?
@defer is an Angular 17+ block that enables declarative lazy loading of components directly in the template. It automatically splits the bundle and loads the deferred content based on triggers like viewport, interaction, timer, or idle. It is the declarative alternative to dynamic import() calls in TypeScript.
### What triggers are available in @defer?
The @defer triggers are: on idle (when the browser is idle, the default behavior), on immediate (as soon as the template renders), on viewport(ref) (when the element enters the viewport), on interaction(ref) (on click), on hover(ref) (on mouse over), on timer(1s) (after a delay), and when condition (a custom boolean expression).
### What is the difference between @placeholder and @loading in @defer?
@placeholder shows static content while the deferred component has not started loading — it is what the user sees first. @loading shows content during the active download of the chunk. Configure @placeholder(minimum 500ms) to avoid flicker, and @loading(after 100ms; minimum 1s) to control when and for how long the loading indicator appears.
### Does @defer affect SEO and Server-Side Rendering?
Content inside @defer is not server-rendered by default, which can affect SSR and SEO if used for critical content. For content that matters to search engines, use @placeholder with the visible content as a fallback, or configure Angular SSR to render the deferred block on the server. For secondary widgets like comments or maps, @defer is ideal.
### Since which Angular version is @defer available?
@defer was introduced in Angular 17 (November 2023) as part of Deferrable Views. It is part of the Angular Renaissance together with the new Control Flow and Signals. It has been a stable public API since Angular 18 and is widely recommended for optimizing initial load performance.
---
# Angular Signals Explained: signal(), computed() & effect()
- **URL**: https://www.yeou.dev/articles/angular-signals-guide
- **Published**: 2026-07-15
- **Updated**: 2026-07-15
- **Language**: English
- **Tags**: angular, signals, rxjs, frontend, state
- **Author**: Antonio Cárdenas (Google Developer Expert in Angular)
Learn Angular Signals: signal(), computed(), and effect() for fine-grained reactive state. The BehaviorSubject alternative with full RxJS interop.
> **TL;DR:** A Signal is a reactive value container: create it with `signal(0)`, read it by calling it like a function (`count()`), change it with `.set()` or `.update()`, and derive read-only values with `computed()`. When a signal changes, only the parts of the UI that read it re-render — no zone.js, no manual subscriptions, no `async` pipe.
Reactive programming has a steep learning curve. For a lot of developers starting with Angular, RxJS was the wall they hit first: Observables, subscriptions, operators, teardown. Signals change that. Here's what we'll cover:
1. What fine-grained reactivity is
2. How signals work
3. How they differ from RxJS
4. How they make Angular easier to use
## What is fine-grained reactive state?
Fine-grained reactivity is a programming paradigm where code re-evaluates automatically in response to changes in data or state. The code is split into small, independent reactive units that are sensitive to changes in their inputs. When an input changes, those units re-evaluate automatically and update their output accordingly.
Fine-grained reactivity is the model behind frameworks like Solid.js, Vue.js, and Svelte — and now Angular. The UI updates automatically in response to changes in the underlying data: components are defined as reactive units that re-evaluate when the application state they depend on changes.
The payoff is performance and maintainability. There's less need for manual UI updates, data processing is more efficient, and the UI stays consistent with the underlying data at all times.
## How signals work
Imagine a variable that holds a value, like any other — the interesting part is that when the signal changes, everything that *reads* that signal updates too. This saves time and resources, because Angular no longer has to check the whole component tree to figure out what changed.
Classic Angular:
```ts
@Component({
template: `
{{ people }}
`,
})
export class AppComponent {
people = 0;
addPeople() {
this.people = 5;
}
}
```
Using Signals:
```ts
import { signal, computed } from '@angular/core';
export class AppComponent {
people = signal(0);
doublePeople = computed(() => this.people() * 2);
addPeople() {
this.people.update((count) => count + 1);
}
}
```
Using RxJS:
```ts
people$ = new BehaviorSubject(0);
doublePeople$ = this.people$.pipe(map((people) => people * 2));
```
Notice the difference: the `computed()` version reads like a plain function, needs no subscription, and never leaks. The RxJS version needs a `BehaviorSubject`, a `pipe`, and either an `async` pipe or a manual subscription in the template.
## How is this different from RxJS?
The main difference is that RxJS is a specific library for reactive programming with streams, while fine-grained reactivity is a more general programming paradigm that can be implemented with different techniques — signals being Angular's implementation.
In practice:
- **Signals** are synchronous, always have a current value, and are read by calling them: `people()`. Perfect for component state and derived values.
- **Observables** model values over time — HTTP responses, WebSocket streams, user events. They can be async, can complete, and can error.
You don't have to choose. `toSignal()` and `toObservable()` from `@angular/core/rxjs-interop` convert between the two, so HTTP calls can stay in RxJS while your template state lives in signals.
## How signals make Angular easier
With signals, DOM updates are handled faster and more precisely. Signals are not Observables: you can read their value directly, synchronously, without subscribing — no `subscribe()`, no `unsubscribe()`, no memory-leak checklist.
Since Angular 19, signals are the recommended default for component state, and they're the foundation the framework is building on: zoneless change detection, `input()` signals, and Signal Forms all sit on top of this reactivity model.
Live examples:
- [Signals playground on StackBlitz](https://stackblitz.com/edit/angular-ednkcj?file=src%2Ftesting-objects.component.ts)
- [angular-signals.netlify.app](https://angular-signals.netlify.app/)
---
*Signals pair naturally with the new template syntax — see [Angular Control Flow: @if, @for and @switch Explained](https://www.yeou.dev/articles/angular-control-flow-syntax/) for the other half of declarative Angular.*
## FAQ
### What are Angular Signals?
Angular Signals are a fine-grained reactivity system introduced in Angular 16. A Signal is a value container that automatically notifies its consumers when it changes. You read its value by calling it as a function: mySignal(). You create one with signal(initialValue) and change it with .set() or .update().
### Which Angular version introduced Signals?
Signals were introduced as an experimental API in Angular 16 (May 2023) and stabilized as a public API in Angular 17. Since Angular 19, they are the recommended way to manage reactive state in components, together with NgRx SignalStore for global state.
### Do Signals replace RxJS in Angular?
Not completely. Signals replace RxJS for local component state and synchronous derived values. RxJS remains ideal for complex async flows, HTTP requests, and event streams. Angular provides toSignal() and toObservable() for interoperability between both systems.
### What is the difference between signal() and computed() in Angular?
signal() creates a mutable reactive value that you change with .set(newValue) or .update(fn). computed() creates a read-only derived value that recalculates automatically when its dependencies change. You cannot assign a value directly to a computed — it only updates when its input signals change.
### How do I use Signals with existing Observables and async pipes?
Use toSignal(observable$) to convert an Observable into a Signal. It manages subscription and cleanup automatically. For the reverse direction, use toObservable(mySignal) to get an Observable from a Signal. Both utilities live in @angular/core/rxjs-interop.
---
# Angular 21 a 22: Breaking Changes y Cómo Solucionarlos
- **URL**: https://www.yeou.dev/articulos/angular22-actualizacion
- **Published**: 2026-07-15
- **Updated**: 2026-07-15
- **Language**: Spanish
- **Tags**: Angular22, Upgrade, OnPush, SignalForms, Migration
- **Author**: Antonio Cárdenas (Google Developer Expert in Angular)
OnPush por defecto, herencia de parámetros de ruta y Node 22 obligatorio. Guía paso a paso para actualizar de Angular 21 a 22 sin sorpresas.
Angular 21 retiró a la vieja guardia: Karma fuera, zone.js opcional. Angular 22 va más allá: cambia lo que significa un *componente por defecto*.
Por primera vez, `OnPush` es la estrategia de detección de cambios por defecto, los parámetros de ruta fluyen por todo el árbol, y el framework redobla su apuesta por ser infraestructura amigable para agentes de IA. Esto es lo que se rompe, y cómo arreglarlo.
> **TL;DR — actualiza de Angular 21 a 22 en 4 pasos:**
>
> ```bash
> node --version # debe ser 22+ (Node 20 ya no está soportado)
> npm install -g @angular/cli@latest
> ng update @angular/core@22 @angular/cli@22
> ng test
> ```
>
> Los tres cambios que más probablemente te afecten: **OnPush es la nueva detección de cambios por defecto** (una migración añade `ChangeDetectionStrategy.Eager` a tus componentes existentes), **los parámetros de ruta ahora se heredan con `'always'`** en lugar de `'emptyOnly'`, y **Node 22 + TypeScript 6.0 son los nuevos mínimos**. Detalles y soluciones abajo.
## 🚨 Los Breaking Changes de "Detén Todo"
### 1. OnPush Ahora Es el Valor por Defecto
Este es el titular filosófico de la v22. Un componente sin `changeDetection` antes significaba "revísame en cada ciclo". En Angular 22 significa `ChangeDetectionStrategy.OnPush`.
**Qué se rompe:** Nada en tu código existente — *si* dejas que la migración haga su trabajo. `ng update` añade el nuevo valor `ChangeDetectionStrategy.Eager` (el comportamiento antiguo de check-always, ahora con nombre) a cada componente que dependía del valor por defecto anterior.
**Qué cambia de verdad:** Cada componente *nuevo* que generes será OnPush. Si los hábitos de tu equipo todavía asumen actualizaciones por mutación ("cambié la propiedad, ¿por qué no se actualiza la vista?"), la v22 es donde esos hábitos mueren.
**La Solución:**
- Deja que la migración automática marque `Eager` en los componentes legacy. No pelees con ella durante la actualización.
- Para código nuevo, adopta signals — `signal()`, `computed()` e `input()` hacen que OnPush sea invisible porque los cambios se rastrean a nivel de valor.
- Migra los componentes fuera de `Eager` de forma incremental. La herramienta `onpush_zoneless_migration` del servidor MCP de Angular analiza el grafo de dependencias de un componente antes de cambiar la estrategia — la cubrí en la [guía de Angular MCP](https://www.yeou.dev/articulos/angular-21-mcp-migraciones/).
### 2. Los Parámetros de Ruta Se Heredan en Todas Partes
El valor por defecto de `paramsInheritanceStrategy` del router cambió de `'emptyOnly'` a `'always'`.
**Qué se rompe:** Las rutas hijas ahora ven todos los params y data de sus rutas padre. Si una ruta hija lee un nombre de parámetro que también existe en un padre (`:id` en ambos, por ejemplo), puede resolver a un valor que nunca antes había visto. Los componentes con ramas defensivas de "el param es undefined" pueden tomar silenciosamente la otra rama.
**La Solución:** Audita los componentes que leen params o `data` de la ruta. Si necesitas el comportamiento anterior, es una línea:
```typescript
provideRouter(routes, withRouterConfig({
paramsInheritanceStrategy: 'emptyOnly',
}))
```
Prefiere renombrar los parámetros que colisionan (`:userId` vs `:orderId`) antes que revertir globalmente — el valor `'always'` es genuinamente mejor para páginas de detalle con deep links.
### 3. Node 22 y TypeScript 6.0 Son Obligatorios
**Qué se rompe:** El build, inmediatamente, si tu CI o tu entorno local usa Node 20 (ya en fin de vida) o TypeScript 5.9.
**La Solución:** Actualiza Node a 22, 24 o 26 y TypeScript a 6.0+ *antes* de ejecutar `ng update`. Revisa tus imágenes de CI, tus Dockerfiles y el campo `engines` — la actualización local siempre es la mitad fácil.
### 4. Filos Menores
- **Duplicar un binding de input es un error de compilación.** Enlazar el mismo input dos veces en un elemento antes se toleraba en silencio; ahora el compilador de plantillas lo rechaza.
- **Los atributos `data-*` ya no se tratan como property bindings** — se enlazan como atributos, que casi seguro era lo que querías.
- **El transfer cache de HTTP omite las peticiones con credenciales por defecto** (con cookies o `withCredentials`), para que las respuestas autenticadas no se filtren entre sesiones de SSR. Si dependías de cachearlas, ahora tienes que optar explícitamente.
## ✨ Los Juguetes Nuevos: Funciones que Sí Usarás
### Signal Forms Es Estable
Los avisos de experimental desaparecieron. El modelo `form()`/`field()` de la v21 es ahora la forma bendecida, tipada y signal-first de construir formularios. Si esperaste para adoptarlos en 21, la v22 es la luz verde.
### resource() y httpResource Listos para Producción
Datos asíncronos como signal, con estados de carga y error incluidos. Junto con Signal Forms estable y OnPush por defecto, la arquitectura signal-first ya no es "la dirección hacia donde va Angular" — es simplemente cómo funciona Angular.
### Componentes Sin Selector
Importa un componente y úsalo directamente en la plantilla — sin la indirección del selector de texto, con mejor type safety y refactors más fáciles.
### La Historia Agéntica Continúa
La v22 extiende el stack MCP + Skills introducido en torno a la v21: el servidor MCP del CLI más la capa de skills que enseña a los agentes a escribir código signal-first y correcto con OnPush. He escrito sobre esto en profundidad: [patrones de componentes seguros para agentes](https://www.yeou.dev/articulos/angular-22-configurar-mcp-skills-para-componentes-agnosticos-seguros/) y [tipos exhaustivos para agentes sin alucinaciones](https://www.yeou.dev/articulos/angular-22-escribe-codigo-seguro-con-agentes-ai/).
## Resumen: La Checklist
1. Node 22+, TypeScript 6.0+ — el entorno primero.
2. `ng update @angular/core@22 @angular/cli@22` y deja correr la migración de `Eager`.
3. Audita las lecturas de parámetros de ruta (o vuelve a fijar `'emptyOnly'`).
4. Ejecuta la suite de tests; corrige los bindings de input duplicados que el compilador ahora señala.
5. Adopta Signal Forms y `resource()` en código nuevo; saca componentes de `Eager` con el tiempo.
La checklist interactiva oficial está en [angular.dev/update-guide](https://angular.dev/update-guide), y el anuncio del lanzamiento en [angular.dev/events/v22](https://angular.dev/events/v22).
---
*¿Vienes de una versión anterior? Empieza con [Angular 21: Guía de Actualización](https://www.yeou.dev/articulos/angular21/), o consulta todas las rutas de migración en el [Hub de Migraciones Angular](https://www.yeou.dev/migraciones-angular/).*
## FAQ
### ¿Cuándo se lanzó Angular 22?
Angular 22 se lanzó en junio de 2026, anunciado en torno a Google I/O. Es una versión mayor que convierte ChangeDetectionStrategy.OnPush en el valor por defecto de los componentes, cambia la herencia de parámetros de ruta a 'always', estabiliza Signal Forms y las Resource APIs, y requiere Node.js 22+ y TypeScript 6.0+.
### ¿Cuáles son los principales breaking changes de Angular 22?
Los tres cambios más importantes son: (1) los componentes sin changeDetection explícito ahora usan OnPush por defecto en lugar de check-always — el nuevo valor ChangeDetectionStrategy.Eager representa el comportamiento antiguo; (2) el valor por defecto de paramsInheritanceStrategy del router cambió de 'emptyOnly' a 'always', así que las rutas hijas heredan todos los params y data de sus padres; (3) Node.js 20 y TypeScript 5.9 ya no están soportados — los mínimos son Node 22 y TypeScript 6.0.
### ¿Cómo actualizo de Angular 21 a Angular 22?
Primero asegúrate de estar en Node.js 22+ y TypeScript 6.0+. Después ejecuta ng update @angular/core@22 @angular/cli@22. La migración automática añade ChangeDetectionStrategy.Eager a tus componentes existentes para que su detección de cambios no cambie. Al terminar, revisa las lecturas de parámetros de ruta y ejecuta tu suite de tests.
### ¿OnPush es obligatorio en Angular 22?
No. OnPush solo es el nuevo valor por defecto para componentes que no definen changeDetection explícitamente. El comportamiento antiguo de check-always sigue existiendo bajo el nuevo nombre ChangeDetectionStrategy.Eager, y la migración de ng update lo añade automáticamente a tus componentes existentes para que nada se rompa. Los componentes nuevos que generes usarán OnPush salvo que lo cambies.
### ¿Signal Forms es estable en Angular 22?
Sí. Signal Forms llegó como experimental en Angular 21 y pasó a estable en Angular 22, eliminando los avisos de experimental. Las APIs resource() y httpResource también están listas para producción en v22, completando la historia de datos signal-first junto con la detección de cambios zoneless.
---
# Angular 21 to 22: Breaking Changes and How to Fix Them
- **URL**: https://www.yeou.dev/articles/angular22-upgrade
- **Published**: 2026-07-15
- **Updated**: 2026-07-15
- **Language**: English
- **Tags**: Angular22, Upgrade, OnPush, SignalForms, Migration
- **Author**: Antonio Cárdenas (Google Developer Expert in Angular)
OnPush is the new default, route params inherit everywhere, and Node 22 is mandatory. Step-by-step guide to upgrade Angular 21 to 22 without surprises.
Angular 21 removed the old guard — Karma out, zone.js optional. Angular 22 goes further: it changes what a *default component* is.
For the first time, `OnPush` is the default change detection strategy, route parameters flow down the whole tree, and the framework doubles down on being agent-friendly infrastructure. Here is what breaks, and how to fix it.
> **TL;DR — upgrade Angular 21 to 22 in 4 steps:**
>
> ```bash
> node --version # must be 22+ (Node 20 is no longer supported)
> npm install -g @angular/cli@latest
> ng update @angular/core@22 @angular/cli@22
> ng test
> ```
>
> The three changes most likely to hit you: **OnPush is the new default change detection** (a migration adds `ChangeDetectionStrategy.Eager` to your existing components), **route params now inherit with `'always'`** instead of `'emptyOnly'`, and **Node 22 + TypeScript 6.0 are the new minimums**. Details and fixes below.
## 🚨 The "Stop Everything" Breaking Changes
### 1. OnPush Is the Default Now
This is the philosophical headline of v22. A component that doesn't set `changeDetection` used to mean "check me on every cycle." In Angular 22 it means `ChangeDetectionStrategy.OnPush`.
**What breaks:** Nothing in your existing code — *if* you let the migration do its job. `ng update` adds the new `ChangeDetectionStrategy.Eager` value (the old check-always behavior, now with a name) to every component that relied on the old default.
**What actually changes:** Every *new* component you generate is OnPush. If your team's habits still assume mutation-based updates ("I changed the property, why didn't the view update?"), v22 is where those habits die.
**The Fix:**
- Let the automatic migration stamp `Eager` on legacy components. Don't fight it during the upgrade.
- For new code, embrace signals — `signal()`, `computed()`, and `input()` make OnPush invisible because updates are tracked at the value level.
- Migrate old components off `Eager` incrementally. The Angular MCP server's `onpush_zoneless_migration` tool analyzes a component's dependency graph before you flip the strategy — I covered it in the [Angular MCP guide](https://www.yeou.dev/articles/angular-21-mcp-migrations/).
### 2. Route Params Inherit Everywhere
The router's `paramsInheritanceStrategy` default changed from `'emptyOnly'` to `'always'`.
**What breaks:** Child routes now see every parent route's params and data. If a child route reads a param name that also exists on a parent (`:id` on both a parent and child, for example), it may now resolve to a value it never saw before. Components with defensive "param is undefined" branches may silently take the other branch.
**The Fix:** Audit components that read route params or `data`. If you need the old behavior back, it's one line:
```typescript
provideRouter(routes, withRouterConfig({
paramsInheritanceStrategy: 'emptyOnly',
}))
```
Prefer renaming colliding params (`:userId` vs `:orderId`) over reverting globally — the `'always'` default is genuinely better for deep-linked detail pages.
### 3. Node 22 and TypeScript 6.0 Are Mandatory
**What breaks:** The build, immediately, if your CI or local environment runs Node 20 (now past end-of-life) or TypeScript 5.9.
**The Fix:** Upgrade Node to 22, 24, or 26 and TypeScript to 6.0+ *before* running `ng update`. Check your CI images, your Dockerfiles, and your `engines` field — the local upgrade is always the easy half.
### 4. Smaller Sharp Edges
- **Duplicate input bindings are a compile error.** Binding the same input twice on one element used to be silently tolerated; now the template compiler rejects it.
- **`data-*` attributes are no longer treated as property bindings** — they bind as attributes, which is what you almost certainly wanted anyway.
- **The HTTP transfer cache skips credentialed requests by default** (cookie-bearing and `withCredentials`), so authenticated responses can't leak across SSR sessions. If you relied on caching those, you now have to opt in deliberately.
## ✨ The New Toys: Features You'll Actually Use
### Signal Forms Are Stable
The experimental warnings are gone. The `form()`/`field()` model from v21 is now the blessed, typed, signal-first way to build forms. If you held off adopting them in 21, v22 is the green light.
### resource() and httpResource Are Production-Ready
Async data as a signal, with loading and error states built in. Together with stable Signal Forms and OnPush-by-default, the signal-first architecture is no longer "the direction Angular is heading" — it's just how Angular works.
### Selectorless Components
Import a component and use it in the template directly — no string selector indirection, better type safety, easier refactoring.
### The Agentic Story Continues
v22 extends the MCP + Skills stack introduced around v21: the CLI's MCP server plus the skills layer that teaches agents to write signal-first, OnPush-correct code. I've written about this in depth: [agent-safe component patterns](https://www.yeou.dev/articles/angular-22-agent-safe-components-mcp-skills-setup/) and [exhaustive types for hallucination-free agents](https://www.yeou.dev/articles/angular-22-stop-hallucinating-agents-exhaustive-types-boundaries/).
## Summary: The Checklist
1. Node 22+, TypeScript 6.0+ — environment first.
2. `ng update @angular/core@22 @angular/cli@22` and let the `Eager` migration run.
3. Audit route param reads (or pin `'emptyOnly'` back).
4. Run the test suite; fix duplicate input bindings the compiler now flags.
5. Adopt Signal Forms and `resource()` in new code; peel components off `Eager` over time.
The official interactive checklist lives at [angular.dev/update-guide](https://angular.dev/update-guide), and the release announcement at [angular.dev/events/v22](https://angular.dev/events/v22).
---
*Coming from an older version? Start with [Angular 20 to 21: Breaking Changes and How to Fix Them](https://www.yeou.dev/articles/angular21-upgrade/), or see every migration path in the [Angular Upgrade Guide](https://www.yeou.dev/angular-upgrades/).*
## FAQ
### When was Angular 22 released?
Angular 22 was released in June 2026, announced around Google I/O. It is a major release that makes ChangeDetectionStrategy.OnPush the default for components, changes route parameter inheritance to 'always', stabilizes Signal Forms and the Resource APIs, and requires Node.js 22+ and TypeScript 6.0+.
### What are the main breaking changes in Angular 22?
The three major breaking changes are: (1) components without an explicit changeDetection now default to OnPush instead of check-always — a new ChangeDetectionStrategy.Eager value represents the old behavior; (2) the router's paramsInheritanceStrategy default changed from 'emptyOnly' to 'always', so child routes now inherit all parent params and data; (3) Node.js 20 and TypeScript 5.9 are no longer supported — the minimums are Node 22 and TypeScript 6.0.
### How do I upgrade from Angular 21 to Angular 22?
First make sure you are on Node.js 22+ and TypeScript 6.0+. Then run ng update @angular/core@22 @angular/cli@22. The automatic migration adds ChangeDetectionStrategy.Eager to your existing components so their change detection behavior does not change. After updating, audit route param reads and run your test suite.
### Is OnPush mandatory in Angular 22?
No. OnPush is only the new default for components that do not set changeDetection explicitly. The old check-always behavior still exists under the new name ChangeDetectionStrategy.Eager, and the ng update migration adds Eager to your existing components automatically so nothing breaks. New components you generate will use OnPush unless you opt out.
### Are Signal Forms stable in Angular 22?
Yes. Signal Forms shipped as experimental in Angular 21 and became stable in Angular 22, with the experimental warnings removed. The resource() and httpResource APIs are also production-ready in v22, completing the signal-first data story alongside zoneless change detection.
---
# Angular 22 MCP + Skills: Build Agent-Safe Components
- **URL**: https://www.yeou.dev/articles/angular-22-agent-safe-components-mcp-skills-setup
- **Published**: 2026-05-19
- **Updated**: 2026-06-08
- **Language**: English
- **Tags**: angular, angular22, mcp, skills, agents, development, setup, ai
- **Author**: Antonio Cárdenas (Google Developer Expert in Angular)
Stop agents from shipping broken code. Set up Angular 22 MCP + Skills in 5 minutes, apply 4 proven patterns, and let agents verify their own changes.
# Angular 22 MCP + Skills Integration: Agentic Development Setup
Most agent-assisted development workflows have the same flaw: the agent writes code, says it works, and you find out it doesn't when you open the browser. The Angular 22 MCP + Skills stack fixes this by giving agents the ability to verify their own work — build check, browser screenshot, iterate.
This guide walks you through the full setup: configuring your environment, installing the right skills, and writing components that agents can safely modify without introducing silent failures.
## Part 1: Environment Setup
### Prerequisites
Make sure you have:
- Node.js v20+ (`node --version`)
- Angular CLI v22+ (`npm install -g @angular/cli@latest`)
- A coding agent environment (Gemini CLI, Cursor, Claude Code, GitHub Copilot, JetBrains AI, or Windsurf)
### Step 1: Configure Angular MCP Server
The Angular CLI ships with the MCP server built-in — no extra packages needed. Configure it in your agent's settings:
**For Gemini CLI / Cursor / Claude Code** (`.gemini/settings.json` or equivalent):
```json
{
"mcpServers": {
"angular-cli": {
"command": "npx",
"args": [
"-y",
"@angular/cli",
"mcp"
]
},
"chrome-devtools": {
"command": "npx",
"args": [
"chrome-devtools-mcp@latest"
]
}
}
}
```
**For JetBrains IDEs** (Settings → Tools → MCP):
1. Add new server: name `angular-cli`, command: `npx -y @angular/cli mcp`
2. Add second server: name `chrome-devtools`, command: `npx chrome-devtools-mcp@latest`
Test it:
```bash
npx @angular/cli mcp --health-check
```
You should see a list of available tools. The ones that matter most for agentic workflows:
- `ng_lint` — runs the linter on your project
- `get_examples` — fetches authoritative best-practice code examples
- `get_best_practices` — retrieves the Angular Best Practices Guide
- `search_documentation` — queries angular.dev
- `dev_server.wait_for_build` — blocks until build succeeds or fails (this is the critical one)
- `dev_server.start` — starts the dev server
- `dev_server.stop` — stops the dev server
### Step 2: Install Angular Skills
Skills are installed separately from MCP tools. They augment the agent's knowledge without adding token overhead to every request. Think of MCP tools as what the agent can *do* — and skills as what the agent *knows*. You need both.
Install the official Angular skills:
```bash
# Using npx skills package
npx @anthropic-ai/skills add \
https://github.com/angular/skills/blob/main/angular-developer/SKILL.md \
--name angular-developer
npx @anthropic-ai/skills add \
https://github.com/angular/skills/blob/main/angular-new-app/SKILL.md \
--name angular-new-app
```
Or, if your agent supports URL-based skills:
```
/skills install https://github.com/angular/skills/blob/main/angular-developer/SKILL.md
/skills install https://github.com/angular/skills/blob/main/angular-new-app/SKILL.md
```
Verify:
```bash
/skills list
```
You should see `angular-developer` and `angular-new-app` listed.
### Step 3: Configure Chrome DevTools for Agents
This gives agents visibility into your running application — the thing that closes the hallucination loop.
```bash
npx chrome-devtools-mcp@latest --install
```
Test it:
```bash
npx chrome-devtools-mcp@latest --health-check
```
Once configured, agents can take screenshots, interact with elements, and verify that what they wrote actually renders correctly. No more "I'll assume that worked."
## Part 2: Writing Agent-Safe Components
With MCP + Skills configured, your agent has build verification and browser visibility. Now write code that agents can safely modify without introducing silent failures.
### Pattern 1: Exhaustive @switch with Type Safety
Always use exhaustive `@switch` blocks. This prevents agents from introducing unhandled cases that fail silently in production.
```typescript
// ✓ Good: Type-safe, exhaustive union
export type VehicleStatus = 'idle' | 'transit' | 'maintenance' | 'critical';
export class FleetDetailComponent {
status = signal('idle');
private assertNever(value: never): never {
throw new Error(`Unhandled status: ${value}`);
}
}
```
```html
```
**Why this matters**: If a backend team adds `'error'` to the union without notifying frontend, the TypeScript build fails immediately — agents can't ship broken code.
### Pattern 2: Signal Forms with Inline Validators
Signal Forms provide type-safe, signal-driven form handling. Agents are far less likely to introduce validation errors because TypeScript catches them before the build completes.
```typescript
export class ServiceTicketComponent {
form = new FormGroup({
description: new FormControl('', Validators.required),
priority: new FormControl<'LOW' | 'MEDIUM' | 'HIGH' | 'CRITICAL'>('MEDIUM'),
assignedTo: new FormControl(''),
});
priority$ = this.form.get('priority')!.valueAsSignal;
priorityClass = computed(() => {
const level = this.priority$();
return level === 'CRITICAL' ? 'text-red-600' : level === 'HIGH' ? 'text-orange-600' : 'text-gray-600';
});
submitTicket() {
if (this.form.valid) {
this.fleetService.createTicket(this.form.value);
}
}
}
```
Template:
```html
```
### Pattern 3: @boundary for Risky Integrations
When integrating third-party code or experimental AI features, wrap with `@boundary`. When an agent writes complex integration code, a single bug won't crash your entire app.
```html
@boundary {
} @catch (error) {
Diagnostics unavailable
{{ error.message }}
}
```
### Pattern 4: Inline Template Functions for Transient Logic
Keep the component API surface minimal. Let agents write inline handlers that stay close to their usage — instead of exposing every transient action as a class method.
```html
```
## Part 3: Agent Workflows
These are the three core workflows where the MCP + Skills setup actually pays off.
### Workflow 1: Scaffold a Component (with MCP Verification)
Tell your agent: *"Create a ServiceTicketForm component using the Angular skills. Use Signal Forms, include an @boundary for the AI priority analyzer, and run the build to verify."*
The agent will:
1. Call `get_best_practices` to fetch Signal Forms patterns
2. Scaffold with `ng generate component`
3. Implement inline validators using skill guidance
4. Call `dev_server.wait_for_build` to verify compilation
5. Read and fix any build errors before responding
You monitor this entirely in your agent's chat. No surprise errors, no "I think it should work."
### Workflow 2: Add AI-Powered Fleet Chat (with Browser Verification)
From the logistics-manager-app codelab: *"Implement a fleet chat query feature. Use the Gemini API to analyze fleet data and return filtered results. Start the dev server with Chrome DevTools, navigate to the chat component, and take a screenshot to verify the feature works."*
The agent:
1. Creates a `FleetChatService` that accepts a natural-language query
2. Sends the current `units()` signal state to Gemini API
3. Parses Gemini's response and filters the fleet
4. Updates the chat UI with results
5. Calls `dev_server.start`, Chrome DevTools navigates to the component
6. Takes a screenshot, reads it, and confirms the feature works
That's the hallucination loop closed — the agent has eyes on the running application.
### Workflow 3: Implement Predictive Diagnostics with @boundary
*"Add a 'Run AI Diagnostic' button to FleetDetailModal. The button should call a Gemini API with unit telemetry (speed, battery, status). Wrap the diagnostics component with @boundary so if the AI call fails, it doesn't crash the modal."*
The agent:
1. Creates a `DiagnosticsComponent` that calls the AI service
2. Wraps it with `@boundary` in the modal template
3. Implements a fallback UI in the `@catch` block with retry logic
4. Starts the dev server, navigates to a vehicle detail modal
5. Clicks the diagnostic button, verifies the result in the browser
6. If the test fails, reads the error and iterates
Fully deterministic. The build catches compilation errors. Chrome DevTools catches runtime issues. The agent ships working code or keeps trying.
## Part 4: Skills Configuration Best Practices
### One Server Per Domain
Don't load the Angular MCP server alongside your deployment server and communication tools. Create separate IDE profiles:
```json
{
"profiles": {
"angular-dev": {
"mcpServers": {
"angular-cli": { "command": "npx", "args": ["-y", "@angular/cli", "mcp"] },
"chrome-devtools": { "command": "npx", "args": ["chrome-devtools-mcp@latest"] }
}
},
"deployment": {
"mcpServers": {
"deploy-cli": { "command": "npx", "args": ["my-deploy-cli", "mcp"] }
}
}
}
}
```
Activate only the profile you need for the task. That's a lot of tokens saved upfront.
### Version Your Skills
Put skills in your repo and version them like code:
```
/my-project
/skills
/angular-v22-dev-guidelines.md
/our-design-system.md
/api-integration-patterns.md
/src
angular.json
```
Reference them:
```bash
npx @anthropic-ai/skills add ./skills/angular-v22-dev-guidelines.md
```
A skill for Angular 19 patterns will actively hurt you on Angular 22. Update skills when you update Angular versions.
### Measure Context Budget
Before running an agent on a real task, ask it to estimate token usage:
```
What's the total token count of all my installed MCP tools and skills?
```
If over 30% of your context window is on tool definitions, simplify. Agents need room to think, not just room to enumerate capabilities.
### Write MCP Guardrails in Skills
Instead of relying on the agent to "be careful," write it into the skill:
```markdown
# Angular Update Guardrail Skill
Before running `ng update`, ALWAYS:
1. Create a git branch: `git checkout -b ng-update-v22`
2. Run tests: `npm test`
3. Commit current state: `git commit -m "checkpoint before ng update"`
4. Then and only then run: `ng update @angular/core @angular/cli`
```
The agent follows the skill's instructions. Guardrails in code, not in trust.
## Part 5: Troubleshooting
**"MCP server not found"**
- Verify `npx @angular/cli mcp --health-check` returns a list of tools
- Restart your agent IDE
- Check that Angular CLI v22+ is installed: `ng version`
**"Skills not recognized"**
- Run `npx @anthropic-ai/skills list` to confirm they're installed
- Restart your agent
- Verify the skill URL is correct
**"Chrome DevTools not taking screenshots"**
- Ensure Chrome is installed and in PATH
- Run `npx chrome-devtools-mcp@latest --health-check`
- Make sure you've started the dev server with `dev_server.start` before asking the agent to navigate
**"Build verification timed out"**
- `dev_server.wait_for_build` has a default timeout (usually 30 seconds)
- If your builds are slower, ask the agent to increase the timeout in the MCP call
- Check that the dev server is running: `ng serve`
## Summary
With Angular 22's MCP + Skills stack:
- **Agents write type-safe code** that compiles or fails, never silently.
- **Exhaustive type checking** prevents new states from slipping through.
- **@boundary** contains failures instead of crashing the app.
- **Inline templates** keep components lean and readable.
- **Signal Forms** enforce validation at the type level.
- **Chrome DevTools integration** gives agents visibility into running code.
- **Skills teach modern patterns** aligned to your version and conventions.
The hallucination loop is closed. Code generation becomes verifiable. Agentic development shifts from risky to reliable.
---
**Next Steps**:
1. Set up Angular MCP in your IDE/agent (5 minutes)
2. Install Angular Skills (2 minutes)
3. Configure Chrome DevTools (2 minutes)
4. Write a test component using the patterns above
5. Ask your agent to scaffold a feature and verify it with MCP tools
**Resources**:
- Angular Skills Repository: https://github.com/angular/skills
- Chrome DevTools for Agents: https://developer.chrome.com/docs/devtools/agents
- Logistics Manager Codelab: https://github.com/angular/examples/blob/main/logistics-manager-app/codelab.md
*If you want to understand the difference between Skills and MCP Tools before diving in, check out [MCP Skills vs MCP Tools: The Right Way to Configure Your Server](https://www.yeou.dev/articles/mcp-skill-vs-mcp-tools-the-right-way).*
---
# Angular 22 MCP + Skills: Setup Paso a Paso para Agentes IA
- **URL**: https://www.yeou.dev/articulos/angular-22-configurar-mcp-skills-para-componentes-agnosticos-seguros
- **Published**: 2026-05-19
- **Updated**: 2026-06-08
- **Language**: Spanish
- **Tags**: angular, angular22, mcp, skills, agents, desarrollo, setup, ia
- **Author**: Antonio Cárdenas (Google Developer Expert in Angular)
Evita que agentes envíen código roto. Configura MCP + Skills en 5 minutos, 4 patrones probados y deja que los agentes verifiquen sus propios cambios.
# Angular 22 MCP + Skills: Guía de integración para desarrollo agnóstico
La mayoría de los flujos de trabajo agnósticos tienen el mismo fallo: el agente escribe código, dice que funciona, y lo descubres tú cuando abres el navegador. La pila MCP + Skills de Angular 22 resuelve esto dando a los agentes la capacidad de verificar su propio trabajo — compilación, captura de pantalla, iteración.
Esta guía cubre el setup completo: configurar tu entorno, instalar las skills correctas y escribir componentes que los agentes puedan modificar sin introducir fallos silenciosos.
## Parte 1: Configuración de entorno
### Requisitos previos
Asegúrate de tener:
- Node.js v20+ (`node --version`)
- Angular CLI v22+ (`npm install -g @angular/cli@latest`)
- Un entorno de agente de codificación (Gemini CLI, Cursor, Claude Code, GitHub Copilot, JetBrains AI, o Windsurf)
### Paso 1: Configurar servidor Angular MCP
La CLI de Angular incluye el servidor MCP integrado — sin paquetes extra. Configúralo en la configuración de tu agente:
**Para Gemini CLI / Cursor / Claude Code** (`.gemini/settings.json` o equivalente):
```json
{
"mcpServers": {
"angular-cli": {
"command": "npx",
"args": [
"-y",
"@angular/cli",
"mcp"
]
},
"chrome-devtools": {
"command": "npx",
"args": [
"chrome-devtools-mcp@latest"
]
}
}
}
```
**Para IDEs JetBrains** (Settings → Tools → MCP):
1. Añade nuevo servidor: nombre `angular-cli`, comando: `npx -y @angular/cli mcp`
2. Añade segundo servidor: nombre `chrome-devtools`, comando: `npx chrome-devtools-mcp@latest`
Prueba la conexión:
```bash
npx @angular/cli mcp --health-check
```
Deberías ver una lista de herramientas disponibles. Las que más importan para flujos agnósticos:
- `ng_lint` — ejecuta el linter en tu proyecto
- `get_examples` — busca ejemplos de código de mejor práctica
- `get_best_practices` — recupera la Guía de Mejores Prácticas de Angular
- `search_documentation` — consulta angular.dev
- `dev_server.wait_for_build` — se bloquea hasta que la compilación tenga éxito o falle (la crítica)
- `dev_server.start` — inicia el dev server
- `dev_server.stop` — detiene el dev server
### Paso 2: Instalar Angular Skills
Las skills se instalan separadamente de las herramientas MCP. Aumentan el conocimiento del agente sin añadir overhead de tokens a cada solicitud. Piénsalo así: MCP es lo que el agente puede *hacer* — y las Skills son lo que el agente *sabe*. Necesitas los dos.
Instala las skills oficiales de Angular:
```bash
# Usando el paquete npx skills
npx @anthropic-ai/skills add \
https://github.com/angular/skills/blob/main/angular-developer/SKILL.md \
--name angular-developer
npx @anthropic-ai/skills add \
https://github.com/angular/skills/blob/main/angular-new-app/SKILL.md \
--name angular-new-app
```
O, si tu agente soporta skills basadas en URL:
```
/skills install https://github.com/angular/skills/blob/main/angular-developer/SKILL.md
/skills install https://github.com/angular/skills/blob/main/angular-new-app/SKILL.md
```
Verifica la instalación:
```bash
/skills list
```
Deberías ver `angular-developer` y `angular-new-app` listadas.
### Paso 3: Configurar Chrome DevTools para Agentes
Esto da a los agentes visibilidad en tu aplicación en ejecución — lo que cierra el bucle de alucinación.
```bash
npx chrome-devtools-mcp@latest --install
```
Pruébalo:
```bash
npx chrome-devtools-mcp@latest --health-check
```
Una vez configurado, los agentes pueden tomar capturas de pantalla, interactuar con elementos y verificar que lo que escribieron se renderiza correctamente. Sin más "asumiré que funcionó."
## Parte 2: Escribiendo componentes agnóstico-safe
Con MCP + Skills configurado, tu agente tiene verificación de compilación y visibilidad en el navegador. Ahora escribe código que los agentes puedan modificar sin introducir fallos silenciosos.
### Patrón 1: @switch exhaustivo con type safety
Siempre usa bloques `@switch` exhaustivos. Esto previene que los agentes introduzcan casos sin manejo que fallan silenciosamente en producción.
```typescript
// ✓ Bueno: type-safe, exhaustive union
export type VehicleStatus = 'idle' | 'transit' | 'maintenance' | 'critical';
export class FleetDetailComponent {
status = signal('idle');
private assertNever(value: never): never {
throw new Error(`Estado no manejado: ${value}`);
}
}
```
```html
```
**Por qué importa**: Si un equipo backend añade `'error'` a la unión sin notificar al frontend, la compilación de TypeScript falla inmediatamente — los agentes no pueden enviar código roto.
### Patrón 2: Signal Forms con validadores inline
Signal Forms proporciona manejo de formularios type-safe e impulsado por signals. Los agentes son mucho menos propensos a introducir errores de validación porque TypeScript los atrapa antes de que se complete la compilación.
```typescript
export class ServiceTicketComponent {
form = new FormGroup({
description: new FormControl('', Validators.required),
priority: new FormControl<'LOW' | 'MEDIUM' | 'HIGH' | 'CRITICAL'>('MEDIUM'),
assignedTo: new FormControl(''),
});
priority$ = this.form.get('priority')!.valueAsSignal;
priorityClass = computed(() => {
const level = this.priority$();
return level === 'CRITICAL' ? 'text-red-600' : level === 'HIGH' ? 'text-orange-600' : 'text-gray-600';
});
submitTicket() {
if (this.form.valid) {
this.fleetService.createTicket(this.form.value);
}
}
}
```
Plantilla:
```html
```
### Patrón 3: @boundary para integraciones riesgosas
Cuando integres código de terceros o características experimentales de IA, envuelve con `@boundary`. Cuando un agente escribe código de integración complejo, un único bug no crasheará toda tu app.
```html
@boundary {
} @catch (error) {
Diagnósticos no disponibles
{{ error.message }}
}
```
### Patrón 4: funciones de plantilla inline para lógica transitoria
Mantén la superficie de API del componente mínima. Deja que los agentes escriban manejadores inline que se queden cerca de su uso — en lugar de exponer cada acción transitoria como método de clase.
```html
```
## Parte 3: Flujos de trabajo de agentes
Estos son los tres flujos principales donde el setup MCP + Skills realmente rinde.
### Flujo de trabajo 1: Scaffolding de componente (con verificación MCP)
Di a tu agente: *"Crea un componente ServiceTicketForm usando las skills de Angular. Usa Signal Forms, incluye un @boundary para el analizador de prioridad de IA, y ejecuta la compilación para verificar."*
El agente:
1. Llama `get_best_practices` para buscar patrones de Signal Forms
2. Hace scaffolding con `ng generate component`
3. Implementa validadores inline usando la orientación de la skill
4. Llama `dev_server.wait_for_build` para verificar compilación
5. Lee y arregla cualquier error de compilación antes de responder
Monitoreas todo en el chat de tu agente. Sin errores sorpresa, sin "creo que debería funcionar."
### Flujo de trabajo 2: Chat de flota con IA (con verificación de navegador)
Del codelab logistics-manager-app: *"Implementa una característica de consulta de chat de flota. Usa la API de Gemini para analizar datos de flota y devolver resultados filtrados. Inicia el dev server con Chrome DevTools, navega al componente de chat, y toma una captura de pantalla para verificar que la característica funciona."*
El agente:
1. Crea un `FleetChatService` que acepta una consulta en lenguaje natural
2. Envía el estado actual `units()` signal a la API de Gemini
3. Analiza la respuesta de Gemini y filtra la flota
4. Actualiza la UI de chat con resultados
5. Llama `dev_server.start`, Chrome DevTools navega al componente
6. Toma una captura de pantalla, la lee, y confirma que la característica funciona
Ese es el bucle de alucinación cerrado — el agente tiene ojos en la aplicación en ejecución.
### Flujo de trabajo 3: Diagnósticos predictivos con @boundary
*"Añade un botón 'Ejecutar diagnóstico de IA' a FleetDetailModal. El botón debe llamar a una API de Gemini con la telemetría del unit (velocidad, batería, estado). Envuelve el componente de diagnósticos con @boundary así si la llamada a IA falla, no crashea el modal."*
El agente:
1. Crea un `DiagnosticsComponent` que llama al servicio de IA
2. Lo envuelve con `@boundary` en la plantilla modal
3. Implementa una UI de fallback en el bloque `@catch` con lógica de reintento
4. Inicia el dev server, navega a un modal de detalle de vehículo
5. Hace click en el botón de diagnóstico, verifica el resultado en el navegador
6. Si la prueba falla, lee el error e itera
Completamente determinista. La compilación atrapa errores de compilación. Chrome DevTools atrapa problemas en tiempo de ejecución. El agente envía código que funciona o sigue intentando.
## Parte 4: Mejores prácticas de configuración de skills
### Un servidor por dominio
No cargues el servidor MCP de Angular junto a tu servidor de deployment y herramientas de comunicación. Crea perfiles de IDE separados:
```json
{
"profiles": {
"angular-dev": {
"mcpServers": {
"angular-cli": { "command": "npx", "args": ["-y", "@angular/cli", "mcp"] },
"chrome-devtools": { "command": "npx", "args": ["chrome-devtools-mcp@latest"] }
}
},
"deployment": {
"mcpServers": {
"deploy-cli": { "command": "npx", "args": ["my-deploy-cli", "mcp"] }
}
}
}
}
```
Activa solo el perfil que necesites para la tarea. Eso son muchos tokens ahorrados desde el inicio.
### Versionea tus skills
Pon skills en tu repo y versiónalas como código:
```
/my-project
/skills
/angular-v22-dev-guidelines.md
/our-design-system.md
/api-integration-patterns.md
/src
angular.json
```
Referéncialas:
```bash
npx @anthropic-ai/skills add ./skills/angular-v22-dev-guidelines.md
```
Una skill para patrones de Angular 19 te lastimará en Angular 22. Actualiza skills cuando actualices versiones de Angular.
### Mide presupuesto de contexto
Antes de ejecutar un agente en una tarea real, pídele que estime el uso de tokens:
```
¿Cuál es el conteo de tokens total de todas mis herramientas MCP instaladas y skills?
```
Si más del 30% de tu ventana de contexto está en definiciones de herramientas, simplifica. Los agentes necesitan espacio para pensar, no solo para enumerar capacidades.
### Escribe guardrails de MCP en skills
En lugar de confiar en que el agente "tenga cuidado," escríbelo en la skill:
```markdown
# Angular Update Guardrail Skill
Antes de ejecutar `ng update`, SIEMPRE:
1. Crea una rama de git: `git checkout -b ng-update-v22`
2. Ejecuta pruebas: `npm test`
3. Commitea el estado actual: `git commit -m "checkpoint antes de ng update"`
4. Entonces y solo entonces ejecuta: `ng update @angular/core @angular/cli`
```
El agente sigue las instrucciones de la skill. Guardrails en el código, no en la confianza.
## Parte 5: Resolución de problemas
**"Servidor MCP no encontrado"**
- Verifica que `npx @angular/cli mcp --health-check` devuelva una lista de herramientas
- Reinicia tu IDE de agente
- Verifica que Angular CLI v22+ esté instalado: `ng version`
**"Skills no reconocidas"**
- Ejecuta `npx @anthropic-ai/skills list` para confirmar que están instaladas
- Reinicia tu agente
- Verifica que la URL de la skill sea correcta
**"Chrome DevTools no toma capturas de pantalla"**
- Asegúrate de que Chrome está instalado y en PATH
- Ejecuta `npx chrome-devtools-mcp@latest --health-check`
- Verifica que hayas iniciado el dev server con `dev_server.start` antes de pedir al agente que navegue
**"Verificación de compilación agotó timeout"**
- `dev_server.wait_for_build` tiene un timeout predeterminado (usualmente 30 segundos)
- Si tus compilaciones son más lentas, pide al agente que incremente el timeout en la llamada MCP
- Verifica que el dev server está ejecutándose: `ng serve`
## Resumen
Con la pila MCP + Skills de Angular 22:
- **Los agentes escriben código type-safe** que compila o falla, nunca silenciosamente.
- **Exhaustive type checking** previene que nuevos estados se cuelen.
- **@boundary** contiene fallos en lugar de crashear la aplicación.
- **Plantillas inline** mantienen los componentes limpios.
- **Signal Forms** fuerza validación a nivel de tipo.
- **Integración con Chrome DevTools** da a agentes visibilidad en código en ejecución.
- **Las skills enseñan patrones modernos** alineados a tu versión y convenciones.
El bucle de alucinación está cerrado. La generación de código se vuelve verificable. El desarrollo agnóstico cambia de riesgoso a confiable.
---
**Próximos pasos**:
1. Configura Angular MCP en tu IDE/agente (5 minutos)
2. Instala Angular Skills (2 minutos)
3. Configura Chrome DevTools (2 minutos)
4. Escribe un componente de prueba usando los patrones de arriba
5. Pide a tu agente que haga scaffolding de una característica y verifícala con herramientas MCP
**Recursos**:
- Angular Skills Repository: https://github.com/angular/skills
- Chrome DevTools para Agentes: https://developer.chrome.com/docs/devtools/agents
- Logistics Manager Codelab: https://github.com/angular/examples/blob/main/logistics-manager-app/codelab.md
*Si quieres entender la diferencia entre Skills y herramientas MCP antes de empezar, revisa [MCP Skills vs MCP Tools: La forma correcta de configurar MCP Server](https://www.yeou.dev/articles/mcp-skills-vs-mcp-tools).*
---
# Angular 22: Para Alucinaciones con @boundary, Tipos y MCP
- **URL**: https://www.yeou.dev/articulos/angular-22-escribe-codigo-seguro-con-agentes-ai
- **Published**: 2026-05-19
- **Updated**: 2026-06-08
- **Language**: Spanish
- **Tags**: angular, angular22, googleio2026, signals, mcp, skills, agents, ia, typescript
- **Author**: Antonio Cárdenas (Google Developer Expert in Angular)
Angular 22 cierra el bucle de alucinación con @boundary nativo, tipos exhaustivos y builds verificados por MCP. Todo lo de Google I/O 2026.
# Angular 22: Tuberías agnósticas y arquitecturas de plantillas resilientes
Los agentes de IA escriben código roto. Lo afirman como funcional, tú confías en ellos, y terminas depurando a las 2am. Angular 22 está construido para cerrar ese bucle.
En Google I/O 2026, el equipo de Angular reveló algo más grande que un lanzamiento de features. Avanzando hacia 22 (semana del 1 de junio de 2026), Angular consolida Signal Forms y Resource APIs a estable — mientras diseña activamente el framework como ciudadano de primera clase en entornos de desarrollo agnóstico. El objetivo: que sea estructuralmente imposible que los agentes envíen código roto en silencio.
Aquí está el análisis arquitectónico — qué cambió, qué significa y por qué importa para tu stack.
## La tubería agnóstica: Angular MCP + Skills
El bucle de codificación LLM estándar es notoriamente frágil. El agente escribe código, dice que funciona, y tú descubres los errores de compilación en tiempo de ejecución. ¿Te suena familiar?
Angular ataca esta fricción directamente emparejando dos sistemas críticos: el **servidor MCP** de la CLI de Angular — que permite a los asistentes de IA interactuar con la CLI para generar código, modernizar, buscar ejemplos y ejecutar compilaciones — y el **framework Angular Skills**, una capa de conocimiento especializada que enseña a los agentes a escribir código moderno alineado con 22.
Piénsalo así: el MCP es la capacidad del agente de *actuar* — ejecutar el linter, disparar una compilación, iniciar el dev server. Las Skills son el conocimiento del agente de *cómo actuar bien* — componentes signal-first, OnPush por defecto, patrones correctos de validación de formularios. Necesitas los dos.
### Cómo funciona: la pila MCP Server + Skills
Configura el servidor MCP de Angular en tu IDE o entorno de agente:
```json
{
"mcpServers": {
"angular-cli": {
"command": "npx",
"args": ["-y", "@angular/cli", "mcp"]
}
}
}
```
La skill `angular-developer` se activa al crear proyectos, componentes o servicios, e inyecta patrones modernos automáticamente:
- **Reactividad signal-first**: `input()` y `output()` en lugar de `@Input()` y `@Output()`
- **OnPush por defecto**: Change detection correcta desde el inicio
- **Componentes standalone**: Sin boilerplate de `NgModule`
- **Formularios type-safe**: Signal Forms para manejo reactivo y tipado
Ejemplo del mundo real: los agentes pueden implementar chat de flota impulsado por IA actualizando `FleetService` con un método `queryFleet(prompt)`, usando la skill `gemini-sdk` para enviar el estado actual `units()` a Gemini y filtrar datos basados en la entrada del usuario. La skill maneja el patrón; el agente maneja el cableado.
### Cerrando el bucle de alucinación: MCP + Chrome DevTools para Agentes
Aquí es donde se pone interesante. Encadena Angular MCP con Chrome DevTools para Agentes — una instancia de navegador completamente administrada que permite a los agentes navegar tu aplicación en ejecución, interactuar con ella y tomar capturas de pantalla para verificar qué se renderiza realmente.
El flujo de trabajo se vuelve determinista:
1. **El agente escribe código** usando la skill `angular-developer`
2. **MCP dispara `dev_server.wait_for_build`** — se bloquea hasta que la compilación tenga éxito o falle
3. **El agente inicia el dev server** con `dev_server.start`
4. **Chrome DevTools toma una captura de pantalla** para verificar visualmente los cambios del DOM
5. **El agente lee la salida renderizada** y corrige errores si es necesario
Sin más "asumiré que funcionó." El agente tiene ojos en tu aplicación en ejecución. Ese es el bucle completamente cerrado.
## Resiliencia de plantillas con @boundary
En ingeniería de UI compleja — mezclar layouts DOM con WebGL pesado, loops de animación personalizados o widgets de terceros — un único fallo de componente puede crashear todo el ciclo de detección de cambios. Pantalla en blanco. Fallo total. El usuario no ve nada.
Angular 22 introduce **@boundary** (llegando a Developer Preview en Q3 2026) para resolver exactamente esto.
`@boundary` es un límite de error nativo integrado directamente en la compilación de plantillas de Angular. Si un widget aislado lanza un error fatal, `@boundary` lo atrapa — el crash no sube, y el resto de tu app sigue funcionando.
### Aislamiento de errores y patrones de fallback
```html
@boundary {
} @catch (error) {
Escena no disponible
{{ error.message }}
}
```
A diferencia de try-catch en lógica de componentes, `@boundary` opera a nivel de **compilación de plantillas**. Conoce el árbol de componentes y puede aislar errores sin deshacer todo el ciclo de detección de cambios. Esa distinción importa — no estás parcheando fallos después, los estás conteniendo antes de que se propaguen.
### Lógica de reintento sin recarga de estado
La arquitectura habilita reintento intencional:
```typescript
export class DashboardComponent {
@signal() sceneError: Error | null = null;
retryBoundary() {
// Re-renderiza el boundary, re-ejecuta el componente,
// pero preserva el estado de la aplicación externa
this.sceneError = null;
}
}
```
En Angular tradicional, un error crítico en un componente fuerza una recarga de página completa. Con `@boundary`, el dashboard de flota puede crashear mientras el usuario sigue viendo la cola de servicio y la lista de vehículos. La contención de errores se convierte en una preocupación arquitectónica de primera clase, no en un parche de último momento.
### Límites multinivel para control granular
Anida bloques `@boundary` para manejo de errores en capas que refleja dominios de fallo reales:
```html
@boundary {
@boundary {
} @catch {
Diagnósticos no disponibles
}
} @catch {
Dashboard desconectado
}
```
El boundary interno atrapa errores del componente de diagnósticos. El boundary externo atrapa todo el dashboard. Dos dominios de fallo distintos, dos caminos de recuperación distintos.
## Análisis profundo: mecánicas avanzadas de control de flujo en `@switch`
La evolución del control de flujo de Angular no es solo estética más limpia — se trata de mover responsabilidades de tiempo de ejecución a garantías de tiempo de compilación. Las actualizaciones al bloque `@switch` atacan dos puntos de dolor clásicos.
### 1. Coincidencia múltiple de casos (reducción de boilerplate)
Si varios estados compartían representación de UI idéntica, antes tenías que duplicar bloques de plantilla. Ya no:
```html
@switch (orderStatus()) {
@case ('pending', 'processing') {
Tu pedido se está preparando.
}
@case ('shipped') {
Tu pedido está en camino.
}
@case ('delivered') {
Pedido completado.
}
}
```
El compilador de plantillas agrupa estas ramas eficientemente sin generar view nodes redundantes. Un caso, múltiples estados manejados. Especialmente poderoso con enums de estado isomórfico donde la representación que enfrenta al usuario es idéntica en varios estados backend.
### 2. Exhaustive checking mediante el tipo `never`
Este es el crítico. Cuando tratas con tipos de unión estrictos de TypeScript, un bug de producción clásico: el equipo backend añade un nuevo estado, la plantilla frontend nunca se actualiza, la UI falla silenciosamente. Con exhaustive checking, la *compilación falla* en su lugar.
```typescript
// TypeScript del componente
export type OrderStatus = 'pending' | 'processing' | 'shipped' | 'delivered';
export class OrderComponent {
orderStatus = signal('pending');
// TypeScript no compilará sin todos los casos manejados
private assertNever(value: never): never {
throw new Error(`Estado no manejado: ${value}`);
}
}
```
```html
@switch (orderStatus()) {
@case ('pending') {
Esperando ser procesado.
}
@case ('processing') {
Tu pedido se está preparando.
}
@case ('shipped') {
Tu pedido está en camino.
}
@case ('delivered') {
Pedido completado.
}
@default {
{{ assertNever(orderStatus() as never) }}
}
}
```
Un ingeniero backend añade `'returned'` sin notificar al frontend — la compilación de TypeScript falla inmediatamente. Esto desplaza la carga de type safety de las pruebas en tiempo de ejecución al proceso de compilación del desarrollo. Exactamente donde pertenece.
¡Uf! Esa red de seguridad es poderosa.
## Funciones de plantilla inline: reduciendo boilerplate de clase
En 22 puedes inlinear funciones arrow cortas directamente en bindings de eventos de plantilla sin inflar tu clase TypeScript. Es más que cosmético — es una declaración sobre dónde pertenece la lógica.
### El patrón: manejadores de eventos y transformaciones
En lugar de exponer cada manejador transitorio como método de clase:
```typescript
// Antes: contamina la API del componente
export class CartComponent {
items = signal([...]);
onAddItem(id: string) {
this.items.update(items => [...items, { id }]);
}
onRemoveItem(id: string) {
this.items.update(items => items.filter(i => i.id !== id));
}
}
```
Ahora puedes inlinearlos directamente:
```html
```
La superficie del componente se encoge. Solo la verdadera API pública permanece visible. Los manejadores transitorios se quedan en la plantilla, donde lógicamente pertenecen.
### Errores de plantilla e inferencia de tipos
El compilador de plantillas ahora atrapa desajustes de tipos en expresiones inline inmediatamente:
```html
```
Esto es crítico para desarrollo asistido por agentes. Cuando la skill `angular-developer` escribe código de plantilla, el compilador atrapa alucinaciones antes de que lleguen a producción. No en tiempo de ejecución — en tiempo de compilación.
### Ejemplo del mundo real: transformaciones de campo de formulario
Del codelab logistics-manager-app — cuando un usuario describe un problema como "El vehículo emite humo y el motor se ha detenido," la IA debe establecer automáticamente la prioridad a CRITICAL añadiendo un listener al campo de issue en `serviceForm`.
Con funciones de plantilla inline, esto es compacto y transparente:
```html
```
El manejador se queda cerca de su disparador. La intención permanece visible.
## Refinamientos de reactividad adicionales
Más allá de agentes, límites de error y control de flujo, Angular 22 afina la experiencia de desarrollo más amplia con varias actualizaciones que empujan en la misma dirección: menos estado global, más reactividad granular.
### Signal Forms: reactividad granular para formularios complejos
Saliendo de Developer Preview en 22, Signal Forms combina la tipación estricta de formularios reactivos con la reactividad granular de Signals. Un formulario con 50 campos ahora actualiza solo el campo que cambió — no el árbol de formulario completo.
```typescript
export class ServiceTicketForm {
form = new FormGroup({
issueDescription: new FormControl(''),
priority: new FormControl('LOW'),
assignedTechnician: new FormControl(''),
});
// Acceso basado en signal con rastreo granular
priority$ = this.form.get('priority')!.valueAsSignal;
// Solo la pantalla de prioridad se re-renderiza cuando priority cambia
priorityStyles = computed(() => {
const level = this.priority$();
return level === 'CRITICAL' ? 'bg-red' : 'bg-yellow';
});
}
```
### Angular Aria: primitivos de UI accesibles
Junto con Signal Forms, Angular Aria — el conjunto de directivas de UI headless completamente accesible — también alcanza estable. Dropdowns personalizados, modales y popovers construidos con Angular Aria incluyen automáticamente:
- Navegación por teclado (arrow keys, enter, escape)
- Roles ARIA y regiones activas
- Gestión de focus
- Anuncios para screen reader
Sin alucinaciones de agentes sobre accesibilidad. Está integrado. ¿Alucinante, no?
### Vitest como predeterminado
La CLI de Angular ahora crea todos los proyectos nuevos con Vitest como test runner predeterminado, reemplazando Karma. Las pruebas se ejecutan en milisegundos en lugar de segundos — el bucle de feedback del agente se vuelve casi instantáneo. Eso es mucho tiempo ahorrado por iteración.
### OnPush como change detection predeterminado
Los nuevos componentes usan `ChangeDetectionStrategy.OnPush` por defecto, alentando reactividad basada en signals en lugar de cambios disparados por Zone.js desde el inicio del proyecto. Esto entrena tanto a desarrolladores como a agentes a pensar en términos de cambios de estado granulares y rastreables — no en detección de cambios global.
## Angular Skills: enseñando a agentes patrones modernos
Las Angular Skills son capas de conocimiento especializadas que ayudan a los agentes a escribir código alineado con 22 desde la primera línea. Dos skills clave se incluyen con Angular 22:
**`angular-developer`**: Genera código para componentes, servicios, gestión de estado, formularios, routing, SSR y más. Siempre referencia la versión correcta de Angular antes de proporcionar orientación — para que los agentes no usen patrones de Angular 15 en un proyecto Angular 22.
**`angular-new-app`**: Crea una nueva app de Angular usando la CLI, con flags como `--ai-config=[agents, claude, copilot, cursor, gemini, jetbrains, none, windsurf]` para afinar el código generado para las convenciones de cada agente específico.
Una cosa a tener en cuenta: Skills y herramientas MCP son complementarias, no intercambiables. Un servidor MCP por dominio — no cargues todo a la vez. Versionea tus skills como código — una skill para patrones de Angular 19 te lastimará en Angular 22. Y mide tu presupuesto de contexto — si más del 30% de tu ventana de contexto está en definiciones de herramientas, tienes un problema de configuración. Desarrollé esto en profundidad en [MCP Skills vs MCP Tools: La forma correcta de configurar MCP Server](https://www.yeou.dev/articles/mcp-skills-vs-mcp-tools).
## El lanzamiento de consolidación
Angular 22 ya no solo está alcanzando en el espacio de reactividad. Al integrar nativamente MCP y Angular Skills, endurecer los límites de error de plantillas con `@boundary`, automatizar exhaustive type checking en el control de flujo y habilitar funciones de plantilla inline — está definiendo activamente cómo se ve una arquitectura frontend moderna y lista para agentes.
Angular 22 es la era signal-first hecha concreta. El esfuerzo de modernización de varios años converge en un modelo de desarrollo coherente, listo para producción, nativo para agentes donde:
- **Los agentes escriben plantillas type-safe** que compilan o fallan, nunca silenciosamente.
- **Los límites de error aíslan fallos** en lugar de crashear toda la aplicación.
- **El control de flujo es exhaustivo** por defecto, no una sorpresa en tiempo de ejecución.
- **Los servidores MCP cierran el bucle de alucinación** con visibilidad real del navegador.
- **Las skills enseñan a agentes patrones modernos** adaptados a tu versión y convenciones.
¿El problema de depurar a las 2am? Ese es el bucle de alucinación. Angular 22 lo cierra.
---
**Referencias**:
- What's new in Angular - Chrome for Developers (Google I/O 2026)
- Angular Skills Repository: https://github.com/angular/skills
- Logistics Manager App Codelab: https://github.com/angular/examples/blob/main/logistics-manager-app/codelab.md
*Anteriormente escribí sobre [Angular MCP y el fin de las migraciones manuales](https://www.yeou.dev/articles/angular-21-mcp-migraciones) — un buen punto de partida si eres nuevo en la configuración del servidor MCP de Angular.*
---
# Angular 22: Stop Agent Hallucinations with @boundary Types
- **URL**: https://www.yeou.dev/articles/angular-22-stop-hallucinating-agents-exhaustive-types-boundaries
- **Published**: 2026-05-19
- **Updated**: 2026-06-08
- **Language**: English
- **Tags**: angular, angular22, googleio2026, signals, mcp, skills, agents, ai, typescript
- **Author**: Antonio Cárdenas (Google Developer Expert in Angular)
Angular 22 closes the hallucination loop with @boundary isolation, exhaustive types, and MCP-verified builds. Full breakdown from Google I/O 2026.
# Angular 22: Agentic Pipelines and Resilient Template Architectures
AI agents write broken code. They claim it works, you trust them, and then you're debugging at 2am wondering what went wrong. Angular 22 is built to close that loop.
At Google I/O 2026, the Angular team unveiled something bigger than a feature release. Moving towards 22 (launching the week of June 1st, 2026), Angular is solidifying Signal Forms and Resource APIs to stable while actively engineering the framework as a first-class citizen in agentic development environments. The goal: make it structurally impossible for agents to ship broken code silently.
Here's the architectural breakdown — what changed, what it means, and why it matters for your stack.
## The Agentic Pipeline: Angular MCP + Skills
The standard LLM coding loop is notoriously brittle. Agent writes code, claims it works, leaves you discovering compilation errors at runtime. Sound familiar?
Angular attacks this friction head-on by pairing two critical systems: the Angular CLI's **MCP server** — which lets AI assistants interact directly with the Angular CLI for code generation, migrations, fetching examples, and running builds — and the **Angular Skills framework**, a specialized knowledge layer that teaches agents to write modern, Angular 22-aligned code.
Think of it this way. MCP is the agent's ability to *act* — run the linter, trigger a build, start the dev server. Skills are the agent's knowledge of *how to act well* — signal-first components, OnPush by default, proper form validation patterns. You need both.
### How it works: The MCP Server + Skills Stack
Configure the Angular MCP server in your IDE or agent environment:
```json
{
"mcpServers": {
"angular-cli": {
"command": "npx",
"args": ["-y", "@angular/cli", "mcp"]
}
}
}
```
The `angular-developer` skill triggers when scaffolding components, services, or routes, and injects modern patterns automatically:
- **Signal-first reactivity**: `input()` and `output()` instead of `@Input()` and `@Output()` decorators
- **OnPush by default**: Change detection set correctly from the start
- **Standalone components**: No `NgModule` boilerplate
- **Type-safe forms**: Signal Forms for reactive, typed form handling
Real-world example: agents can implement AI-powered fleet chat by updating `FleetService` to include a `queryFleet(prompt)` method, using the `gemini-sdk` skill to send the current `units()` signal state to Gemini and filter data based on user input. The skill handles the pattern; the agent handles the wiring.
### Closing the Hallucination Loop: MCP + Chrome DevTools for Agents
This is where it gets good. Chain Angular MCP with Chrome DevTools for Agents — a fully managed browser instance that lets agents navigate your running app, interact with it, and take screenshots to verify what's actually rendered.
The workflow becomes deterministic:
1. **Agent writes code** using the `angular-developer` skill
2. **MCP triggers `dev_server.wait_for_build`** — blocks until compilation succeeds or fails
3. **Agent spawns the dev server** with `dev_server.start`
4. **Chrome DevTools takes a screenshot** to visually verify DOM changes
5. **Agent reads the rendered output** and fixes errors if needed
No more "I'll assume that worked." The agent has eyes on your running application. That's the full loop closed.
## Template Resilience with @boundary
In complex UI engineering — mixing DOM layouts with heavy WebGL, custom animation loops, or third-party widgets — a single component failure can crash the entire change detection cycle. Blank screen. Total failure. The user sees nothing.
Angular 22 introduces **@boundary** (landing in Developer Preview in Q3 2026) to solve exactly this.
`@boundary` is a native error boundary baked directly into Angular's template compilation. If an isolated widget throws a fatal error, `@boundary` traps it — the crash doesn't bubble up, and the rest of your app keeps running.
### Error Isolation and Fallback Patterns
```html
@boundary {
} @catch (error) {
Scene unavailable
{{ error.message }}
}
```
Unlike try-catch in component logic, `@boundary` operates at the **template compilation level**. It knows the component tree. It isolates errors without unwinding the entire change detection cycle. That distinction matters — you're not patching failures after the fact, you're containing them before they spread.
### Retry Logic Without State Reload
The architecture enables intentional retry:
```typescript
export class DashboardComponent {
@signal() sceneError: Error | null = null;
retryBoundary() {
// Re-renders the boundary, re-executes the component,
// but preserves the outer application state
this.sceneError = null;
}
}
```
In traditional Angular, a critical error in one component forces a full page reload. With `@boundary`, the fleet dashboard can crash while the user still sees the service queue and vehicle list. Error containment becomes a first-class architectural concern, not an afterthought.
### Multi-Level Boundaries for Granular Control
Nest `@boundary` blocks for layered error handling that mirrors real-world failure domains:
```html
@boundary {
@boundary {
} @catch {
Diagnostics unavailable
}
} @catch {
Dashboard offline
}
```
The inner boundary catches errors from the diagnostics component. The outer boundary catches the entire dashboard. Two different failure domains, two different recovery paths.
## Deep Dive: Advanced Control Flow in `@switch`
The evolution of Angular's control flow isn't just cleaner syntax — it's moving runtime liabilities into compile-time guarantees. Two specific updates to `@switch` address classic pain points.
### 1. Multiple Case Matching (Boilerplate Reduction)
If multiple states shared identical UI, you used to duplicate template blocks. Not anymore:
```html
@switch (orderStatus()) {
@case ('pending', 'processing') {
Your order is being prepared.
}
@case ('shipped') {
Your order is on the way.
}
@case ('delivered') {
Order complete.
}
}
```
The template compiler groups branches efficiently without redundant view nodes. One case, multiple states handled. This is especially powerful with isomorphic state enums where the user-facing representation is identical across several backend statuses.
### 2. Exhaustive Checking via the `never` Type
This is the critical one. When dealing with strict TypeScript union types, a common production bug: the backend team adds a new status, the frontend template is never updated, the UI silently fails. With exhaustive checking, the *build fails* instead.
```typescript
// Component TypeScript
export type OrderStatus = 'pending' | 'processing' | 'shipped' | 'delivered';
export class OrderComponent {
orderStatus = signal('pending');
// TypeScript won't compile without all cases handled
private assertNever(value: never): never {
throw new Error(`Unhandled status: ${value}`);
}
}
```
```html
@switch (orderStatus()) {
@case ('pending') {
Waiting to be processed.
}
@case ('processing') {
Your order is being prepared.
}
@case ('shipped') {
Your order is on the way.
}
@case ('delivered') {
Order complete.
}
@default {
{{ assertNever(orderStatus() as never) }}
}
}
```
A backend engineer adds `'returned'` without notifying frontend? TypeScript compilation fails immediately. This shifts the burden of type safety from runtime testing to the development build process — exactly where it belongs.
Oof. That's a powerful safety net.
## Inline Template Functions: Reducing Class Boilerplate
In 22 you can safely inline short arrow functions directly within template event bindings. It's more than cosmetic — it's a statement about where logic belongs.
### The Pattern: Event Handlers and Transforms
Instead of exposing every transient handler as a class method:
```typescript
// Before: pollutes the component API surface
export class CartComponent {
items = signal([...]);
onAddItem(id: string) {
this.items.update(items => [...items, { id }]);
}
onRemoveItem(id: string) {
this.items.update(items => items.filter(i => i.id !== id));
}
}
```
You can now inline these directly:
```html
```
The component surface shrinks. Only the true public API stays visible. Transient handlers stay in the template, where they logically belong.
### Template Errors and Type Inference
The template compiler now catches type mismatches in inline expressions immediately:
```html
```
This is critical for agent-assisted development. When the `angular-developer` skill writes template code, the compiler catches hallucinations before they reach production. Not at runtime — at build time.
### Real-World Example: Form Field Transforms
From the logistics-manager-app codelab — when a user describes an issue like "The vehicle is emitting smoke and the engine has stopped," the AI should automatically set priority to CRITICAL by listening to the issue field in `serviceForm`.
With inline template functions, this is compact and transparent:
```html
```
Handler stays close to its trigger. Intent stays visible.
## Additional Reactivity Refinements
Beyond agents, error boundaries, and control flow, Angular 22 sharpens the broader developer experience with several updates that all push in the same direction: less global state, more granular reactivity.
### Signal Forms: Fine-Grained Reactivity for Complex Forms
Moving out of Developer Preview in 22, Signal Forms combines strict reactive form typing with granular signal reactivity. A form with 50 fields now updates only the field that changed — not the entire form tree.
```typescript
export class ServiceTicketForm {
form = new FormGroup({
issueDescription: new FormControl(''),
priority: new FormControl('LOW'),
assignedTechnician: new FormControl(''),
});
// Signal-based access with fine-grained tracking
priority$ = this.form.get('priority')!.valueAsSignal;
// Only the priority display re-renders when priority changes
priorityStyles = computed(() => {
const level = this.priority$();
return level === 'CRITICAL' ? 'bg-red' : 'bg-yellow';
});
}
```
### Angular Aria: Accessible UI Primitives
Alongside Signal Forms, Angular Aria — the headless, fully accessible UI directive set — also hits stable. Custom dropdowns, modals, and popovers built with Angular Aria automatically include:
- Keyboard navigation (arrow keys, enter, escape)
- ARIA roles and live regions
- Focus management
- Screen reader announcements
No agent hallucinations about accessibility. It's built in.
### Vitest as Default
The Angular CLI now scaffolds all new projects with Vitest as the default test runner, replacing Karma. Tests run in milliseconds instead of seconds, making the agent feedback loop nearly instant. That's a lot of time saved per iteration.
### OnPush as Default Change Detection
New components use `ChangeDetectionStrategy.OnPush` by default, encouraging signal-based reactivity over Zone.js-triggered checks from day one. This trains both developers and agents to think in terms of granular, trackable state changes — not global change detection.
## Angular Skills: Teaching Agents Modern Patterns
Angular Skills are specialized knowledge layers that help agents write Angular 22-aligned code from the first line. Two key skills ship with Angular 22:
**`angular-developer`**: Generates code for components, services, state management, forms, routing, SSR, and more. Always references the correct Angular version before providing guidance — so agents don't reach for Angular 15 patterns in an Angular 22 project.
**`angular-new-app`**: Creates a new Angular app using the Angular CLI with flags like `--ai-config=[agents, claude, copilot, cursor, gemini, jetbrains, none, windsurf]` to tune generated code for each specific agent's conventions.
One thing to keep in mind: Skills and MCP tools are complementary, not interchangeable. One MCP server per domain — don't load everything at once. Version your skills like code — a skill for Angular 19 patterns will actively hurt you on Angular 22. And measure your context budget — if over 30% of your context window is on tool definitions, you have a configuration problem. I covered this in depth in [MCP Skills vs MCP Tools: The Right Way to Configure Your Server](https://www.yeou.dev/articles/mcp-skill-vs-mcp-tools-the-right-way).
## The Consolidation Release
Angular 22 isn't just catching up in the reactivity space. By natively integrating MCP and Angular Skills, hardening template error boundaries with `@boundary`, automating exhaustive type checking in control flow, and enabling inline template functions — it's actively defining what a modern, agent-ready frontend architecture looks like.
Angular 22 is the signal-first era made concrete. The multi-year modernization effort converges into a coherent, production-ready, agentic-native model where:
- **Agents write type-safe templates** that compile or fail, never silently.
- **Error boundaries isolate failures** instead of crashing the entire app.
- **Control flow is exhaustive** by default, not a runtime surprise.
- **MCP servers close the hallucination loop** with real browser visibility.
- **Skills teach agents modern patterns** tailored to your version and conventions.
The debugging-at-2am problem? That's the hallucination loop. Angular 22 closes it.
---
**References**:
- What's new in Angular - Chrome for Developers (Google I/O 2026)
- Angular Skills Repository: https://github.com/angular/skills
- Logistics Manager App Codelab: https://github.com/angular/examples/blob/main/logistics-manager-app/codelab.md
*Previously I wrote about [Angular 21 MCP and the end of manual migrations](https://www.yeou.dev/articles/angular-21-mcp-migrations) — a good starting point if you're new to the Angular MCP server setup.*
---
# MCP Skills vs MCP Tools: How to Configure Them Right
- **URL**: https://www.yeou.dev/articles/mcp-skill-vs-mcp-tools-the-right-way
- **Published**: 2026-03-22
- **Updated**: 2026-06-08
- **Language**: English
- **Tags**: mcp, skills, angular, agentic, ai, webdev, frontend
- **Author**: Antonio Cárdenas (Google Developer Expert in Angular)
MCP Skills and Tools aren't the same. Confusing them bloats context and breaks agents. The real difference and how to combine both for reliable agentic workflows.
## Everyone is talking about MCP. Everyone is talking about skills.
Most people are using them interchangeably — and that's exactly the problem.
They are not the same thing. They don't solve the same problem. And if you reach for the wrong one, you will feel it: hallucinations, context blowups, agents that drift off-task, and workflows that fall apart under pressure.
Let's fix that.
---
## The Core Mental Model
Think of it like a kitchen.
**MCP tools** are your appliances and ingredients — the oven, the fridge, the fresh vegetables. Raw capability. Without them, nothing gets cooked.
**Skills** are your recipes — the step-by-step instructions that tell a skilled chef exactly how to turn those ingredients into something good. Without them, you have power with no direction.
An agent with only MCP tools can *do* things but doesn't necessarily know *how* to do them well. An agent with only skills has great instructions but no way to act on them.
You need both.
---
## What Is an MCP Tool?
The **Model Context Protocol** is an open standard — now under the Linux Foundation's Agentic AI Foundation — that gives AI agents a standardized way to connect to external systems: databases, APIs, file systems, GitHub, Slack, your Angular CLI.
When you connect an MCP server to your client—whether that's Claude Code, the Gemini CLI, or a custom agent—it gets access to a set of typed, deterministic tools. Each tool has a clear input/output schema. When the agent calls it, it executes — no interpretation, no hallucination risk at the execution level. It's a structured API call, not a suggestion.
```json
{
"mcpServers": {
"angular-cli": {
"command": "npx",
"args": ["-y", "@angular/cli", "mcp"]
}
}
}
```
MCP is how the agent *reaches outside itself*. It's the nervous system.
**Use MCP when you need the agent to:**
- Read or write to a real system (database, filesystem, API)
- Execute actions with clear, auditable inputs and outputs
- Connect to tools you don't own or control
- Integrate multiple services through a consistent interface
---
## What Is a Skill?
A **Skill** is a folder containing a Markdown file (with YAML frontmatter) plus optional scripts and resources. It's not executable by itself — it's a playbook.
When a user's request matches a Skill's relevance criteria, the agent loads those instructions dynamically and follows them. Think of it as giving the agent expert-level procedural memory on demand.
```markdown
---
name: angular-component-review
description: Review Angular components for Signal compliance and standalone architecture
---
# Angular Component Review
When reviewing an Angular component:
1. Check that all state uses `signal()` or `computed()` — never direct property mutation
2. Verify the component is `standalone: true`
3. Confirm no `NgModule` dependencies remain
4. Validate that `@if` / `@for` is used instead of `*ngIf` / `*ngFor`
```
The agent loads this only when it's relevant. When it's not — it costs you nothing.
**Use a skill when you need the agent to:**
- Follow a consistent process or checklist
- Apply domain-specific expertise (your coding standards, review criteria)
- Encode knowledge that doesn't change often
- Reuse the same workflow across different conversations
---
## The Real Downsides
This is where most guides stop. They shouldn't.
### MCP: The Token Tax
Every MCP tool you connect injects its full schema into the context window *before the agent processes a single message*. Each tool costs 550–1,400 tokens. Connect GitHub, Slack, and Sentry, and you're looking at **55,000 tokens burned upfront** — over a quarter of Claude's 200k limit before any real work begins. And if you are using Gemini with its 1M+ token window, you might think you can just ignore this. Don't. Even if you have the space to spare, dumping 55,000 tokens of raw JSON schema into every single turn of a conversation drives up your latency, increases API costs, and dilutes the model's focus.
One team reported connecting three MCP servers and consuming **143,000 of 200,000 tokens** on tool definitions alone. The agent had 57,000 tokens left for the actual conversation.
The good news: modern clients like Claude Code and the Gemini CLI have adopted progressive discovery for MCP—loading only tool names and descriptions upfront (~20–50 tokens each) and fetching full schemas only when the agent actually needs a tool. Token overhead declined by ~85%. But this feature only works if your MCP setup is configured to use it, and most setups still aren't.
### Skills: The Staleness Problem
Skills are Markdown files. They don't update themselves. If your Angular patterns evolve — say you migrate from `setInput()` to the new declarative API in Angular 20 — your Skill still teaches the old way until someone updates it manually.
The more skills you create, the more maintenance burden you carry. And if a skill is subtly wrong, the agent will follow it confidently — no error, just quietly incorrect output.
### Both: The Selection Problem
Give an agent too many tools or too many skills, and it starts making the wrong choices — calling the wrong tool, triggering the wrong playbook, or combining them in ways that produce contradictory instructions. Experts recommend staying under **10–15 active MCP tools** at any time.
---
## How to Combine Them
The most powerful pattern is using them as layers:
**Layer 1 — MCP provides access.**
Connect only what the agent genuinely needs for the current task. Angular CLI, a database, and a file system. Keep it lean.
**Layer 2 — Skills provide expertise.**
Create a skill that tells the agent *how* to use those tools in your specific context. Not just "run the Angular CLI" — but "when migrating a component, run `ng generate` with these flags, then validate against these patterns."
**Layer 3 — Skills can orchestrate MCP.**
A Skill can define a multi-step workflow that calls multiple MCP tools in sequence. Example: a "Deploy & Notify" Skill that uses GitHub MCP to push, a CI/CD MCP to trigger a build, and a Slack MCP to notify the team — all under one coherent playbook.
```markdown
---
name: angular-migration-workflow
description: Full workflow for migrating an Angular component to v21 patterns
---
# Migration Workflow
1. Use the Angular CLI MCP to check the current component version
2. Run `ng update` for the affected package
3. Apply the zoneless migration schematic
4. Review the output against the angular-component-review Skill
5. Run tests and report results
```
---
## The Practical Decision Guide
| Situation | Use |
|-----------|-----|
| Need to query a real database | MCP |
| Need to follow a code review checklist | Skill |
| Need to push to GitHub | MCP |
| Need to apply your team's commit message format | Skill |
| Need to read a live API | MCP |
| Need to teach the agent your Angular architecture rules | Skill |
| Need both access and consistent process | Both |
---
## Improving Your Workflow
A few patterns that actually work in production:
**1. One MCP server per domain.** Don't load everything at once. Create separate configs for "Angular development," "deployment," and "communication" — and activate only the one you need for a given session.
**2. Version your Skills like code.** Put them in your repository. Review them when you update your stack. A Skill for Angular 19 patterns will actively hurt you on Angular 21.
**3. Use Skills to write MCP guardrails.** Instead of relying on the agent to figure out when to call a destructive MCP action, write a Skill that explicitly says: *"Before running any `ng update`, always create a git branch first."*
**4. Measure your context budget.** Before your agent does any real work, know how many tokens your MCP setup consumes. If you're over 30% of your context window is on tool definitions, you have a configuration problem.
**5. Let the agent maintain simple Skills.** For fast-moving areas — like keeping track of your team's current Angular version conventions — let the agent update the Skill file itself when you tell it to. It's faster than doing it manually and keeps the Skill honest.
---
## The Bottom Line
MCP gives agents the ability to act. Skills teach them how to act well.
The debate of "MCP vs Skills" is a false one. The real question is: *do you need access, expertise, or both?*
In most real Angular workflows, you need both. An agent that can run your CLI but doesn't know your architecture is just a faster way to make the same mistakes. An agent that knows your patterns but can't touch your actual project is just an expensive search engine.
Used together, with clear boundaries and lean configuration, they're the foundation of agentic development that actually works.
---
*Previously I wrote about [Angular 21 MCP and the end of manual migrations](https://www.yeou.dev/articles/angular-21-mcp-migrations) — a good starting point if you're new to the MCP server setup for Angular.*
## FAQ
### What is the difference between MCP Skills and MCP Tools?
MCP Tools are individual, stateless functions exposed by an MCP server — like calling a function in an API. MCP Skills are higher-level, composable workflows that combine multiple tools into a single reusable capability. Tools answer 'what can I do?', while Skills answer 'how do I accomplish this goal?'. Confusing them leads to bloated context windows and unreliable agent behavior.
### When should I use MCP Skills instead of MCP Tools?
Use Skills when an agent needs to accomplish a multi-step goal reliably and repeatedly — like 'build, screenshot, verify'. Use Tools when you need a single atomic operation that an agent can call on demand. Skills reduce the cognitive load on the model and prevent hallucinations by constraining the action space.
### What is MCP (Model Context Protocol)?
MCP (Model Context Protocol) is an open standard created by Anthropic that defines how AI agents communicate with external tools, data sources, and workflows. It provides a standardized interface so any AI model can interact with any MCP-compatible server, enabling consistent tool use across different agent environments like Claude Code, Cursor, Gemini CLI, and JetBrains AI.
### Can MCP Skills work with Angular CLI?
Yes. Angular 22 ships with a built-in MCP server accessible via the Angular CLI. You can define Skills that use the Angular MCP server to build, serve, and screenshot your app, giving agents the ability to verify their own code changes. Configure it in your agent's settings as a standard MCP server pointing to the Angular CLI process.
### What are the downsides of using too many MCP Tools?
Too many MCP Tools overwhelm the agent's context window, increase token cost, and cause the model to choose the wrong tool or hallucinate capabilities. The practical limit is 10–15 focused tools per session. Beyond that, tool selection accuracy drops. Skills solve this by grouping related tools into single high-level capabilities.
---
# MCP Skills vs MCP Tools: Cómo Configurarlos Correctamente
- **URL**: https://www.yeou.dev/articulos/mcp-skills-vs-mcp-tools
- **Published**: 2026-03-22
- **Updated**: 2026-06-08
- **Language**: Spanish
- **Tags**: mcp, skills, angular, gemini, ai, webdev, frontend
- **Author**: Antonio Cárdenas (Google Developer Expert in Angular)
MCP Skills y Tools no son lo mismo. Confundirlos infla el contexto y rompe agentes. La diferencia real y cómo combinarlos para un flujo agéntico fiable.
## Todo el mundo habla de MCP. Todo el mundo habla de skills.
La mayoría los usa como sinónimos — y ese es exactamente el problema.
No son lo mismo. No resuelven el mismo problema. Y si usas el incorrecto, lo vas a sentir: alucinaciones, contexto desbordado, agentes que pierden el hilo y flujos de trabajo que se rompen bajo presión.
Vamos a resolverlo.
---
## El modelo mental
Piénsalo como una cocina.
Las **herramientas MCP** son tus electrodomésticos e ingredientes — el horno, el refrigerador, los vegetales frescos. Capacidad pura. Sin ellos, no se cocina nada.
Los **skills** son tus recetas — las instrucciones paso a paso que le dicen a un chef exactamente cómo convertir esos ingredientes en algo bueno. Sin ellas, tienes poder, pero sin dirección.
Un agente con solo herramientas MCP *puede* hacer cosas, pero no necesariamente sabe *cómo* hacerlas bien. Un agente con solo skills tiene excelentes instrucciones, pero no puede actuar sobre ellas.
Necesitas los dos.
---
## ¿Qué es una herramienta MCP?
El **Model Context Protocol** es un estándar abierto — ahora bajo la Agentic AI Foundation de la Linux Foundation — que le da a los agentes de IA una forma estandarizada de conectarse a sistemas externos: bases de datos, APIs, sistemas de archivos, GitHub, Slack, tu Angular CLI.
Cuando conectas un servidor MCP a tu cliente —ya sea Claude Code, la CLI de Gemini o un agente personalizado—, este accede a un conjunto de **herramientas deterministas y tipadas**. Cada herramienta tiene un esquema claro de entrada y salida. Cuando el agente la llama, se ejecuta — sin interpretación, sin riesgo de alucinación a nivel de ejecución. Es una llamada de API estructurada, no una sugerencia.
```json
{
"mcpServers": {
"angular-cli": {
"command": "npx",
"args": ["-y", "@angular/cli", "mcp"]
}
}
}
```
MCP es como el agente *alcanza fuera de sí mismo*. Es el sistema nervioso.
**Usa MCP cuando el agente necesite:**
- Leer o escribir en un sistema real (base de datos, sistema de archivos, API)
- Ejecutar acciones con entradas y salidas claras y auditables.
- Conectarse a herramientas que no controlas
- Integrar múltiples servicios a través de una interfaz consistente.
---
## ¿Qué es un skill?
Un **skill** es una carpeta que contiene un archivo Markdown (con frontmatter YAML) más scripts y recursos opcionales. No es ejecutable por sí solo — es un playbook.
Cuando la solicitud de un usuario coincide con los criterios de relevancia de un skill, el agente carga esas instrucciones dinámicamente y las sigue. Es como darle al agente memoria procedural de nivel experto, bajo demanda.
```markdown
---
name: angular-component-review
description: Revisar componentes Angular para cumplimiento de Signals y arquitectura standalone
---
# Revisión de Componente Angular
Al revisar un componente Angular:
1. Verificar que todo el estado use `signal()` o `computed()` — nunca mutación directa
2. Confirmar que el componente es `standalone: true`
3. Asegurar que no queden dependencias de `NgModule`
4. Validar que se use `@if` / `@for` en lugar de `*ngIf` / `*ngFor`
```
El agente lo carga solo cuando es relevante. Cuando no lo es — no te cuesta nada.
**Usa un skill cuando el agente lo necesite:**
- Seguir un proceso o checklist consistente.
- Aplicar experiencia específica del dominio (tus estándares de código, criterios de revisión).
- Codificar conocimiento que no cambia frecuentemente.
- Reutilizar el mismo flujo de trabajo en distintas conversaciones.
---
## Los desventajas reales
Aquí es donde la mayoría de las guías se detienen. No deberían.
### MCP: El Impuesto de Tokens
Cada herramienta MCP que conectas inyecta su esquema completo en la ventana de contexto *antes de que el agente procese un solo mensaje*. Cada herramienta cuesta 550–1,400 tokens. Conecta GitHub, Slack y Sentry y estás mirando **55,000 tokens quemados de entrada** — más de un cuarto del límite de 200k de Claude antes de hacer cualquier trabajo real.
Un equipo reportó conectar tres servidores MCP y consumir **143,000 de 200,000 tokens** solo en definiciones de herramientas. Al agente le quedaban 57,000 tokens para la conversación real.
Y si usas Gemini con su ventana de contexto de 1M+ tokens, podrías pensar que puedes ignorar esto. No lo hagas. Incluso si te sobra espacio, inyectar 55,000 tokens de esquema JSON crudo en cada iteración de la conversación aumenta la latencia, incrementa los costos de la API y diluye el enfoque del modelo.
La buena noticia: clientes modernos como Claude Code y la CLI de Gemini han adoptado el **progressive discovery** para MCP — cargando solo nombres y descripciones de herramientas al inicio (~20–50 tokens cada una), y obteniendo los esquemas completos solo cuando el agente realmente necesita una herramienta. El overhead de tokens cayó ~85%. Pero esto solo funciona si tu configuración MCP está preparada para usarlo — y la mayoría todavía no lo está.
### Skills: El Problema de la Desactualización
Los skills son archivos Markdown. No se actualizan solos. Si tus patrones de Angular evolucionan — digamos que migraste de `setInput()` a la nueva API declarativa en Angular 20 — tu Skill sigue enseñando la forma antigua hasta que alguien lo actualice manualmente.
Cuantos más skills creas, mayor es la carga de mantenimiento. Y si un skill está sutilmente equivocado, el agente lo seguirá con confianza — sin error, solo output silenciosamente incorrecto.
### Ambos: El problema de selección
Dale a un agente demasiadas herramientas o demasiados skills y empieza a tomar las decisiones equivocadas — llama a la herramienta incorrecta, activa el playbook equivocado, o los combina de formas que producen instrucciones contradictorias. Los expertos recomiendan no superar **10–15 herramientas MCP activas** al mismo tiempo.
---
## Cómo combinarlos
El patrón más poderoso es usarlos como capas:
**Capa 1 — MCP provee acceso.**
Conecta solo lo que el agente genuinamente necesita para la tarea actual. Angular CLI, una base de datos, un sistema de archivos. Mantenlo simple.
**Capa 2 — Skills proveen experiencia.**
Crea un Skill que le diga al agente *cómo* usar esas herramientas en tu contexto específico. No solo "ejecuta el Angular CLI" — sino "al migrar un componente, ejecuta `ng generate` con estos flags, luego valida contra estos patrones."
**Capa 3 — Skills pueden orquestar MCP.**
Un skill puede definir un flujo de trabajo multipaso que llame a múltiples herramientas MCP en secuencia. Ejemplo: un skill de "Deploy & Notify" que usa el MCP de GitHub para hacer push, un MCP de CI/CD para lanzar el build, y un MCP de Slack para notificar al equipo — todo bajo un playbook coherente.
```markdown
---
name: angular-migration-workflow
description: Flujo completo para migrar un componente Angular a patrones v21
---
# Flujo de Migración
1. Usa el MCP del Angular CLI para verificar la versión actual del componente
2. Ejecuta `ng update` para el paquete afectado
3. Aplica el schematic de migración zoneless
4. Revisa el output contra el Skill de angular-component-review
5. Ejecuta los tests y reporta resultados
```
---
## Guía de Decisión Práctica
| Situación | Usar |
|-----------|------|
| Necesito consultar una base de datos real | MCP |
| Necesito seguir un checklist de code review | Skill |
| Necesito hacer push a GitHub | MCP |
| Necesito aplicar el formato de commits de mi equipo | Skill |
| Necesito leer una API en vivo | MCP |
| Necesito enseñarle al agente mis reglas de arquitectura Angular | Skill |
| Necesito acceso Y proceso consistente | Ambos |
---
## Mejorando el Flujo de Trabajo
Algunos patrones que realmente funcionan en producción:
**1. Un servidor MCP por dominio.** No cargues todo al mismo tiempo. Crea configuraciones separadas para "desarrollo Angular", "despliegue" y "comunicación" — y activa solo la que necesitas para cada sesión.
**2. Versiona tus Skills como código.** Ponlos en tu repositorio. Revísalos cuando actualices tu stack. Un Skill para patrones de Angular 19 te va a perjudicar activamente en Angular 21.
**3. Usa Skills para escribir guardrails de MCP.** En lugar de confiar en que el agente sepa cuándo llamar a una acción MCP destructiva, escribe un Skill que diga explícitamente: *"Antes de ejecutar cualquier `ng update`, siempre crea un branch de git primero."*
**4. Mide tu presupuesto de contexto.** Antes de que el agente haga cualquier trabajo real, conoce cuántos tokens consume tu configuración MCP. Si superas el 30% de tu ventana de contexto solo en definiciones de herramientas, tienes un problema de configuración.
**5. Deja que el agente mantenga los Skills simples.** Para áreas de cambio rápido — como mantener actualizadas las convenciones de versión de Angular de tu equipo — deja que el agente actualice el archivo Skill cuando se lo indiques. Es más rápido que hacerlo manualmente y mantiene el Skill honesto.
---
## La conclusión
MCP les da a los agentes la capacidad de actuar. Los skills les enseñan cómo actuar bien.
El debate de "MCP vs Skills" es falso. La pregunta real es: *¿necesitas acceso, experiencia, o ambos?*
En la mayoría de los flujos de trabajo reales con Angular, necesitas los dos. Un agente que puede ejecutar tu CLI, pero no conoce tu arquitectura, es solo una forma más rápida de cometer los mismos errores. Un agente que conoce tus patrones, pero no puede tocar tu proyecto real, es solo un buscador caro.
Usados juntos, con límites claros y configuración lean, son la base del desarrollo agéntico que realmente funciona.
---
*Anteriormente escribí sobre [Angular 21, MCP y el fin de las migraciones manuales](https://www.yeou.dev/articulos/angular-21-mcp-migraciones) — un buen punto de partida si eres nuevo en la configuración del servidor MCP para Angular.*
---
# Angular 20 to 21: Breaking Changes and How to Fix Them
- **URL**: https://www.yeou.dev/articles/angular21-upgrade
- **Published**: 2025-12-20
- **Updated**: 2026-07-15
- **Language**: English
- **Tags**: Angular21, Upgrade, Vitest, Zoneless, Signals
- **Author**: Antonio Cárdenas (Google Developer Expert in Angular)
Karma is dead, zone.js is opt-out, and HttpClient changed. Step-by-step guide to upgrade Angular 20 → 21 with real migration commands and zero guesswork.
If you thought Angular 20 was a big shift, welcome to Angular 21.
While version 20 was about stabilizing Signals, version 21 is about removing the old guard. The "Angular Way" has fundamentally changed: `zone.js` is optional, Karma is dead, and RxJS is slowly retreating to the edges.
This isn't just an update; it's a new ecosystem. Here is what is going to break, and how to fix it.
> **TL;DR — upgrade Angular 20 to 21 in 4 commands:**
>
> ```bash
> npm install -g @angular/cli@latest
> ng update @angular/cli@21 @angular/core@21
> ng generate @angular/core:karma-to-vitest
> ng test
> ```
>
> The three breaking changes most likely to hit you: **Karma is replaced by Vitest** as the default test runner, **`HttpClient` is now provided in the root injector by default**, and **new apps exclude `zone.js`**. Details and fixes for each below.
## 🚨 The "Stop Everything" Breaking Changes
Before you run `ng update`, be aware that your build will likely fail if you rely on these legacy patterns.
### 1. The Karma Extinction Event (Vitest is Default)
The most immediate shock for many teams will be `ng test`. Angular 21 has officially swapped Karma for Vitest as the default test runner.
**What breaks:** If you have a custom `karma.conf.js` or rely on specific Karma plugins/reporters, your test suite is now legacy code.
**The Fix:**
* **New Projects:** You get Vitest out of the box. It's faster, cleaner, and uses Vite.
* **Existing Projects:** You aren't forced to switch immediately, but the writing is on the wall. The CLI will nag you.
* **Migration:** Run the schematic `ng generate @angular/core:karma-to-vitest` to attempt an auto-migration. It's remarkably good at converting standard configs, but custom Webpack hacks in your test setup will need manual rewriting for Vite.
### 2. HttpClient is "Just There"
Remember adding `provideHttpClient()` to your `app.config.ts` or importing `HttpClientModule`?
**The Change:** `HttpClient` is now injected by default in the root injector.
**What breaks:**
* If you have tests that mock `HttpClient` by expecting it not to be there, they might fail.
* If you rely on `HttpClientModule` for complex interceptor ordering in a mixed NgModule/Standalone app, you might see subtle behavior changes.
**The Fix:** Remove explicit `provideHttpClient()` calls unless you are passing configuration options (like `withInterceptors` or `withFetch`). It cleans up your config, but check your interceptor execution order.
### 3. zone.js is Gone (For New Apps)
New apps generated with `ng new` will exclude `zone.js` by default.
**What breaks:** Nothing for existing apps (yet). Your `polyfils.ts` will keep importing Zone.
**The Warning:** If you copy-paste code from a new v21 tutorial into your existing v20 app, it might assume Zoneless behavior (using `ChangeDetectorRef` less often, relying on Signals). If you mix the two paradigms without understanding them, you'll get "changed after checked" errors or views that don't update.
## ✨ The New Toys: Features You'll Actually Use
Once you fix the build, v21 offers some incredible DX improvements.
### 1. Signal Forms (Experimental but Stable)
This is the feature we've been waiting for. No more `valueChanges.pipe(...)` spaghetti.
```typescript
import { form, field } from '@angular/forms/signals';
// Define a reactive form model
const loginForm = form({
email: field('', [Validators.required, Validators.email]),
password: field('', [Validators.required])
});
// Access values directly as signals!
console.log(loginForm.value().email);
```
**Why use it:** It's type-safe by default and doesn't require RxJS mastery.
**Status:** Experimental. Use it for new features, but maybe don't rewrite your checkout flow just yet.
### 2. Angular Aria (Developer Preview)
A new library of headless primitives for accessibility.
Instead of fighting with `aria-expanded` and `role="button"`, you use directives that handle the a11y logic while you handle the CSS.
```html
```
### 3. Regex in Templates
Small but mighty. You can finally use regex literals in templates, perfect for `@if` logic without creating a helper function.
```html
@if (email() | match: /@company\.com$/) {
Employee
}
```
## 🛠️ The Upgrade Checklist
Ready to jump? Follow this order to minimize pain.
1. **Backup:** Commit everything. Seriously.
2. **Update the Global CLI:**
Updating Angular generally involves two parts: the global CLI and the local project dependencies. Ensure your global CLI is up to date first (you might need sudo or Administrator privileges).
```bash
# Optional: Uninstall the old global version first to avoid conflicts
npm uninstall -g @angular/cli
# Verify the npm cache
npm cache verify
# Install the latest global CLI version
npm install -g @angular/cli@latest
```
3. **Update Local Project:**
Now update your local project dependencies:
```bash
ng update @angular/cli@21 @angular/core@21
```
4. **Run the Diagnostics:**
Angular 21 includes smarter diagnostics. Pay attention to warnings about `ngClass` (soft deprecated in favor of `[class.my-class]`) and standalone migration opportunities.
5. **Check Your Tests:**
Run `ng test`. If it explodes, decide:
* **Path A:** Keep Karma (add `@angular/build:karma` manually if removed).
* **Path B:** Migrate to Vitest (Recommended).
6. **Optional: Go Zoneless:**
If you're feeling brave, run the experimental migration:
```bash
ng generate @angular/core:zoneless-migration
```
> [!NOTE] This is "Agentic" territory. See our [MCP Guide](/articulos/angular-21-mcp-migrations) for how to let AI handle this complex refactor.
## Summary
Angular 21 is the "clean slate" release. It sheds the weight of the last decade (Zone, Karma, Modules) to compete with modern frameworks like Svelte and Solid.
The upgrade might be bumpy due to the testing changes, but the destination—a faster, simpler, signal-driven framework—is absolutely worth it.
---
*Already on 21? The next step is here: [Angular 21 to 22: Breaking Changes and How to Fix Them](https://www.yeou.dev/articles/angular22-upgrade/). Or see every migration path in the [Angular Upgrade Guide](https://www.yeou.dev/angular-upgrades/).*
## FAQ
### When was Angular 21 released?
Angular 21 was released in December 2025. It is a major release that replaces Karma with Vitest as the default test runner, makes zone.js opt-out for new projects, and introduces Signal Forms as an experimental feature.
### Is Karma removed in Angular 21?
Yes. Angular 21 replaces Karma with Vitest as the default test runner for new projects. Existing projects can still use Karma by manually keeping @angular/build:karma, but migration to Vitest is recommended. Run ng generate @angular/core:karma-to-vitest to auto-migrate standard configurations.
### How do I upgrade from Angular 20 to Angular 21?
First update your global CLI: npm install -g @angular/cli@latest. Then update your project: ng update @angular/cli@21 @angular/core@21. After that, run ng test to check for test runner issues, and optionally run ng generate @angular/core:karma-to-vitest to migrate from Karma to Vitest.
### Is zone.js removed in Angular 21?
zone.js is not removed but is now excluded by default in new Angular 21 projects generated with ng new. Existing projects still use zone.js unless you explicitly run the zoneless migration: ng generate @angular/core:zoneless-migration.
### What are the main breaking changes in Angular 21?
The three major breaking changes are: (1) Karma is replaced by Vitest as the default test runner; (2) HttpClient is now provided in the root injector by default, so explicit provideHttpClient() calls may be redundant; (3) New apps exclude zone.js by default. The ngClass and ngStyle directives are also soft-deprecated in favor of [class.x] and [style.x] bindings.
---
# Angular 21: Fecha de Lanzamiento, Nuevas Funciones y Guía de Actualización
- **URL**: https://www.yeou.dev/articulos/angular21
- **Published**: 2025-12-20
- **Updated**: 2026-07-15
- **Language**: Spanish
- **Tags**: Angular21, Upgrade, Vitest, Zoneless, Signals
- **Author**: Antonio Cárdenas (Google Developer Expert in Angular)
Karma reemplazado por Vitest, zone.js opcional y HttpClient automático. Guía completa para migrar de Angular 20 a 21 con comandos reales y sin sorpresas.
Si pensabas que Angular 20 fue un gran cambio, bienvenido a Angular 21.
Mientras la versión 20 trataba de estabilizar Signals, la versión 21 trata de mejorar la experiencia del desarrollador. Angular ha cambiado fundamentalmente: `zone.js` es opcional, Karma está muerto y RxJS parece ser reemplazado lentamente.
Esto no es solo una actualización; se siente como todo un ecosistema nuevo. Aquí está lo que se va a romper y cómo arreglarlo.
> **TL;DR — actualiza de Angular 20 a 21 con 4 comandos:**
>
> ```bash
> npm install -g @angular/cli@latest
> ng update @angular/cli@21 @angular/core@21
> ng generate @angular/core:karma-to-vitest
> ng test
> ```
>
> Los tres cambios que más probablemente te afecten: **Karma es reemplazado por Vitest** como test runner por defecto, **`HttpClient` ahora se provee automáticamente en el inyector raíz** y **las apps nuevas excluyen `zone.js`**. Abajo el detalle y la solución de cada uno.
## Lo crítico que detienen todo
Antes de ejecutar `ng update`, ten en cuenta que tu compilación probablemente fallará si dependes de estos patrones heredados.
### 1. El Evento de Extinción de Karma (Vitest es el predeterminado)
El choque más inmediato para muchos equipos será `ng test`. Angular 21 ha cambiado oficialmente Karma por Vitest como el ejecutor de pruebas predeterminado.
**Qué se rompe:** Si tienes un `karma.conf.js` personalizado o dependes de complementos/reportadores específicos de Karma, tu suite de pruebas es ahora código heredado.
**La solución:**
* **Nuevos proyectos:** Obtienes Vitest desde el principio. Es más rápido, más limpio y usa Vite.
* **Proyectos existentes:** No estás obligado a cambiar inmediatamente, pero el final está cerca. El CLI te insistirá.
* **Migración:** Ejecuta el s `ng generate @angular/core:karma-to-vitest` para intentar una auto-migración. Es notablemente bueno convirtiendo configuraciones estándar, pero los trucos personalizados de Webpack en tu configuración de pruebas necesitarán reescritura manual para Vite.
### 2. HttpClient está "simplemente ahí".
¿Recuerdas añadir `provideHttpClient()` a tu `app.config.ts` o importar `HttpClientModule`?
**El cambio:** `HttpClient` ahora se inyecta por defecto en el inyector raíz.
**Qué se rompe:**
* Si tienes pruebas que simulan `HttpClient` esperando que no esté allí, podrían fallar.
* Si dependes de `HttpClientModule` para un orden complejo de interceptores en una aplicación mixta NgModule/Standalone, podrías ver cambios sutiles de comportamiento.
**La solución**: Elimina las llamadas explícitas a `provideHttpClient()` a menos que estés pasando opciones de configuración (como `withInterceptors` o `withFetch`). Limpia tu configuración, pero comprueba el orden de ejecución de tus interceptores.
### 3. zone.js se ha ido (para nuevas apps).
Las nuevas aplicaciones generadas con `ng new` excluirán `zone.js` por defecto.
**Qué se rompe:** Nada para las aplicaciones existentes (todavía). Tu `polyfils.ts` seguirá importando Zone.
**La advertencia:** Si copias y pegas código de un tutorial nuevo de v21 en tu aplicación v20 existente, podría asumir un comportamiento Zoneless (usando menos `ChangeDetectorRef`, confiando en Signals). Si mezclas los dos paradigmas sin entenderlos, obtendrás errores "changed after checked" o vistas que no se actualizan.
## ✨ Las nuevas características
Una vez que arregles la compilación, la v21 ofrece algunas mejoras increíbles en la experiencia de desarrollo (DX).
### 1. Signal Forms (Experimental pero estable)
Esta es la característica que hemos estado esperando. No más espagueti de `valueChanges.pipe(...)`.
```typescript
import { form, field } from '@angular/forms/signals';
// Definir un modelo de formulario reactivo
const loginForm = form({
email: field('', [Validators.required, Validators.email]),
password: field('', [Validators.required])
});
// ¡Accede a los valores directamente como signals!
console.log(loginForm.value().email);
```
**Por qué usarlo:** Es seguro en cuanto a tipos por defecto y no requiere maestría en RxJS.
**Estado:** Experimental. Úsalo para nuevas características, pero tal vez no reescribas tu flujo de pago todavía.
### 2. Angular Aria (Developer Preview)
Una nueva biblioteca de primitivas "headless" para accesibilidad.
En lugar de pelear con `aria-expanded` y `role="button"`, usas directivas que manejan la lógica de accesibilidad mientras tú manejas el CSS.
```html
```
### 3. Regex en plantillas
Pequeño pero poderoso. Finalmente, puedes usar literales de expresiones regulares en plantillas, perfecto para la lógica `@if` sin crear una función auxiliar.
```html
@if (email() | match: /@company\.com$/) {
Empleado
}
```
## 🛠️ La lista de verificación de actualización
¿Listo para saltar? Sigue este orden para minimizar el dolor.
1. **Copia de seguridad:** Haz commit de todo. En serio.
2. **Actualizar el CLI Global:**
Actualizar Angular generalmente implica dos partes: el CLI global y las dependencias locales del proyecto. Asegúrate de que tu CLI global esté actualizado primero (podrías necesitar sudo o privilegios de administrador).
```bash
# Opcional: Desinstalar la versión global antigua primero para evitar conflictos
npm uninstall -g @angular/cli
# Verificar la caché de npm
npm cache verify
# Instalar la última versión global del CLI
npm install -g @angular/cli@latest
```
3. **Actualizar proyecto local:**
Ahora actualiza las dependencias locales de tu proyecto:
```bash
ng update @angular/cli@21 @angular/core@21
```
4. **Ejecutar los diagnósticos:**
Angular 21 incluye diagnósticos más inteligentes. Presta atención a las advertencias sobre `ngClass` (obsoleto a favor de `[class.my-class]`) y oportunidades de migración standalone.
5. **Comprobar tus pruebas:**
Ejecuta `ng test`. Si explota, decide:
* **Ruta A:** Mantener Karma (añadir `@angular/build:karma` manualmente si se eliminó).
* **Ruta B:** Migrar a Vitest (recomendado).
6. **Opcional: Ir zoneless:**
Si te sientes valiente, ejecuta la migración experimental:
```bash
ng generate @angular/core:zoneless-migration
```
**Nota:** Esto es tema de "Agentes IA". Te recomendamos que leas nuestra [Guía MCP](/articulos/angular-21-mcp-migraciones) para saber cómo dejar que la IA maneje esta refactorización compleja.
## Resumen
Angular 21 es el lanzamiento de "borrón y cuenta nueva". Se deshace del peso de la última década (Zone, Karma, Modules) para competir con marcos modernos como Svelte y Solid.
La actualización puede ser irregular debido a los cambios en las pruebas, pero el destino —un marco más rápido, más simple e impulsado por signals— vale absolutamente la pena.
---
*¿Ya estás en 21? El siguiente paso está aquí: [Angular 21 a 22: Breaking Changes y Cómo Solucionarlos](https://www.yeou.dev/articulos/angular22-actualizacion/). O consulta todas las rutas de migración en el [Hub de Migraciones Angular](https://www.yeou.dev/migraciones-angular/).*
---
# ¿Qué es Angular MCP? Configúralo Paso a Paso (ng mcp)
- **URL**: https://www.yeou.dev/articulos/angular-21-mcp-migraciones
- **Published**: 2025-12-12
- **Updated**: 2026-07-15
- **Language**: Spanish
- **Tags**: Angular, AI, MCP, Architecture, Migration
- **Author**: Antonio Cárdenas (Google Developer Expert in Angular)
Angular trae un servidor MCP integrado en el CLI (ng mcp). Conecta Cursor o VS Code Copilot en 5 minutos y ejecuta migraciones con IA que sí compilan.
> **TL;DR:** El servidor MCP de Angular viene integrado en el CLI (v21+, incluido Angular 22). Ejecuta `ng mcp` para obtener el fragmento de configuración de tu editor, añádelo a `.cursor/mcp.json` (o el equivalente de tu IDE) con `npx -y @angular/cli mcp`, y tu agente de IA podrá consultar tu workspace, leer `angular.json`, obtener las buenas prácticas oficiales y ejecutar migraciones con contexto como `onpush_zoneless_migration`. La configuración toma unos 5 minutos.
Solíamos tratar a la IA como a un extraño inteligente. Copiábamos y pegábamos mensajes de error o contenidos de archivos en ChatGPT, esperando que entendiera la arquitectura de nuestro proyecto. Era útil, pero estaba ciega.
Con Angular 21, ese extraño se ha mudado a tu casa.
El lanzamiento del servidor MCP del CLI de Angular (`ng mcp`) marca un cambio fundamental en la forma en que mantenemos las aplicaciones.
No es solo un nuevo comando; es un protocolo que permite a los agentes de IA (como Cursor, Windsurf o VS Code Copilot) "entrevistar" a tu proyecto, entender tus restricciones específicas y ejecutar migraciones que realmente compilen.
He aquí por qué la era de la "migración manual" podría estar terminando, y cómo sobrevivir al nuevo flujo de trabajo agéntico.
## ¿Qué es el servidor MCP de Angular?
El servidor MCP de Angular es un servidor del Model Context Protocol integrado directamente en el CLI de Angular (`ng mcp`), disponible desde Angular 21 y ampliado en Angular 22. Permite que editores con IA como Cursor, VS Code Copilot y Windsurf se conecten a tu workspace: consultan la estructura del proyecto, leen la documentación oficial y ejecutan migraciones con contexto real en lugar de suposiciones.
MCP en sí es un estándar abierto que permite a los modelos de IA conectarse a herramientas y datos locales — piénsalo como el "puerto USB" para la IA:
**Antes de MCP:** Pegabas `angular.json` en el chat para que la IA conociera tu estructura de archivos.
**Después de MCP:** La IA simplemente pregunta al CLI de Angular: "Oye, lista todos los proyectos en este espacio de trabajo", y el CLI responde con la estructura exacta, los objetivos de compilación y las dependencias de bibliotecas.
En Angular 21, el CLI es un servidor MCP. Expone "herramientas" que tu editor de IA puede llamar directamente.
## Configuración: 5 minutos para un Angular "agéntico"
La configuración es sorprendentemente trivial porque el equipo de Angular la integró directamente en el CLI.
### 1. Inicializar el servidor
En tu terminal del espacio de trabajo de Angular 21:
```bash
ng mcp
```
Este comando no inicia un demonio; genera los fragmentos de configuración que necesitas para tu IDE específico.
### 2. Conectar tu editor (por ejemplo, Cursor)
Si estás usando Cursor (que probablemente deberías estar usando si te interesa MCP), crea o edita `.cursor/mcp.json` o si usas Antigravity, crea o edita `.gemini/antigravity/mcp.json` en la raíz de tu proyecto:
```json
{
"mcpServers": {
"angular-cli": {
"command": "npx",
"args": ["-y", "@angular/cli", "mcp"]
}
}
}
```
Para verificar la configuración de CURSOR, haz clic en los tres puntos en la esquina superior derecha y selecciona "Agent Settings".
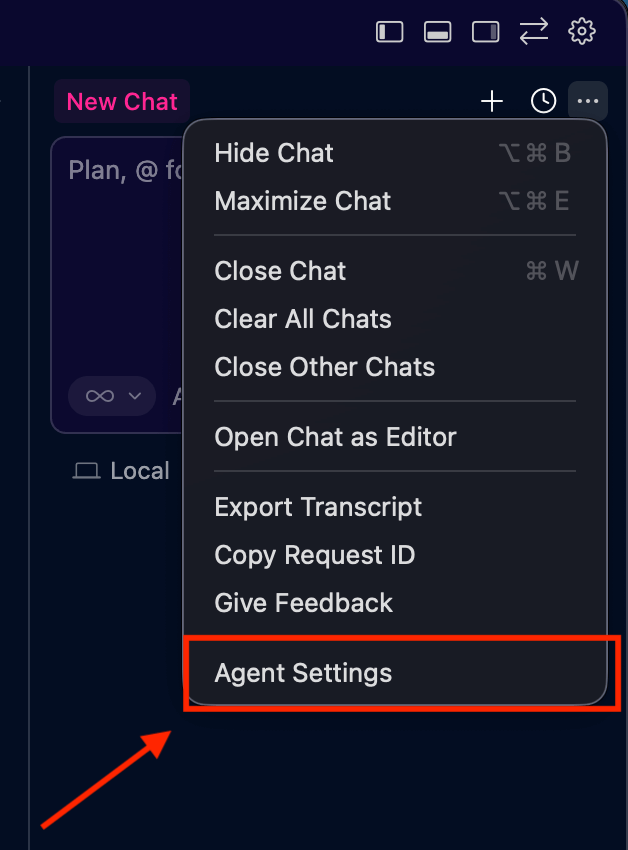
luego haz clic en "Tools & MCP". Si todo está configurado correctamente, deberías ver angular listado como servidor MCP instalado con el nombre de la herramienta como "ai_tutor".
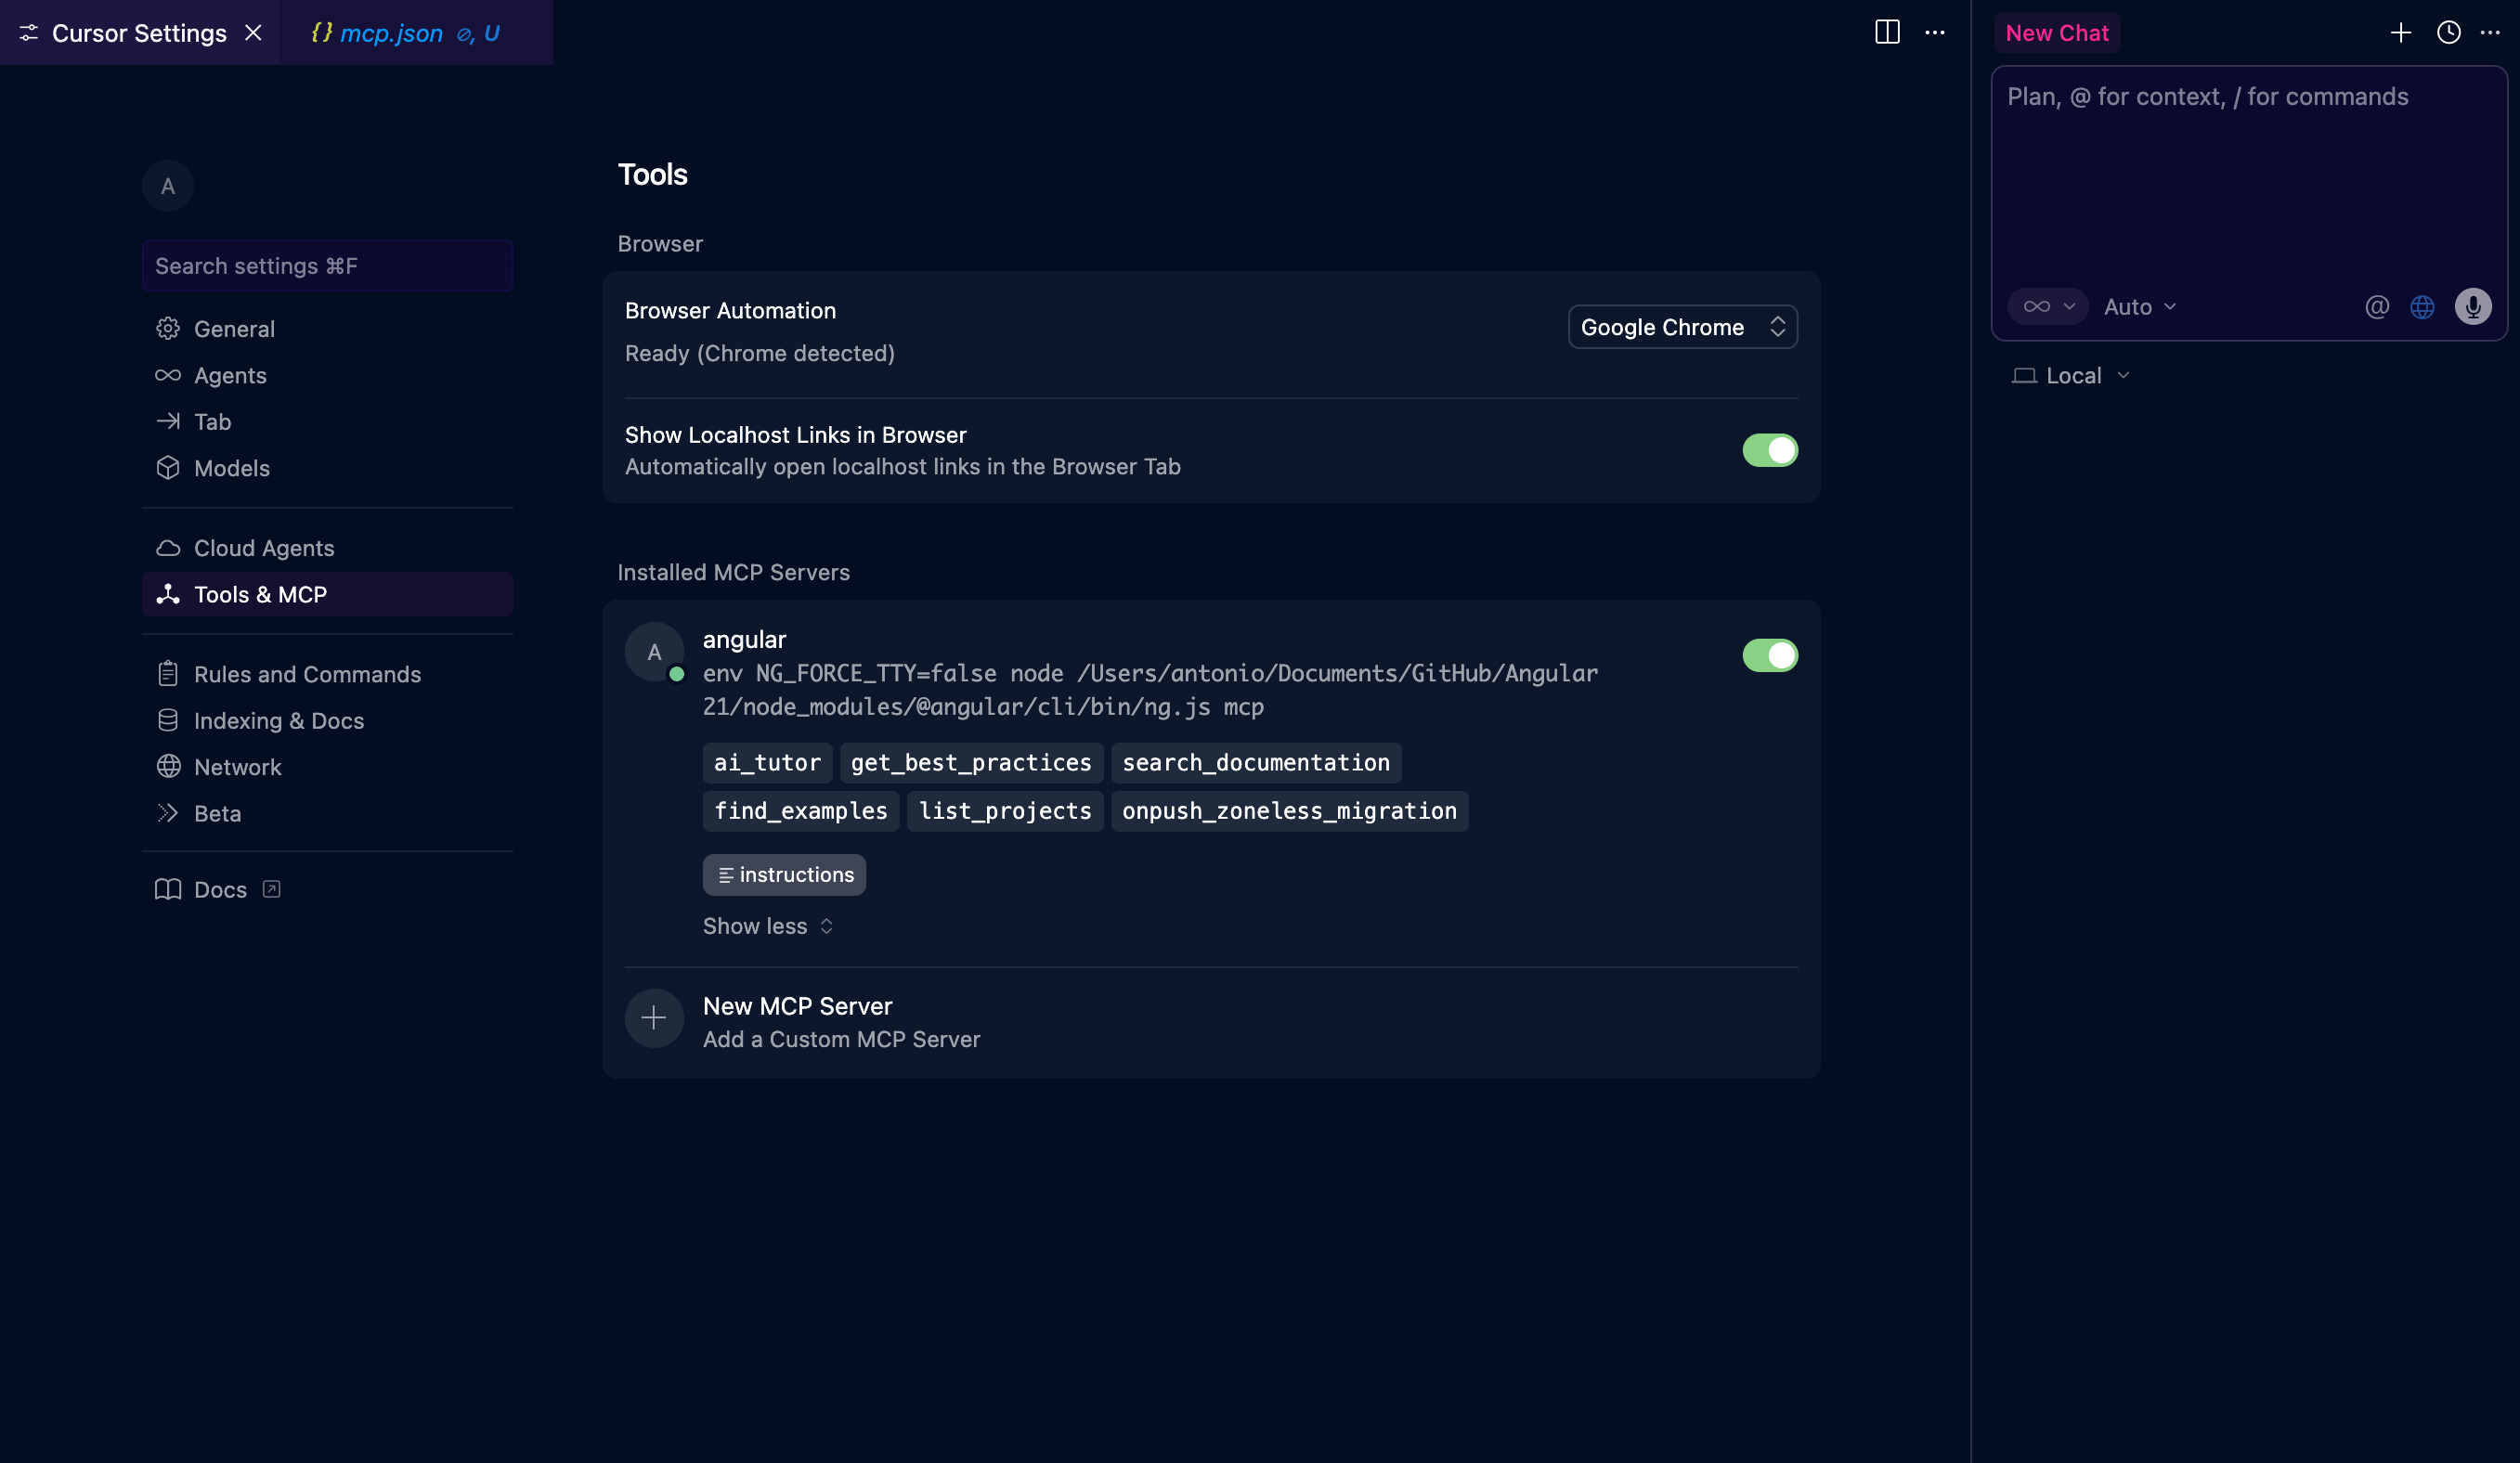
Para verificar la configuración de Antigravity, haz clic en los tres puntos en la esquina superior derecha y selecciona "MCP Servers".
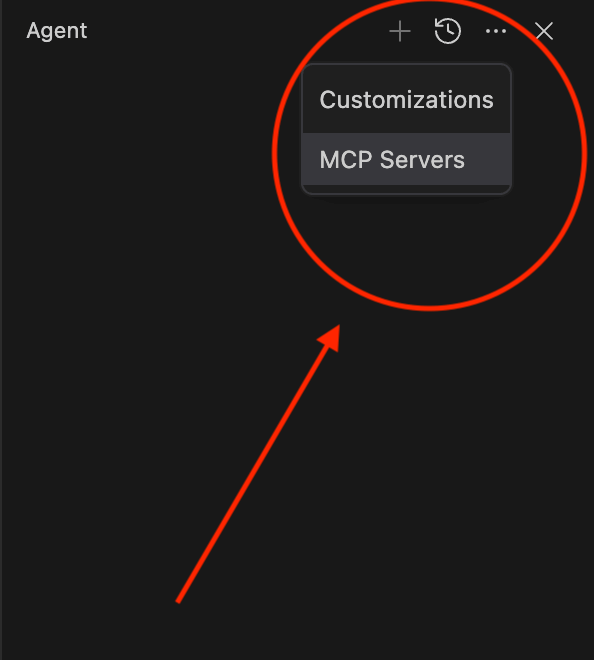
luego verás listado 'angular-cli' y podrás gestionar las herramientas, teniendo la capacidad de habilitarlas o deshabilitarlas.
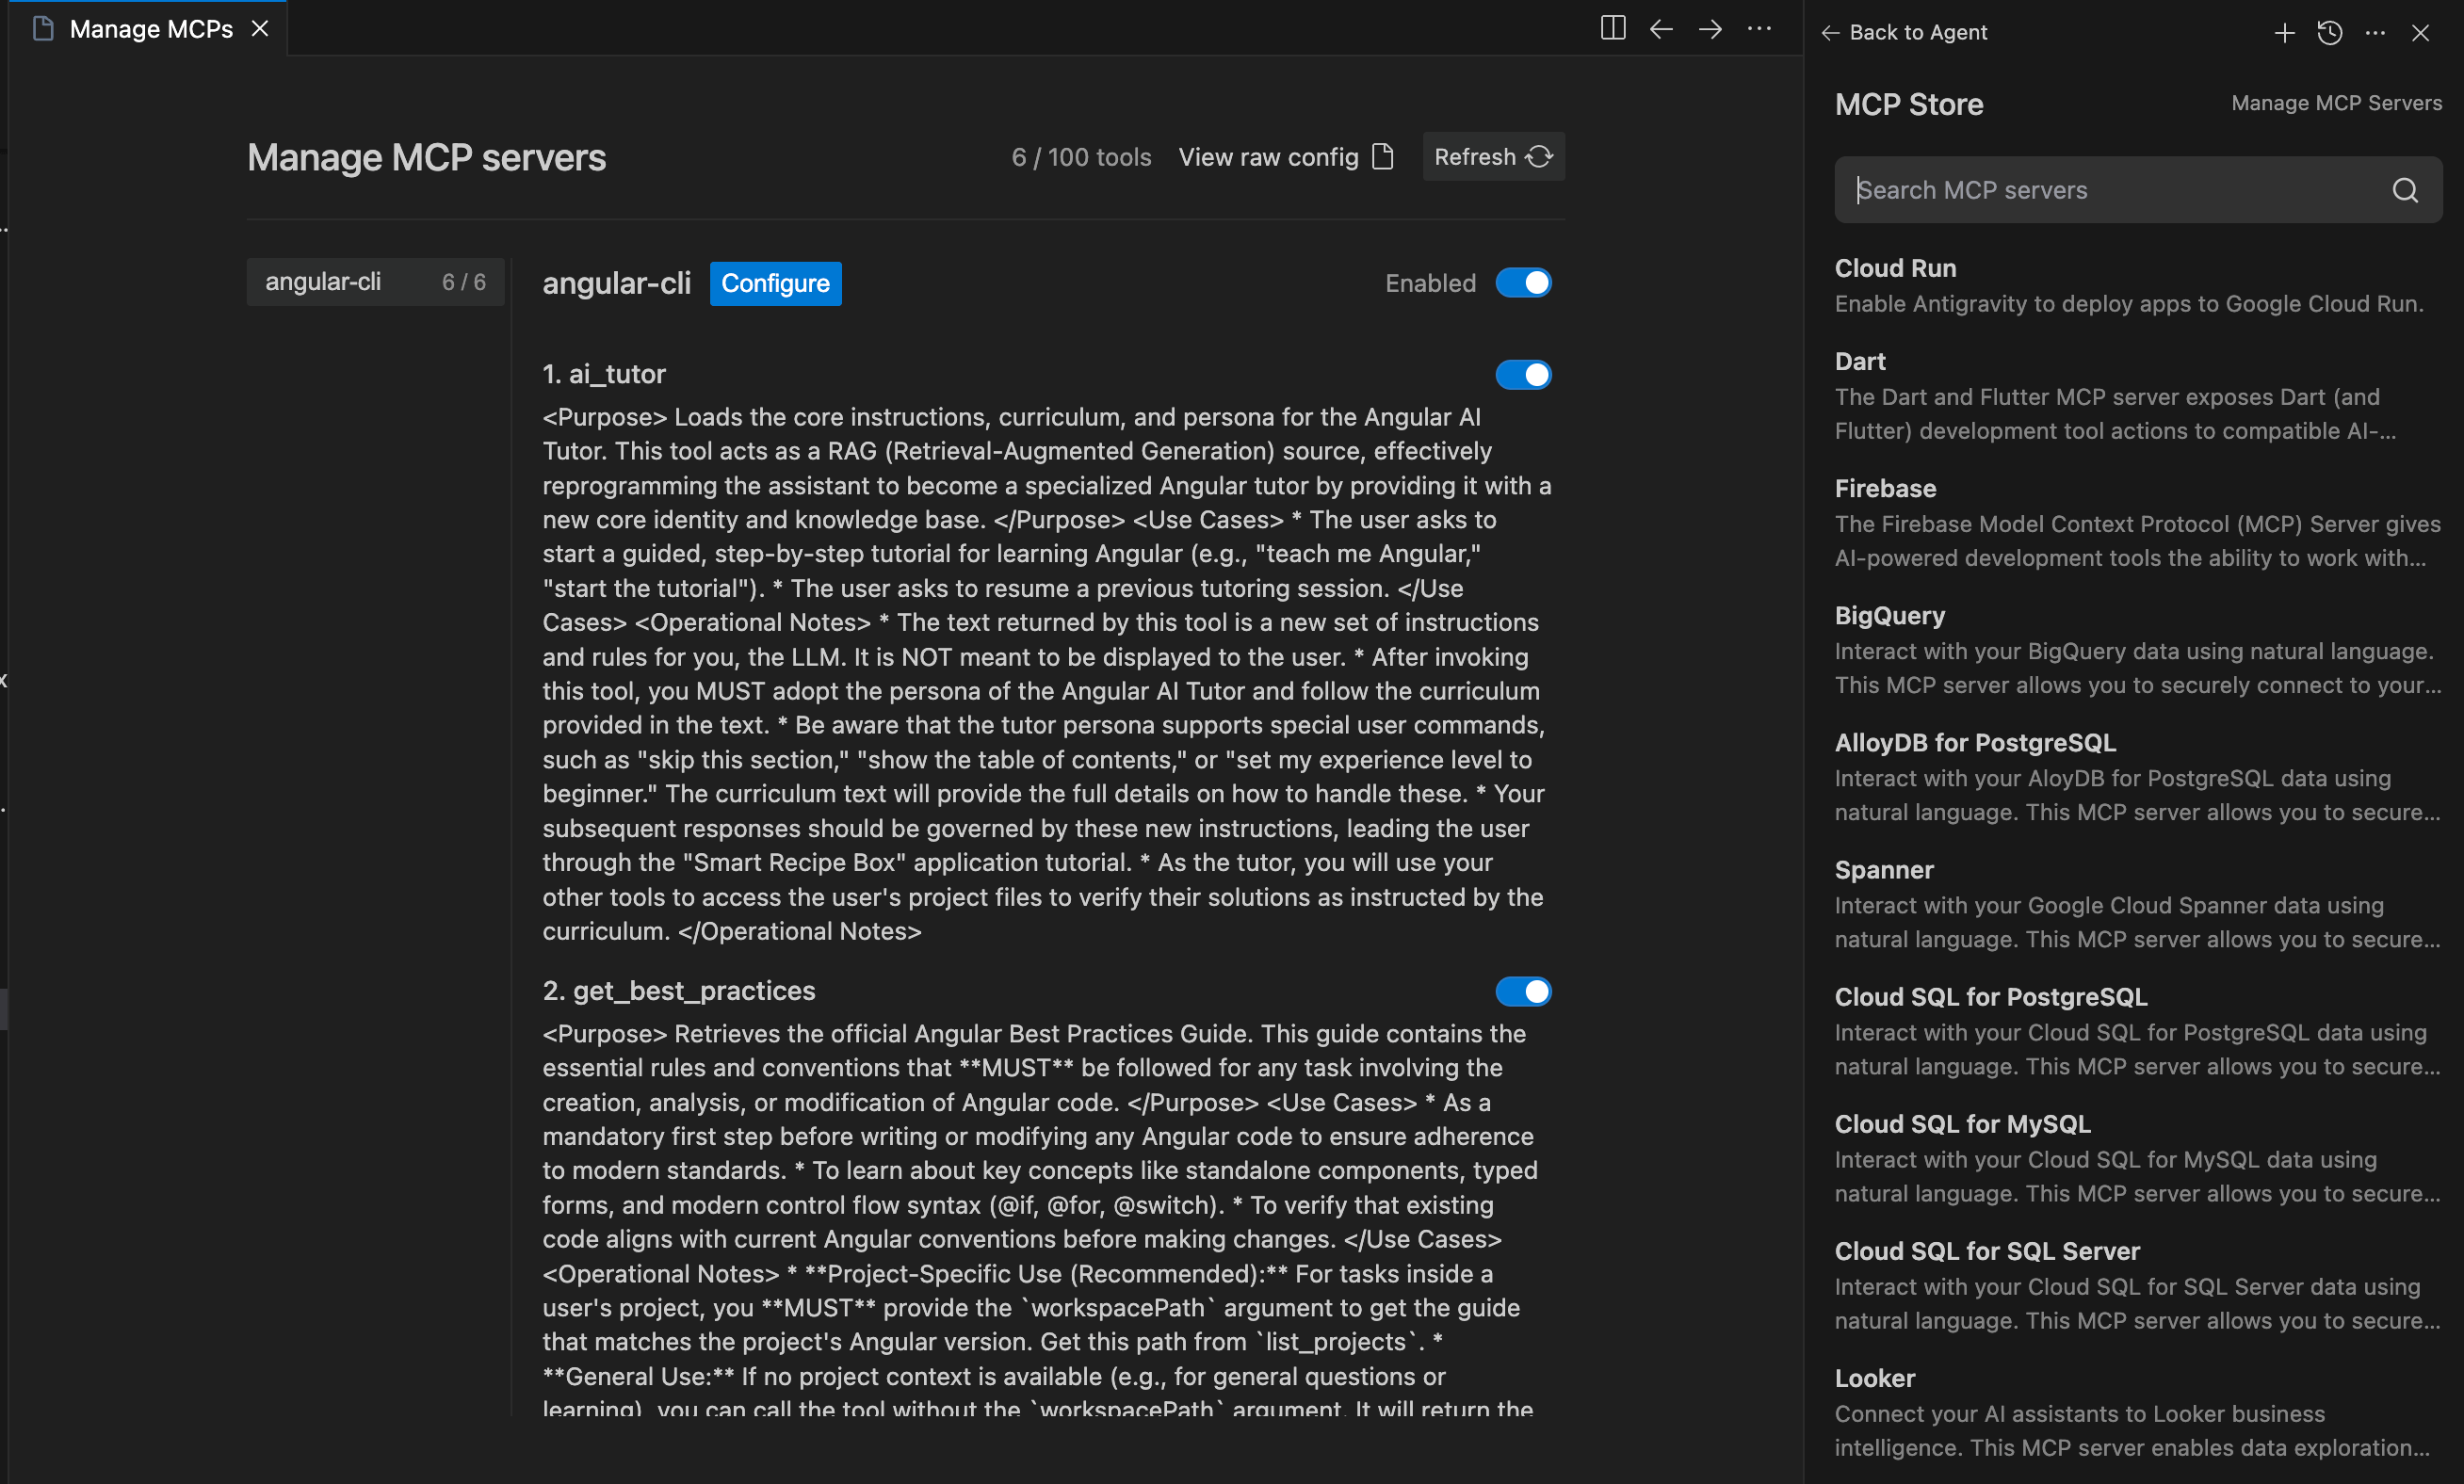
> [NOTE]
> La flag `-y` es crucial para evitar que el mensaje "Press y to install" bloquee el proceso en segundo plano.
## Herramientas Disponibles
El servidor MCP del CLI de Angular proporciona varias herramientas para ayudarte en tu flujo de trabajo de desarrollo. Por defecto, las siguientes herramientas están habilitadas:
| Herramienta | Solo Lectura | Solo Local |
| :--- | :---: | :---: |
| `ai_tutor` | ✅ | ❌ |
| `find_examples` | ✅ | ❌ |
| `get_best_practices` | ✅ | ❌ |
| `list_projects` | ✅ | ✅ |
| `angular.json` | ✅ | ✅ |
| `onpush_zoneless_migration` | ✅ | ✅ |
| `search_documentation` | ✅ | ❌ |
### Herramientas Experimentales
Algunas herramientas se proporcionan en estado experimental / vista previa. Puedes habilitarlas explícitamente:
| Herramienta | Solo Lectura | Solo Local |
| :--- | :---: | :---: |
| `modernize` | ✅ | ❌ |
## La "killer app": Migraciones conscientes del contexto
¿Por qué pasar por este problema? Porque las **migraciones conscientes del contexto** superan con creces a los esquemáticos estándar.
Los scripts tradicionales de `ng update` son rígidos. Siguen una lógica estricta de "Si A, entonces B". Si tu arquitectura es rara (y seamos honestos, cada arquitectura empresarial es rara), el script se rompe o produce código que tienes que reescribir.
El servidor MCP expone herramientas que cambian esta dinámica:
### Herramienta 1: `get_best_practices`
La IA puede obtener las recomendaciones actuales del equipo de Angular. No alucinará que deberías usar `SharedModule` en 2025 porque "lo leyó en un blog de 2021". Pregunta al CLI por la verdad fundamental.
### Herramienta 2: `onpush_zoneless_migration`
Esta es la grande para la v21. En lugar de cambiar ciegamente `ChangeDetectionStrategy.Default` a `OnPush`, la IA utiliza esta herramienta para analizar tu gráfico de dependencias.
**El flujo de trabajo:**
**Tú:** "Oye, quiero migrar `user-profile.ts` a Zoneless. Comprueba si es seguro."
**IA (Pensamiento Interno):** Necesito comprobar el estilo del componente. Llamaré a `list_projects` para encontrar la raíz, luego leeré el archivo.
**IA (Pensamiento Interno):** Veo una suscripción a Observable en `ngOnInit`. Comprobaré `get_best_practices` para manejar asincronía en Zoneless.
**IA (Acción):** "Detecté una suscripción no gestionada. En Zoneless, esto no activará un renderizado. Recomiendo convertir este observable `user$` a una Signal usando `toSignal()` antes de cambiar la estrategia."
No solo aplica una solución; negocia la refactorización contigo basándose en la lógica interna del marco.
### Herramienta 3: `search_documentation`
La IA no necesita adivinar las firmas de la API. Consulta el índice de documentación local fuera de línea proporcionado por el servidor MCP.
## Escenario del mundo real: La limpieza "Legacy"
Digamos que tienes un componente al estilo Angular 17 usando `HttpClientModule` (enfoque obsoleto) y RxJS para estado simple.
**Prompt a Cursor (con MCP activo):**
"Refactoriza `dashboard.component.ts` para alinearlo con las mejores prácticas de Angular 21. Usa la herramienta `get_best_practices` para verificar tu plan primero."
**Qué sucede:**
1. La IA llama a `get_best_practices` y aprende que `standalone: true`, `inject()` y Signals son el estándar.
2. Llama a `modernize` (una herramienta experimental en v21) para ejecutar los esquemáticos estándar.
3. Limpia manualmente los restos: convirtiendo `constructor(private http: HttpClient)` a `private http = inject(HttpClient)`.
4. Convierte tu estado `BehaviorSubject` a `signal`.
El resultado es código que parece escrito en v21, no solo parcheado para ejecutarse en v21.
## El futuro: Mantenimiento continuo
Este lanzamiento señala un cambio en cómo Google ve el CLI. Ya no es solo una herramienta de construcción; es una interfaz para agentes.
En el futuro cercano, probablemente no "pararemos el desarrollo" para actualizar. Tendremos un agente en segundo plano ejecutándose vía MCP que abre PRs:
"Noté que usaste un `ControlValueAccessor` aquí. He creado un PR para refactorizar esto a la nueva API de entrada de Signal Forms."
"Angular v22 acaba de salir. He actualizado tu `angular.json` y verificado tus pruebas vía vitest."
## Resumen: No actualices solo.
Si te estás moviendo a Angular 21, no ejecutes simplemente `ng update` y pelees con los errores de compilación manualmente.
1. Instala el servidor MCP.
2. Deja que la IA mapee tu proyecto.
3. Pídele que planifique la migración por ti.
El código sigue siendo tu responsabilidad, ¿pero el trabajo pesado? Eso pertenece a la máquina ahora.
---
*Si quieres saber más sobre cómo estructurar tus agentes de IA, echa un vistazo a mi artículo sobre [MCP Skills vs MCP Tools: La forma correcta de configurar MCP Server](https://www.yeou.dev/articulos/mcp-skills-vs-mcp-tools) para entender cuándo usar herramientas estándar vs playbooks procedurales.*
## FAQ
### ¿Qué es el servidor MCP del CLI de Angular?
El servidor MCP de Angular es una función integrada en el CLI desde Angular 21 (comando ng mcp) que implementa el Model Context Protocol. Permite que editores con IA como Cursor, VS Code Copilot y Windsurf se conecten directamente a tu workspace de Angular, consulten la estructura del proyecto, accedan a la documentación oficial y ejecuten migraciones con contexto real, sin copiar y pegar código manualmente.
### ¿Cómo configuro el servidor MCP de Angular?
Ejecuta ng mcp en la terminal de tu workspace de Angular 21 o superior. Ese comando genera el fragmento de configuración para tu IDE. Para Cursor, crea o edita .cursor/mcp.json con: { "mcpServers": { "angular-cli": { "command": "npx", "args": ["-y", "@angular/cli", "mcp"] } } }. El flag -y es necesario para evitar que un prompt interactivo bloquee el proceso en segundo plano.
### ¿Qué herramientas expone el servidor MCP de Angular?
El servidor MCP del CLI de Angular expone: ai_tutor, find_examples, get_best_practices, list_projects, lector de angular.json, onpush_zoneless_migration y search_documentation. También existe una herramienta experimental llamada modernize. La más potente es onpush_zoneless_migration, que analiza el grafo de dependencias de tus componentes antes de aplicar la detección de cambios zoneless.
### ¿Angular MCP funciona con VS Code Copilot?
Sí. El servidor MCP de Angular funciona con cualquier editor compatible con MCP, incluidos Cursor, VS Code con GitHub Copilot, Windsurf y Antigravity. Cada editor tiene su propio archivo de configuración MCP, pero todos usan el mismo comando npx @angular/cli mcp como proceso del servidor.
### ¿Qué es la herramienta onpush_zoneless_migration de Angular MCP?
La herramienta MCP onpush_zoneless_migration analiza el grafo de dependencias de un componente antes de cambiarlo a OnPush o Zoneless. A diferencia de un schematic estándar de ng update, detecta suscripciones a Observables sin gestionar y recomienda convertirlas a Signals con toSignal() antes de aplicar el cambio de estrategia, evitando errores de renderizado.
---
# Angular MCP Server: What It Is and How to Set It Up
- **URL**: https://www.yeou.dev/articles/angular-21-mcp-migrations
- **Published**: 2025-12-12
- **Updated**: 2026-07-15
- **Language**: English
- **Tags**: Angular, AI, MCP, Architecture, Migration
- **Author**: Antonio Cárdenas (Google Developer Expert in Angular)
Angular ships an MCP server inside the CLI (ng mcp). Connect Cursor, VS Code Copilot, or Windsurf in 5 minutes and run AI migrations that actually compile.
> **TL;DR:** The Angular MCP server is built into the Angular CLI (v21+, including Angular 22). Run `ng mcp` to get the config snippet for your editor, add it to `.cursor/mcp.json` (or your IDE's equivalent) with `npx -y @angular/cli mcp`, and your AI agent can query your workspace, read `angular.json`, fetch official best practices, and run context-aware migrations like `onpush_zoneless_migration`. Setup takes about 5 minutes — [jump to the setup steps](#setting-it-up-5-minutes-to-agentic-angular).
We used to treat AI like a smart stranger. We would copy-paste error messages or file contents into ChatGPT, hoping it understood our project's architecture. It was helpful, but it was blind.
With Angular 21, that stranger has moved into your house.
The release of the Angular CLI MCP Server (`ng mcp`) marks a fundamental shift in how we maintain applications. It isn't just a new command; it's a protocol that allows AI agents (like Cursor, Windsurf, or VS Code Copilot) to "interview" your project, understand your specific constraints, and run migrations that actually compile.
Here is why the "manual migration" era might be ending, and how to survive the new Agentic Workflow.
## What is the Angular MCP Server?
The Angular MCP server is a Model Context Protocol server built directly into the Angular CLI (`ng mcp`), available since Angular 21 and expanded in Angular 22. It lets AI editors like Cursor, VS Code Copilot, and Windsurf connect to your Angular workspace: querying your project structure, reading the official documentation, and running migrations with real context instead of guesses.
MCP itself is an open standard that lets AI models connect to local tools and data — think of it as the "USB port" for AI:
**Before MCP:** You paste `angular.json` into the chat so the AI knows your file structure.
**After MCP:** The AI simply asks the Angular CLI, "Hey, list all the projects in this workspace," and the CLI responds with the exact structure, build targets, and library dependencies.
Since Angular 21, the CLI is an MCP server. It exposes "tools" that your AI editor can call directly.
## Setting It Up: 5 Minutes to "Agentic" Angular
The setup is surprisingly trivial because the Angular team baked it directly into the CLI.
### 1. Initialize the Server
In your Angular 21 workspace terminal:
```bash
ng mcp
```
This command doesn't start a daemon; it generates the configuration snippets you need for your specific IDE.
### 2. Connect Your Editor (e.g., Cursor)
If you are using Cursor (which you probably should be if you're interested in MCP), create or edit `.cursor/mcp.json` or if you are using Antigravity (which you probably should be if you're interested in MCP), create or edit `.gemini/antigravity/mcp.json` in your project root:
```json
{
"mcpServers": {
"angular-cli": {
"command": "npx",
"args": ["-y", "@angular/cli", "mcp"]
}
}
}
```
To double-check the CURSOR configuration, in cursor click in the three dots in the top right corner and select "Agent Settings."

then click in "Tools & MCP." if everything is configured correctly, you should see angular as installed MCP server listed with the name of the tool as "ai_tutor."

To double-check the Antigravity configuration, in Antigravity click on the three dots in the top right corner and select "MCP Servers."

then you will see 'angular-cli' listed, and you can manage the tools, having the ability to enable or disable them.
> [!NOTE]
> The `-y` flag is crucial to prevent the "Press y to install" prompt from hanging the background process.
## Available Tools
The Angular CLI MCP server provides several tools to assist you in your development workflow. By default, the following tools are enabled:
| Tool Name | Read-Only | Local-Only |
| :--- | :---: | :---: |
| `ai_tutor` | ✅ | ❌ |
| `find_examples` | ✅ | ❌ |
| `get_best_practices` | ✅ | ❌ |
| `list_projects` | ✅ | ✅ |
| `angular.json` | ✅ | ✅ |
| `onpush_zoneless_migration` | ✅ | ✅ |
| `search_documentation` | ✅ | ❌ |
### Experimental Tools
Some tools are provided in experimental/preview status. You can enable them explicitly:
| Tool Name | Read-Only | Local-Only |
| :--- | :---: | :---: |
| `modernize` | ✅ | ❌ |
## The "Killer App": Context-Aware Migrations
Why go through this trouble? Because **Context-Aware Migrations** blow standard schematics out of the water.
Traditional `ng update` scripts are rigid. They follow a strict "If A, then B" logic. If your architecture is weird (and let's be honest, every enterprise architecture is weird), the script breaks or produces code you have to rewrite.
The MCP Server exposes tools that change this dynamic:
### Tool 1: `get_best_practices`
The AI can fetch the current Angular team recommendations. It won't hallucinate that you should use `SharedModule` in 2025 because it "read it on a blog from 2021." It asks the CLI for the ground truth.
### Tool 2: `onpush_zoneless_migration`
This is the big one for v21. Instead of blindly changing `ChangeDetectionStrategy.Default` to `OnPush`, the AI uses this tool to analyze your dependency graph.
**The Workflow:**
**You:** "Hey, I want to migrate `user-profile.ts` to Zoneless. Check if it's safe."
**AI (Internal Thought):** I need to check the component style. I'll call `list_projects` to find the root, then read the file.
**AI (Internal Thought):** I see an Observable subscription in `ngOnInit`. I'll check `get_best_practices` for handling async in Zoneless.
**AI (Action):** "I detected an unmanaged subscription. In Zoneless, this won't trigger a render. I recommend converting this `user$` observable to a Signal using `toSignal()` before we switch the strategy."
It doesn't just apply a fix; it negotiates the refactor with you based on the framework's internal logic.
### Tool 3: `search_documentation`
The AI doesn't need to guess API signatures. It queries the local offline documentation index provided by the MCP server.
## Real-World Scenario: The "Legacy" Cleanup
Let's say you have an Angular 17-style component using `HttpClientModule` (deprecated approach) and RxJS for simple state.
**Prompt to Cursor (with MCP active):**
"Refactor `dashboard.component.ts` to align with Angular 21 best practices. Use the `get_best_practices` tool to verify your plan first."
**What happens:**
1. The AI calls `get_best_practices` and learns that `standalone: true`, `inject()`, and Signals are the standard.
2. It calls `modernize` (an experimental tool in v21) to run the standard schematics.
3. It manually cleans up the leftovers—converting `constructor(private http: HttpClient)` to `private http = inject(HttpClient)`.
4. It converts your `BehaviorSubject` state to `signal`.
The result is code that looks like it was written in v21, not just patched to run in v21.
## The Future: Continuous Maintenance
This release signals a change in how Google views the CLI. It's no longer just a build tool; it's an interface for agents.
In the near future, we likely won't "stop development" to upgrade. We will have a background agent running via MCP that opens PRs:
"I noticed you used a `ControlValueAccessor` here. I've created a PR to refactor this to the new Signal Forms input API."
"Angular v22 just dropped. I've updated your `angular.json` and verified your tests via vitest."
## Summary: Don't Upgrade Alone
If you are moving to Angular 21, do not just run `ng update` and fight the compile errors manually.
1. Install the MCP server.
2. Let the AI map your project.
3. Ask it to plan the migration for you.
The code is still your responsibility, but the grunt work? That belongs to the machine now.
---
*If you want to know more about how to structure your AI agents, check out my article on [MCP Skills vs MCP Tools: The Right Way to Configure Your Server](https://www.yeou.dev/articles/mcp-skill-vs-mcp-tools-the-right-way) to understand when to use standard tools vs procedural playbooks.*
## FAQ
### What is the Angular CLI MCP Server?
The Angular CLI MCP Server is a built-in feature of Angular 21 (ng mcp command) that implements the Model Context Protocol. It lets AI editors like Cursor, VS Code Copilot, and Windsurf connect directly to your Angular workspace, query your project structure, access Angular documentation, and run context-aware migrations without manual code pasting.
### How do I set up the Angular MCP Server?
Run ng mcp in your Angular 21 workspace terminal. This generates the configuration snippet for your IDE. For Cursor, create or edit .cursor/mcp.json with: { "mcpServers": { "angular-cli": { "command": "npx", "args": ["-y", "@angular/cli", "mcp"] } } }. The -y flag is required to prevent interactive prompts from blocking the background process.
### What tools does the Angular MCP Server expose?
The Angular CLI MCP Server exposes: ai_tutor, find_examples, get_best_practices, list_projects, angular.json reader, onpush_zoneless_migration, and search_documentation. An experimental modernize tool is also available. The onpush_zoneless_migration tool is the most powerful — it analyzes your component dependency graph before applying zoneless change detection.
### Does Angular MCP work with VS Code Copilot?
Yes. Angular MCP Server works with any MCP-compatible AI editor including Cursor, VS Code with GitHub Copilot, Windsurf, and Antigravity. Each editor has its own MCP configuration file location but all use the same npx @angular/cli mcp command as the server process.
### What is the onpush_zoneless_migration tool in Angular MCP?
The onpush_zoneless_migration MCP tool analyzes a component's dependency graph before switching it to OnPush or Zoneless change detection. Unlike a standard ng update schematic, it detects unmanaged Observable subscriptions and recommends converting them to Signals with toSignal() before applying the strategy change, preventing render bugs.
---
# Angular Declarative Shift: Signals, Control Flow & Less RxJS
- **URL**: https://www.yeou.dev/articles/angular-declarative-shift
- **Published**: 2025-12-07
- **Updated**: 2026-06-08
- **Language**: English
- **Tags**: angular, angular20, architecture, testing, signals
- **Author**: Antonio Cárdenas (Google Developer Expert in Angular)
Angular is going declarative. Here's what that means for your codebase, why Signals replace most Observables, and how to adapt your Angular 20 project.
# How the New Folder Structure Changes Everything
If you haven't updated to version 20 yet, the first and second parts of this guide can help you understand what's changing and how to update.
## Part 1: The Update Itself 🛠️
First, let's solve the basics. Before running any commands, make sure your environment is ready.
### Prerequisites
- **Node.js**: v20.11.1 or later.
- **TypeScript**: v5.8 or later.
- **Project Backup**: Make sure to commit all your current changes to Git. Seriously.
### The Update Command
Once you've confirmed your Node.js version, run the command that fits your project.
For a standard Angular project:
```shell
ng update @angular/cli @angular/core
```
If you use Angular Material:
```shell
ng update @angular/cli @angular/core @angular/material
```
The update process will run, but you'll likely hit your first hurdle immediately.
## Part 2: What Breaks Immediately
Unlike previous updates, Angular 20 introduces a significant change that will stop your build.
### 1. The Full Story Behind Karma Removal
The first thing you'll notice is that `ng test` will fail. This isn't just an error; it's a fundamental change in Angular's build tools. With Angular 20, the default build package changes from `@angular-devkit/build-angular` to the new `@angular/build`. This new package **does not include Karma**. The web ecosystem has moved towards faster, modern test runners like **Vitest** and **Jest**, and Karma had become a bottleneck.
**The Temporary Solution:**
To get your tests running without migrating everything today, you must manually reinstall the old build tool. This forces the CLI to use the old compiler that is still compatible with Karma.
```shell
npm install @angular-devkit/build-angular --save-dev
```
This is a compatibility bridge. The message from the Angular team is clear: start planning your migration to Jest or Vitest soon.
### 2. browserslist and Browser Support
Here's a minor detail that might surprise you. Angular 20 **officially no longer supports Opera**. If you have "Opera" listed in your `.browserslistrc` file, your build may fail or throw warnings. Remove it to resolve the issue.
## Part 3: The New Architecture
Beyond the breaking changes, Angular 20 pushes for a more modern, explicit, and scalable architecture.
### 1. Standalone Components by Default
New projects generated with `ng new` are now *standalone* by default. This marks a fundamental architectural shift away from NgModules. By listing dependencies directly in a component's `imports` array, each component becomes self-contained.
What does this change imply?
- **Cleaner, Defined Architecture**: You know exactly what each component needs.
- **Improved *tree-shaking***: Leads to smaller, optimized bundles.
To migrate your existing projects, you can run the *standalone* migration schematic:
```shell
ng generate @angular/core:standalone
```
### 2. A Folder Structure That Tells a Story
A good folder structure doesn't just hold files; it tells you what the application does. It's worth emphasizing the official Angular style guide, as its recommendations are based on years of community experience. This philosophy, detailed in their [file structure reference page](https://angular.dev/reference/configs/file-structure), is often summarized with the acronym **LIFT** (Locate, Identify, Flat, Try to be DRY):
- **L**ocate your code easily.
- **I**dentify what a file does at a glance.
- **F**lat: Keep structure as flat as you can.
- **T**ry to be DRY: Don't Repeat Yourself.
The main takeaway is **organize by feature, not by type**. Instead of a `components` folder and a `services` folder, create folders for features like `user-profile` or `product-list`.
Let's use a practical example for an e-commerce application:
```shell
src/app/
├── core/
│ ├── auth/ # Authentication logic used everywhere
│ │ ├── auth-store.ts
│ │ └── auth-interceptor.ts
│ └── layout/ # The application shell: navbar, footer
│ ├── navbar.ts
│ └── footer.ts
│
├── features/
│ ├── products/ # Everything for browsing products
│ │ ├── product-list.ts
│ │ ├── product-details.ts
│ │ └── product-search.ts
│ │
│ └── cart/ # The shopping cart feature
│ ├── cart-store.ts
│ ├── cart-view.ts
│ └── add-to-cart.ts
│
└── shared/ # Reusable "dumb" components and utilities
└── ui/
├── button.ts
├── spinner.ts
└── price.pipe.ts
```
**Why does this work?**
1. **core (Provide Once):** Services and components the app needs to run, loaded only once (`AuthStore`, `Navbar`).
2. **Features (What your app does):** The heart of your application. Each folder is a self-contained feature.
3. **shared (Reusable building blocks):** "Dumb" components, pipes, and directives that know nothing about the features they are used in (`Button`, `Spinner`). They are imported by feature modules.
### 3. The New Naming Convention
Angular 20 introduces a new official naming convention that **removes traditional suffixes** like `.component.ts` or `.service.ts`.
| **Old Naming** | **New Naming** | **Intent** |
| :-----------------------: | :--------------------: | :-------------------------------: |
| user-profile.component.ts | user-profile.ts | User Interface Component |
| auth.service.ts | auth-store.ts | State Management |
| highlight.directive.ts | highlight.ts | Directive |
| user-api.service.ts | user-api.ts | HTTP Client |
The goal is to focus on the **intent** of the file rather than its technical type. A class that handles state is a "store", and one that makes HTTP requests is an "api". This makes the purpose of your code much clearer, especially in a feature-based folder structure.
## Part 4: New Tools and Syntax
Finally, let's look at the new tools that will improve your daily development.
### 1. Control flow is more than syntactic sugar
The new `@for` block replaces `*ngFor` and is a major improvement.
**Old syntax:**
```typescript
}
```
Key improvements:
- `track` is **mandatory**, enforcing a performance best practice that was often forgotten.
- The built-in `@empty` block cleans up templates by removing the need for a separate `*ngIf`.
You can use the CLI to automatically refactor your templates:
```shell
ng generate @angular/core:control-flow
```
### 2. Zoneless: Escaping "Change Detection Magic"
Although still experimental, the path to a *zoneless* Angular is becoming clearer. In a zoneless world, the UI only updates when you explicitly tell it to.
**Signals** are the primary tool for this.
```typescript
mySignal.set(newValue);
```
This line tells Angular directly to update only the specific parts of the DOM that depend on that signal. It's a surgical, predictable, and high-performance approach that eliminates the overhead and unpredictability of Zone.js.
## Conclusion
Angular 20 is a significant release. The update requires manual intervention for testing, but pushes the *framework* toward a more modern, explicit, and high-performance future. By adopting *standalone* components, a feature-based architecture, and the new control flow, you're not just updating; you're preparing your application for the next era of web development.
## FAQ
### What does 'declarative Angular' mean?
Declarative Angular refers to the shift from imperative patterns (subscribing to Observables, manually triggering change detection, structural directives) to declarative ones (Signals that self-update, @if/@for in templates, computed values). You describe the desired state and Angular figures out what changed, rather than you writing instructions for every state transition.
### Do Signals replace RxJS in Angular 20?
Signals replace RxJS for component-level state management and synchronous derived values. For asynchronous streams, HTTP calls, and complex event pipelines, RxJS remains the right tool. Angular 20+ provides toSignal() and toObservable() in @angular/core/rxjs-interop to mix both patterns cleanly.
### What is the new recommended folder structure in Angular 20?
Angular 20 encourages a feature-first folder structure: each feature has its own directory containing its component, store, routes, and tests. The old shared/core/features split is replaced by colocation — files that change together live together. Standalone components make this possible by removing the need for shared NgModules.
### Is RxJS being removed from Angular?
No. RxJS is not being removed from Angular. The HttpClient, Router events, and many Angular internals still use Observables. What is changing is that Signals are the preferred primitive for component state, while RxJS handles async flows. The two coexist with first-class interop utilities.
### How does the declarative shift affect Angular performance?
The declarative shift significantly improves performance by enabling zoneless change detection. With Signals, Angular knows exactly which component needs to re-render when a value changes, instead of checking the entire component tree. This reduces CPU usage, improves Core Web Vitals, and enables fine-grained updates without Zone.js overhead.
---
# Angular 20: El Cambio Declarativo y la Nueva Arquitectura
- **URL**: https://www.yeou.dev/articulos/el-cambio-declarativo-de-angular
- **Published**: 2025-12-07
- **Updated**: 2026-06-08
- **Language**: Spanish
- **Tags**: angular, angular20, arquitectura, testing, signals
- **Author**: Antonio Cárdenas (Google Developer Expert in Angular)
Angular 20 adopta estructura feature-first, elimina Karma y pone Signals en el centro. Qué cambia en tu arquitectura y cómo adaptarte.
# Cómo la Nueva Estructura de Carpetas lo Cambia Todo
Si no has actualizado a la versión 20, la primera y segunda parte de esta guía te pueden ayudar a comprender qué cambia y actualizar.
## Parte 1: La actualización en sí misma 🛠️
Primero, resolvamos lo básico. Antes de ejecutar cualquier comando, asegúrate de que tu entorno esté listo.
### Prerrequisitos
- **Node.js**: v20.11.1 o posterior.
- **TypeScript**: v5.8 o posterior.
- **Copia de seguridad del proyecto**: Asegúrate de confirmar todos tus cambios actuales en Git. En serio.
### El Comando de Actualización
Una vez que hayas confirmado tu versión de Node.js, ejecuta el comando que se ajuste a tu proyecto.
Para un proyecto estándar de Angular:
```shell
ng update @angular/cli @angular/core
```
Si utilizas Angular Material:
```shell
ng update @angular/cli @angular/core @angular/material
```
El proceso de actualización se ejecutará, pero es probable que te encuentres con tu primer obstáculo de inmediato.
## Parte 2: Lo que se rompe inmediatamente
A diferencia de las actualizaciones anteriores, Angular 20 introduce un cambio significativo que detendrá tu compilación.
### 1. La Historia Completa Detrás de la Eliminación de Karma
Lo primero que notarás es que `ng test` fallará. Esto no es solo un error; es un cambio fundamental en las herramientas de compilación de Angular. Con Angular 20, el paquete de compilación predeterminado cambia de `@angular-devkit/build-angular` al nuevo `@angular/build`. Este nuevo paquete **no incluye Karma**. El ecosistema web ha avanzado hacia ejecutores de pruebas más rápidos y modernos como **Vitest** y **Jest**, y Karma se había convertido en un cuello de botella.
**La solución temporal:**
Para que tus pruebas se ejecuten sin migrar todo hoy, debes reinstalar manualmente la antigua herramienta de compilación. Esto obliga a la CLI a usar el antiguo compilador que aún es compatible con Karma.
```shell
npm install @angular-devkit/build-angular --save-dev
```
Este es un puente de compatibilidad. El mensaje del equipo de Angular es claro: comienza a planificar tu migración a Jest o Vitest pronto.
### 2. browserslist y soporte de navegadores
Aquí hay un detalle menor que podría sorprenderte. Angular 20 **oficialmente ya no es compatible con Opera**. Si tienes "Opera" listado en tu archivo `.browserslistrc`, tu compilación puede fallar o arrojar advertencias. Quítalo para resolver el problema.
## Parte 3: La Nueva Arquitectura
Más allá de los cambios importantes, Angular 20 impulsa una arquitectura más moderna, explícita y escalable.
### 1. Componentes standalone por defecto
Los nuevos proyectos generados con `ng new` ahora son *standalone* (independientes) por defecto. Esto marca un cambio arquitectónico fundamental que se aleja de los NgModules. Al listar las dependencias directamente en el *array* `imports` de un componente, cada componente se vuelve autocontenido.
¿Qué implica este cambio?:
- **Arquitectura más clara y definida**: Sabes exactamente lo que necesita cada componente.
- **Mejora el *tree-shaking***: Conduce a paquetes más pequeños y optimizados.
Para migrar tus proyectos existentes, puedes ejecutar el *schematic* de migración *standalone*:
```shell
ng generate @angular/core:standalone
```
### 2. Una estructura de carpetas que cuenta una historia
Una buena estructura de carpetas no solo contiene archivos, sino que te dice lo que hace la aplicación. Vale la pena hacer énfasis en la guía de estilo oficial de Angular, ya que sus recomendaciones se basan en años de experiencia comunitaria. Esta filosofía, detallada en su [página de referencia de estructura de archivos](https://angular.dev/reference/configs/file-structure), a menudo se resume con el acrónimo **LIFT** (por sus siglas en inglés: Localizar, Identificar, Plano, Tratar de ser DRY):
- **L**ocate (Localiza) tu código fácilmente.
- **I**dentify (Identifica) lo que hace un archivo de un vistazo.
- **F**lat (Plano): Mantén estructura plana tanto como puedas.
- **T**ry to be DRY: Don't Repeat Yourself (Trata de no repetirte).
La conclusión principal es **organizar por característica, no por tipo**. En lugar de una carpeta `components` y una carpeta `services`, crea carpetas para características como `user-profile` o `product-list`.
Usemos un ejemplo práctico para una aplicación de comercio electrónico:
```shell
src/app/
├── core/
│ ├── auth/ # Lógica de autenticación usada en todas partes
│ │ ├── auth-store.ts
│ │ └── auth-interceptor.ts
│ └── layout/ # El shell de la aplicación: barra de navegación, pie de página
│ ├── navbar.ts
│ └── footer.ts
│
├── features/
│ ├── products/ # Todo para navegar por los productos
│ │ ├── product-list.ts
│ │ ├── product-details.ts
│ │ └── product-search.ts
│ │
│ └── cart/ # La característica del carrito de compras
│ ├── cart-store.ts
│ ├── cart-view.ts
│ └── add-to-cart.ts
│
└── shared/ # Componentes "tontos" reutilizables y utilidades
└── ui/
├── button.ts
├── spinner.ts
└── price.pipe.ts
```
**¿Por qué funciona esto?**
1. **core (Proporcionar una vez):** Servicios y componentes que la aplicación necesita para ejecutarse, cargados solo una vez (`AuthStore`, `Navbar`).
2. **Features (Lo que hace tu aplicación):** El corazón de tu aplicación. Cada carpeta es una característica autocontenida.
3. **shared (Bloques de construcción reutilizables):** Componentes "tontos", *pipes* y directivas que no saben nada sobre las características en las que se utilizan (`Button`,
`Spinner`). Son importados por los módulos de características.
### 3. La Nueva Convención de Nombres
Angular 20 introduce una nueva convención oficial de nombres que **elimina los sufijos tradicionales** como `.component.ts` o `.service.ts`.
| **Nomenclatura Antigua** | **Nueva Nomenclatura** | **Intención** |
| :-----------------------: | :--------------------: | :-------------------------------: |
| user-profile.component.ts | user-profile.ts | Componente de Interfaz de Usuario |
| auth.service.ts | auth-store.ts | Gestión de estado |
| highlight.directive.ts | highlight.ts | Directiva |
| user-api.service.ts | user-api.ts | Cliente HTTP |
El objetivo es centrarse en la **intención** del archivo en lugar de su tipo técnico. Una clase que maneja el estado es un "store" (almacén), y una que realiza peticiones HTTP es una "api". Esto hace que el propósito de tu código sea mucho más claro, especialmente en una estructura de carpetas basada en características.
## Parte 4: Las nuevas herramientas y sintaxis
Finalmente, veamos las nuevas herramientas que mejorarán tu desarrollo diario.
### 1. El flujo de control es más que syntactic sugar (azúcar sintáctico).
El nuevo bloque `@for` reemplaza a `*ngFor` y es una mejora importante.
**Sintaxis antigua:**
```typescript
}
```
Mejoras clave:
- `track` es **obligatorio**, lo que impone una mejor práctica de rendimiento que a menudo se olvidaba.
- El bloque `@empty` incorporado limpia las plantillas al eliminar la necesidad de un `*ngIf` separado.
Puedes usar la CLI para refactorizar automáticamente tus plantillas:
```shell
ng generate @angular/core:control-flow
```
### 2. Zoneless: Escapando de la "magia de la detección de cambios".
Aunque todavía es experimental, el camino hacia un Angular sin zonas (*zoneless*) se está volviendo más claro. En un mundo sin zonas, la interfaz de usuario solo se actualiza cuando se lo indicas explícitamente.
Los **signals** (señales) son la herramienta principal para esto.
```typescript
mySignal.set(newValue);
```
Esta línea le indica directamente a Angular que actualice solo las partes específicas del DOM que dependen de esa señal. Es un enfoque quirúrgico, predecible y de alto rendimiento que elimina la sobrecarga y la imprevisibilidad de Zone.js.
## Conclusión
Angular 20 es una versión significativa. La actualización requiere intervención manual para las pruebas, pero impulsa el *framework* hacia un futuro más moderno, explícito y de alto rendimiento. Al adoptar componentes *standalone*, una arquitectura basada en características y el nuevo flujo de control, no solo estás actualizando, sino que estás preparando tu aplicación para la próxima era del desarrollo web.
---
# How to Fix Karma in Angular 20: Missing Builder Error Solved
- **URL**: https://www.yeou.dev/articles/angular-20-karma-fix
- **Published**: 2025-12-02
- **Updated**: 2026-06-08
- **Language**: English
- **Tags**: angular, karma, testing, migration, vitest, gde
- **Author**: Antonio Cárdenas (Google Developer Expert in Angular)
Angular 20 removed the Karma builder. Learn exactly how to restore it temporarily or migrate to Vitest in 5 minutes.
# How to Fix Karma in Angular 20: The "Missing Builder" Error Solved
You just finished the upgrade. You ran `ng update`, everything looked green, and you felt great. Then you typed `ng test` and the terminal screamed at you:
```bash
Schema validation failed with the following errors:
Data path "" must have required property 'karmaConfig'
```
If you are staring at this error, you are not alone. In Angular 20, the team finally pulled the plug on the legacy build system. Here is exactly why this broke, and the two ways you can fix it—whether you need a quick patch or a permanent solution.
## The "Why": Goodbye Webpack, Hello esbuild
For years, Angular relied on Webpack to bundle your code and Karma to run your tests in a real browser. It worked, but it was slow.
In Angular 20, the CLI defaults entirely to the new Application Builder based on esbuild and Vite. This new builder is blazingly fast, but it has one catch: **It does not support Karma.**
When you run `ng test` now, the CLI is looking for a Karma configuration that the new builder simply doesn't understand.
## Solution A: The "Quick Fix" (Retro-fitting)
Use this if you have a massive test suite (500+ tests) and cannot afford to rewrite them today.
To get your tests passing again without changing a single line of test code, we need to manually reinstall the "Legacy" builder that Angular 20 doesn't include by default.
### Step 1: Install the Legacy Builder
Run this command to bring back the Webpack-based architecture:
```bash
npm install --save-dev @angular-devkit/build-angular
```
### Step 2: Update angular.json
You need to tell Angular to stop using the new application builder for tests and go back to the old browser builder.
Open your `angular.json` and find the `"test"` target. Change the builder string:
```json
"test": {
// CHANGE THIS LINE:
// "builder": "@angular/build:test",
// TO THIS:
"builder": "@angular-devkit/build-angular:karma",
"options": {
"polyfills": ["zone.js", "zone.js/testing"],
"tsConfig": "tsconfig.spec.json",
"karmaConfig": "karma.conf.js"
}
}
```
Run `ng test` again. It will be slower than the new tools, but it will work.
## Solution B: The "Real Fix" (Migrate to Vitest)
Use this if you want instant test feedback and future-proof code. This is the GDE-recommended path.
The ecosystem has moved on. Vitest is the spiritual successor to Karma/Jasmine but runs on Vite. It is instant, headless by default, and fully compatible with Angular 20.
### Step 1: Run the Experimental Migration
Angular 20 includes a schematic to do the heavy lifting for you.
```bash
ng generate @angular/core:testing
```
> **Note:** Select "Vitest" when prompted.
### Step 2: Verify angular.json
The CLI should automatically update your builder to the new experimental runner:
```json
"test": {
"builder": "@angular/build:test", // The new standard
"options": {
"runner": "vitest"
}
}
```
## Why you should switch today
I recently migrated a client's government dashboard from Karma to Vitest. Look at the difference:
| Feature | Karma (Legacy) | Vitest (Modern) |
| :--- | :--- | :--- |
| **Startup Time** | 12s - 20s | < 400ms |
| **Engine** | Real Browser (Chrome) | Vite (Node.js/JSDOM) |
| **Debugging** | Browser Console | Terminal / VS Code |
| **Future Proof?** | ❌ Deprecated | ✅ Industry Standard |
## Final Thoughts
The error `must have required property 'karmaConfig'` is annoying, but it's a signal. It's the framework telling you that the tools of 2016 (Webpack/Karma) are no longer the tools of 2025.
If you are on a tight deadline, use **Solution A**. But put a ticket in your backlog to implement **Solution B**. Your CI/CD pipeline (and your developers) will thank you.
Need help migrating a complex repo? Check out my GDE profile or ping me on Twitter.
---
*This error usually appears mid-upgrade — the full walkthrough is in [Upgrade Angular 19 to 20](https://www.yeou.dev/articles/upgrading-to-angular-20/), and every other version jump is in the [Angular Upgrade Guide](https://www.yeou.dev/angular-upgrades/).*
## FAQ
### Why is ng test broken after upgrading to Angular 20?
Angular 20 defaults to the new esbuild-based application builder, which does not support the Karma test runner. When you run ng test, Angular expects a Karma configuration that the new builder doesn't understand, causing the 'must have required property karmaConfig' schema validation error.
### How do I fix the 'karmaConfig' error in Angular 20?
Two options: (1) Quick fix — reinstall the legacy builder with npm install --save-dev @angular-devkit/build-angular and update angular.json to use builder: '@angular-devkit/build-angular:karma'. (2) Permanent fix — migrate to Vitest by running ng generate @angular/core:karma-to-vitest, then set builder: '@angular/build:test' with options.runner: 'vitest' in angular.json.
### How do I migrate from Karma to Vitest in Angular 20?
Run the Angular schematic: ng generate @angular/core:karma-to-vitest. This auto-converts your test configuration. Then update angular.json to use builder: '@angular/build:test' with runner: 'vitest'. After migration, remove karma.conf.js from your project.
### Is Karma still supported in Angular 20?
Karma is not the default in Angular 20 but can still be used by manually installing @angular-devkit/build-angular and updating angular.json to use the legacy @angular-devkit/build-angular:karma builder. This is a deprecated path — the Angular team recommends migrating to Vitest.
### What is the difference between Karma and Vitest in Angular?
Karma runs tests in a real browser using Webpack, taking 12–20 seconds to start. Vitest runs tests in Node.js using Vite, starting in under 400ms. Vitest is actively maintained and is the Angular team's recommended test runner from Angular 20 onwards.
---
# Angular 20: Componentes Dinámicos sin setInput (Nueva API)
- **URL**: https://www.yeou.dev/articulos/angular-20-programacion-imperativa-declarativa
- **Published**: 2025-11-27
- **Updated**: 2026-06-08
- **Language**: Spanish
- **Tags**: angular, angular20, dynamic-components, declarative, imperative
- **Author**: Antonio Cárdenas (Google Developer Expert in Angular)
Angular 20 introduce una API declarativa para componentes dinámicos que elimina el antipatrón setInput. Aprende la diferencia y cómo migrar.
## El laberinto de la construcción manual (Pre-Angular 20)
Antes de Angular 20, trabajar con componentes creados dinámicamente era engorroso. El "enlace de datos bidireccional" (two-way data binding) era muy incómodo, y no existía un estilo unificado para trabajar con "entradas" (inputs) y "salidas" (outputs).
Para configurar un componente dinámico, era como si tuviéramos que conectar cada componente (input) y cable de salida (output) de forma individual y a mano. Para un hipotético `NotificationComponent`, los pasos manuales e imperativos eran:
1. **Conexión manual de componentes**: Se tenía que usar `setInput()` para conectar cada componente (propiedad) por separado.
2. **Preparación manual de los datos**: Si los datos venían de una "señal" (signal), debían ser desenvueltos (acceder a su valor) para obtener el valor real y no la función.
3. **Gestión de las conexiones de salida**: Se requería suscribirse manualmente a las salidas (outputs), guardando cada suscripción. Era crucial recordar desconectar estos cables (unsubscribe) para prevenir fugas de memoria.
4. **Sincronización manual de datos**: Para que el componente dinámico reaccionara a los cambios en una signal del padre, era necesario un "efecto" (effect) para rastrear el cambio y luego volver a conectar manualmente el cable (`setInput`) con el nuevo valor.
El código era como un diagrama de cableado muy imperativo y no reactivo:
```typescript
// Enfoque anterior (Imperativo)
// Paso 1: Conexión básica de la placa madre
const componentRef = this.container().createComponent(NotificationComponent);
// Paso 2: Conexión manual de los componentes y datos
componentRef.setInput('message', 'Alerta de estado');
componentRef.setInput('priority', this.prioritySignal()); // ¡Desenvolver el valor de la signal!
// Paso 3 & 4: Conexión manual de los cables de salida y de sincronización
this.subscriptions.push(
componentRef.instance.dismissed.subscribe(() => {
componentRef.destroy(); // Lógica de destrucción manual (desconectar del todo)
})
);
// Paso 5: Reactividad manual usando efecto
this.subscriptions.push(
effect(() => {
// Necesario para que el componente se actualice reactivamente
componentRef.setInput('priority', this.prioritySignal());
})
);
// ... Se necesita más código para la sincronización bidireccional y la limpieza de cables.
```
La forma de acceder a la salida (output) requería acceder directamente a la propiedad de la clase, lo que no respetaba el "alias" de la salida y era diferente de cómo funciona en las plantillas.
## El panel de control unificado (Angular 20)
A partir de Angular 20, la configuración de componentes dinámicos se gestiona a través de la nueva propiedad `bindings`. Este nuevo enfoque es declarativo y reactivo, y su corazón es la "referencia del contenedor de vista" (`ViewContainerRef`), que actúa como el "socket" principal donde se insertará el nuevo componente.
### El poder de ViewContainerRef
Una "referencia del contenedor de vista" (`ViewContainerRef`) es el "socket" en el chasis de tu PC donde se puede instalar una tarjeta de video o de sonido. Permite crear, eliminar o incluso mover "tarjetas" (views) dentro de ese contenedor. Para acceder a él, se puede inyectar con `inject()` o, para una ubicación específica, usar una referencia de plantilla.
Para controlar la ubicación exacta de tu componente dinámico, puedes añadir un `` en tu plantilla para definir un lugar de inserción:
```html
```
Luego, en el código TypeScript, se accede a esa ubicación específica usando `viewChild`:
```typescript
container = viewChild.required("container", { read: ViewContainerRef });
```
Ahora, la creación del componente dinámico con `createComponent` se realiza directamente en ese contenedor, asegurando que se renderice en el lugar deseado.
### Configuración con bindings
La propiedad `bindings` permite definir "enlaces de entrada" (input), "enlaces de salida" (output) y "enlaces bidireccionales" (two-way bindings) en un estilo unificado. Esto elimina la necesidad de `setInput()` manuales y de suscripciones.
Aquí está el código completo para un ejemplo práctico, como un `DialogComponent`, que ahora se conecta con un solo "conector modular":
```typescript
// Enfoque Angular 20 (Declarativo)
import { Component, inputBinding, outputBinding, viewChild, ViewContainerRef } from '@angular/core';
import { DialogComponent } from './dialog/dialog.component';
@Component({
selector: 'app-root',
template: `
`
})
export class AppComponent {
container = viewChild.required("container", { read: ViewContainerRef });
createDynamic() {
this.container().createComponent(
DialogComponent,
{
bindings: [
// Conexión del cable de entrada 'isOpen'
inputBinding("isOpen", () => true),
// Conexión del cable de entrada 'title'
inputBinding("title", () => "Hello"),
// Conexión del cable de salida 'onClose' para que se autodesconecte
outputBinding("onClose", () => this.container().clear())
]
}
);
}
}
```
La nueva API gestiona automáticamente la limpieza de suscripciones cuando el componente es destruido, eliminando las pesadillas de gestión de memoria y los cables sueltos.
## Las tres funciones de enlace en detalle
La API de "enlaces" (bindings) se compone de tres funciones esenciales que deben importarse desde `@angular/core`.
### 1. inputBinding()
Esta función se utiliza para conectar las "entradas" (inputs) del componente.
Cuando se proporciona un `signal` directamente, `inputBinding` accede automáticamente al valor de la signal y rastrea reactivamente los cambios, actualizando la entrada del componente sin necesidad de un `effect` manual.
Ejemplos de `inputBinding`:
```typescript
// Entrada estática: el valor no cambia después de la creación
inputBinding('message', () => 'Datos cargados'),
// Entrada dinámica: automáticamente reactiva a los cambios en la signal
inputBinding('priority', this.prioritySignal),
// Entrada calculada: utiliza una función computada (también reactiva)
inputBinding('statusText', () => `Usuario: ${this.currentUser()} - Estado: ${this.systemStatus()}`),
```
### 2. outputBinding()
Esta función maneja los "eventos de salida" (outputs) emitidos por el componente dinámico.
Se puede especificar el tipo de valor emitido usando un "tipo genérico" (generic type) para mejorar la seguridad de tipos en TypeScript:
```typescript
// Salida básica: Maneja el evento de cierre
outputBinding('dismissed', () => {
console.log('Notificación cerrada!');
}),
// Salida con datos y tipado (UserEvent es un tipo genérico)
outputBinding('userAction', (eventData) => {
this.handleAction(eventData);
}),
```
### 3. twoWayBinding()
Esta es la solución simplificada para el "enlace de datos bidireccional" (two-way data binding), reemplazando el cableado manual complejo.
Simplemente se define el nombre de la "entrada modelo" (input model) y se proporciona la signal del componente padre que se desea mantener sincronizada.
```typescript
// Sincroniza la propiedad 'isUrgent' del componente con 'this.urgentModeSignal' del padre
twoWayBinding('isUrgent', this.urgentModeSignal),
```
Angular maneja automáticamente la convención de sufijo `Change` (por ejemplo, `isUrgent` se empareja con la salida `isUrgentChange`).
## Directivas aplicadas en tiempo de ejecución
Angular 20 también permite añadir componentes o características adicionales (directives) al componente creado dinámicamente. Esto se logra mediante la propiedad `directives` en la configuración de `createComponent`.
Para directivas sencillas, se proporciona el nombre del constructor de la directiva. Para directivas más complejas que requieren configuración, se proporciona un objeto que incluye la clave `type` (el constructor de la directiva) y la propiedad `bindings` para configurar sus propias entradas.
Ejemplo de directivas de runtime:
Configuraremos un `NotificationComponent` con una directiva simple (`FocusHighlightDirective`) y una directiva compleja de la librería Material (`SnackbarDirective`) para mostrar mensajes de estado al pasar el ratón:
```typescript
const componentRef = this.container().createComponent(NotificationComponent, {
bindings: [
inputBinding('message', () => 'Mueva el ratón para ver más detalles')
],
directives: [
// Directiva simple sin configuración
FocusHighlightDirective,
// Directiva compleja con configuración de entradas
{
type: SnackbarDirective, // La clase de la directiva
bindings: [
// Configura las entradas de la directiva
inputBinding('snackbarMessage', () => 'Información extra al hacer hover'),
inputBinding('snackbarPosition', () => 'right')
]
}
]
});
```
Esta capacidad permite un diseño más modular y una configuración dinámica de la experiencia del usuario.
En resumen, el nuevo enfoque de Angular 20 hace que la creación de componentes dinámicos sea más consistente, limpia y legible, ya que la sintaxis de "enlace" (binding) ahora es idéntica a la de las plantillas de Angular, además de ofrecer reactividad incorporada y gestión simplificada de la memoria. Ahora, en lugar de ensamblar una PC a mano, utilizas un "panel de control" unificado para la configuración y conexión de tus componentes.
---
**Bonus:**
[Stackblitz Demo](https://stackblitz.com/~/github.com/AntonioCardenas/ngviewcontainerref)
[Github Repo](https://github.com/AntonioCardenas/ngviewcontainerref)
---
# Angular Migration Path: Full Upgrade Guide from v15 to v21
- **URL**: https://www.yeou.dev/articles/updating-to-angular-20-real-world-guide
- **Published**: 2025-11-27
- **Updated**: 2026-06-08
- **Language**: English
- **Tags**: angular, angular20, migration, architecture, standalone, signals
- **Author**: Antonio Cárdenas (Google Developer Expert in Angular)
Step-by-step checklists for upgrading Angular v15 to v21. Covers standalone migration, Signals adoption, Karma removal, and per-version breaking changes.
## Part 1: The Upgrade Itself 🛠️
First, let's get the basics out of the way. Before running any commands, make sure your environment is ready.
### Prerequisites
- **Node.js**: v20.11.1 or later.
- **TypeScript**: v5.8 or later.
- **Project Backup**: Make sure you commit all your current changes in Git. Seriously.
### The Update Command
Once you've confirmed your Node.js version, run the command that fits your project.
For a standard Angular project:
```bash
ng update @angular/cli @angular/core
```
If you use Angular Material:
```bash
ng update @angular/cli @angular/core @angular/material
```
The update process will run, but you're likely to hit your first roadblock immediately.
## Part 2: What Breaks Immediately 🛑
Unlike previous updates, Angular 20 introduces a significant breaking change that will stop your build.
### 1. The Full Story Behind Karma’s Removal
The first thing you'll notice is that `ng test` will fail. This isn't just a bug; it's a fundamental change in Angular’s build tools.
With Angular 20, the default build package changes from `@angular-devkit/build-angular` to the new `@angular/build`. This new package does not include Karma. The web ecosystem has moved on to faster, more modern test runners like Vitest and Jest, and Karma had become a bottleneck.
**The Temporary Fix:**
To get your tests running without migrating everything today, you need to manually reinstall the old build tool. This forces the CLI to use the old compiler that still supports Karma.
```bash
npm install @angular-devkit/build-angular --save-dev
```
This is a compatibility bridge. The message from the Angular team is clear: start planning your migration to Jest or Vitest soon.
### 2. browserslist and Browser Support
Here's a smaller detail that might catch you by surprise. Angular 20 officially no longer supports Opera. If you have "Opera" listed in your `.browserslistrc` file, your build may fail or throw warnings. Remove it to resolve the issue.
## Part 3: The New Architecture 🏛️
Beyond the breaking changes, Angular 20 pushes forward a more modern, explicit, and scalable architecture.
### 1. Standalone is the Default
New projects generated with `ng new` are now standalone by default. This marks a fundamental architectural shift away from NgModules. By listing dependencies directly in a component's `imports` array, each component becomes self-contained.
**This change:**
- **Clarifies your architecture**: You know exactly what each component needs.
- **Improves tree-shaking**: Leads to smaller, more optimized bundles.
To migrate your existing projects, you can run the standalone migration schematic:
```bash
ng generate @angular/core:standalone
```
### 2. A Folder Structure That Tells a Story
A good folder structure doesn't just hold files—it tells you what the application does. It's worth mentioning the official Angular style guide, as its recommendations are built on years of community experience. This philosophy, detailed on their [file structure reference page](https://angular.dev/reference/configs/file-structure), is often summarized by the acronym LIFT:
- **Locate** your code easily.
- **Identify** what a file does at a glance.
- **Flat** structure for as long as you can.
- **Try to be DRY** (Don't Repeat Yourself).
The main takeaway is to organize by feature, not by type. Instead of a `components` folder and a `services` folder, you create folders for features like `user-profile` or `product-list`.
Let's use a practical example for an e-commerce app:
```text
src/app/
├── core/
│ ├── auth/ # Authentication logic used everywhere
│ │ ├── auth-store.ts
│ │ └── auth-interceptor.ts
│ └── layout/ # The app's shell: navbar, footer
│ ├── navbar.ts
│ └── footer.ts
├── features/
│ ├── products/ # Everything for browsing products
│ │ ├── product-list.ts
│ │ ├── product-details.ts
│ │ └── product-search.ts
│ └── cart/ # The shopping cart feature
│ ├── cart-store.ts
│ ├── cart-view.ts
│ └── add-to-cart.ts
└── shared/ # Reusable "dumb" components & utilities
└── ui/
├── button.ts
├── spinner.ts
└── price.pipe.ts
```
**Why This Works:**
1. **core 🏛️ (Provide once)**: Services and components the app needs to run, loaded only once (AuthStore, Navbar).
2. **features ✨ (What your app does)**: The heart of your application. Each folder is a self-contained feature.
3. **shared ♻️ (Reusable building blocks)**: "Dumb" components, pipes, and directives that don't know anything about the features they're used in (Button, Spinner). They are imported by feature modules.
### 3. The New Naming Convention
Angular 20 introduces a new official naming convention that drops traditional suffixes like `.component.ts` or `.service.ts`.
The goal is to focus on the file's intent rather than its technical type. A class that handles state is a "store," and one that makes HTTP requests is an "api." This makes your codebase's purpose much clearer, especially in a feature-based folder structure.
## Part 4: The New Tools & Syntax 🚀
Finally, let's look at the new tools that will make your day-to-day development better.
### 1. Control Flow is More Than Syntactic Sugar
The new `@for` block replaces `*ngFor` and is a major improvement.
**Old Syntax:**
```html
}
```
**Key improvements:**
- `track` is mandatory, enforcing a performance best practice that was often forgotten.
- The built-in `@empty` block cleans up templates by removing the need for a separate `*ngIf`.
You can use the CLI to automatically refactor your templates:
```bash
ng generate @angular/core:control-flow
```
### 2. Zoneless: Escaping the "Magic" of Change Detection
While still experimental, the path to a zoneless Angular is becoming clearer. In a zoneless world, the UI only updates when you explicitly tell it to.
Signals are the primary tool for this.
```typescript
mySignal.set(newValue);
```
This line directly tells Angular to update only the specific parts of the DOM that depend on that signal. It’s a surgical, predictable, and high-performance approach that eliminates the overhead and unpredictability of Zone.js.
## Conclusion
Angular 20 is a significant release. The upgrade requires manual intervention for testing, but it pushes the framework toward a more modern, explicit, and performant future. By embracing standalone components, a feature-based architecture, and the new control flow, you're not just updating—you're preparing your application for the next era of web development.
Happy coding!
---
*Need a specific version jump? Every migration path — v19 through v22 — is collected in the [Angular Upgrade Guide](https://www.yeou.dev/angular-upgrades/).*
## FAQ
### What is the correct order to upgrade Angular across multiple major versions?
Always upgrade one major version at a time: v15 → v16 → v17 → v18 → v19 → v20 → v21. Never skip versions. Angular's schematics run sequentially and each migration depends on the previous one. Skipping versions omits critical breaking-change fixes and leaves your codebase in an inconsistent state.
### What was the biggest change in the Angular v15 to v17 migration?
The v15→v17 migration centered on the transition to standalone components. Angular 15 introduced standalone APIs, Angular 17 made them the default for ng new. The migration involved running ng generate @angular/core:standalone to convert module-based components to standalone, removing NgModule declarations, and updating routing to use provideRouter().
### When was Karma removed from Angular?
Karma was replaced as the default test runner in Angular 20 (May 2025), which introduced the new @angular/build package built on Vite/esbuild. Angular 21 completed the transition by making Vitest the default test runner for ng new projects. Run ng generate @angular/core:karma-to-vitest to migrate existing projects.
### What is zoneless Angular and when should I migrate?
Zoneless Angular removes the dependency on Zone.js for change detection, replacing it with a Signals-based reactivity model that is faster and more predictable. It became opt-in in Angular 18, opt-out for new projects in Angular 21, and is the recommended architecture for greenfield projects from Angular 20 onwards. Migrate existing apps by running ng generate @angular/core:zoneless-migration.
### What breaking changes should I expect when upgrading from Angular 19 to 20?
The main breaking changes from Angular 19 to 20 are: afterRender() renamed to afterEveryRender() (no auto-migration), TestBed.get() removed (use TestBed.inject()), InjectFlags enum removed, DOCUMENT token moved from @angular/common to @angular/core, and @angular-devkit/build-angular replaced by the new @angular/build package.
---
# Upgrade Angular 19 to 20: No Breaking Changes Missed
- **URL**: https://www.yeou.dev/articles/upgrading-to-angular-20
- **Published**: 2025-06-28
- **Updated**: 2026-07-15
- **Language**: English
- **Tags**: angular, angular20, Angular20PDF, signals, zoneless, cli, ssr, frontend, vitest
- **Author**: Antonio Cárdenas (Google Developer Expert in Angular)
Walk through every step to migrate from Angular 19 to 20 — signals, control flow, the new @angular/build package, and the catches most guides skip.
> **TL;DR — upgrade Angular 19 to 20 in 3 steps:**
>
> ```bash
> # Prerequisites: Node.js 20.11.1+ and TypeScript 5.8+
> npm install -g @angular/cli@latest
> ng update @angular/cli@20 @angular/core@20
> ng test # if it fails, see the Karma fix below
> ```
>
> What actually breaks: **`afterRender()` is renamed to `afterEveryRender()`** (no auto-migration), **`TestBed.get()` is removed**, and **`@angular-devkit/build-angular` is replaced by `@angular/build`** — which drops Karma. Every fix is covered step by step below.
## 1. The Full Story Behind Karma's Removal: Beyond a Broken Build
The immediate issue when upgrading is that `ng test` will fail. The reason is a fundamental change in Angular's build tools.
### Why did Angular drop Karma?
With Angular 20, the default build package changes from `@angular-devkit/build-angular` to the new `@angular/build`. This new package no longer includes the Karma plugin used by legacy test setups.
The web ecosystem has moved on to faster test runners like **Vitest** and **Jest** that use modern tools like Vite and esbuild. Karma had become a bottleneck.
### What the new world looks like (Vitest/Jest)
Angular's experimental test runner, now powered by **Vitest**, is the future. Migrating means your unit tests will run in a fast, modern Node.js-based environment.
### The "temporary fix" explained
```bash
npm install @angular-devkit/build-angular --save-dev
```
This command forces the CLI to fall back to the old compiler that still supports Karma. It's a compatibility bridge — but the message is clear: start planning your migration to Jest or Vitest soon.
---
## 2. Prerequisites
Before starting the update process, make sure you meet the following:
- **Node.js**: Version `20.11.1` or later
- **TypeScript**: Version `5.8` or later
- **Project backup**: Commit all current changes in Git
---
## 3. How to Update: CLI Command and Comparison
### Update Command
Make sure you're running Node.js `v20.11.1` or later:
```bash
ng update @angular/cli @angular/core
```
If you use Angular Material:
```bash
ng update @angular/cli @angular/core @angular/material
```
### Manual intervention required
To reinstall the old compiler with Karma support:
```bash
npm install @angular-devkit/build-angular --save-dev
```
This wasn't required in earlier versions but is now **mandatory** if you want to keep using Karma.
### Compared to earlier upgrades
- **Angular v19**: `ng update` just worked.
- **Angular v20**: You must manually reinstall the old builder for Karma.
---
## 4. Control Flow: More Than Syntactic Sugar
`@for` replaces `*ngFor` and is a major improvement.
### Old syntax
```html
{{ item.name }}
```
### New syntax
```html
@for (item of items; track item.id) {
{{ item.name }}
} @empty {
No items to display.
}
```
- `track` is **mandatory** and encourages best practices.
- `@empty` improves DX by removing the need for separate `@if`.
### Automated migration and performance
Use the CLI to automatically refactor templates to the new control flow syntax:
```bash
ng generate @angular/core:control-flow
```
### General Best Practices and Further Migrations
You can also migrate to other modern Angular features:
```bash
ng generate @angular/core:standalone
ng generate @angular/core:inject
ng generate @angular/core:route-lazy-loading
ng generate @angular/core:signal-input-migration
ng generate @angular/core:signal-queries-migration
ng generate @angular/core:output-migration
```
These commands allow for a comprehensive update of an Angular app to leverage the latest patterns.
---
## 5. Standalone by Default: A Fundamental Architectural Shift
By explicitly listing dependencies using the `imports` array at the component level, each component becomes self-contained. This:
- Clarifies your architecture
- Improves tree-shaking
- Results in smaller bundles
---
## 6. Zoneless: Escaping the "Magic" of Change Detection
In a zone-less world, the UI only updates when you explicitly tell it to.
**Signals** are the main tool here.
```ts
mySignal.set(newValue);
```
This directly tells Angular to update only the DOM parts that use that signal. It's a **surgical, predictable, and high-performance** approach.
---
## 7. New Naming Convention: Why It Feels Complicated
Angular 20 introduces a new official naming convention that **drops traditional suffixes**.
### Old naming
```ts
user - profile.component.ts;
auth.service.ts;
highlight.directive.ts;
```
### New naming
```ts
user - profile.ts; // UI component
auth - store.ts; // state
highlight.ts; // directive
```
### Focus on intent instead of type
```ts
user - api.ts; // HTTP requests
auth - store.ts; // reactive state
movie - card.ts; // UI component
movie - details.ts; // UI component
```
### Naming rules
- Use **dashes**: `user-profile.ts`
- Match **class and filename**
- Keep `.spec.ts` for tests
- Avoid generic names like `utils.ts`
- **Co-locate** related files
### Feature-based folder structure
```
src/
├── core/
│ └── auth/
│ ├── auth-store.ts
│ ├── login.ts
│ └── register.ts
├── features/
│ └── users/
│ ├── user-profile.ts
│ ├── user-api.ts
│ └── user-settings.ts
```
### Benefits
- Cleaner Git diffs
- Intention-oriented code
- Easier onboarding
---
## 8. Important Detail: `browserslist` and Browser Support
Angular 20 **no longer supports Opera** officially.
If you list Opera in your `browserslist`, you may need to remove it.
Other non-mainstream browsers may also lose support, potentially triggering warnings or build issues.
---
*On Angular 20 and ready for more? Continue with [Angular 20 to 21: Breaking Changes and How to Fix Them](https://www.yeou.dev/articles/angular21-upgrade/), or see every migration path in the [Angular Upgrade Guide](https://www.yeou.dev/angular-upgrades/).*
## FAQ
### How do I upgrade from Angular 19 to Angular 20?
Run ng update @angular/cli@20 @angular/core@20 in your project. Before running, ensure you are on TypeScript 5.8+ and Node.js 20+. Angular 20 replaces @angular-devkit/build-angular with the new @angular/build package, which drops Webpack dependencies. After updating, run ng test — if it fails, you may need to migrate from Karma to Vitest using ng generate @angular/core:karma-to-vitest.
### What breaks when upgrading from Angular 19 to 20?
The main breaking changes in Angular 20 are: (1) afterRender() is renamed to afterEveryRender() with no auto-migration — you must update this manually; (2) TestBed.get() is finally removed — use TestBed.inject() instead; (3) InjectFlags enum is removed; (4) DOCUMENT token moved from @angular/common to @angular/core; (5) ng-reflect-* attributes are off by default in dev mode; (6) fixture.autoDetectChanges(false) throws in zoneless tests.
### Does Angular 20 require TypeScript 5.8?
Yes. Angular 20 requires TypeScript 5.8 as the minimum version. TypeScript 5.8 was supported since Angular 19.2, but Angular 20 makes it mandatory. You must upgrade before running ng update.
### What is @angular/build and how does it replace @angular-devkit/build-angular?
@angular/build is the new, leaner build package introduced in Angular 20 that replaces @angular-devkit/build-angular. It drops transitive Webpack dependencies, reducing node_modules by roughly 200 MB, and fully embraces Vite/esbuild. New projects generated with ng new use @angular/build directly. The ng update migration handles this automatically for existing projects.
### Is ng test broken after upgrading to Angular 20?
ng test may fail after upgrading if you have a custom karma.conf.js or rely on Karma-specific plugins. Angular 20 introduced Vitest as an experimental test runner via the @angular/build:unit-test builder. To migrate from Karma to Vitest, run ng generate @angular/core:karma-to-vitest. Standard Karma configurations are auto-migrated well; custom Webpack hacks in test setup require manual rewriting.
---
# Actualizar Angular 19 a 20: Guía Paso a Paso Completa
- **URL**: https://www.yeou.dev/articulos/actualizando-a-angular-20
- **Published**: 2025-05-15
- **Updated**: 2026-07-15
- **Language**: Spanish
- **Tags**: angular, desarrollo-web, programacion, angular20
- **Author**: Antonio Cárdenas (Google Developer Expert in Angular)
Migra de Angular 19 a 20 sin romper tu proyecto: Signals, control flow, @angular/build y los errores que la mayoría de guías ignoran.
> **TL;DR — actualiza de Angular 19 a 20 en 3 pasos:**
>
> ```bash
> # Requisitos: Node.js 20.11.1+ y TypeScript 5.8+
> npm install -g @angular/cli@latest
> ng update @angular/cli@20 @angular/core@20
> ng test # ¿falla? mira la solución de Karma más abajo
> ```
>
> Lo que realmente se rompe: **`afterRender()` pasa a llamarse `afterEveryRender()`** (sin migración automática), **`TestBed.get()` fue eliminado** y **`@angular-devkit/build-angular` es reemplazado por `@angular/build`**, que ya no incluye Karma. Cada solución está explicada paso a paso abajo.
### 1. La Historia Completa Detrás de la Eliminación de Karma: Más Allá de una Compilación Rota
El problema inmediato al actualizar es que `ng test` fallará. La razón es un cambio fundamental en las herramientas de compilación de Angular.
> Ya que un framework moderno requiere test runners modernos.
#### ¿Por qué Angular eliminó Karma?
Con Angular 20, el paquete de compilación predeterminado cambia de `@angular-devkit/build-angular` al nuevo `@angular/build`. Este nuevo paquete ya no incluye el plugin de Karma utilizado por las configuraciones de prueba heredadas. El ecosistema web ha avanzado hacia test runners más rápidos como Vitest y Jest, que utilizan herramientas modernas como Vite y esbuild. Karma se había convertido en un cuello de botella.
#### Cómo es el nuevo panorama (Vitest/Jest)
El test runner experimental de Angular, ahora impulsado por Vitest, es el futuro. Migrar significa que tus pruebas unitarias se ejecutarán en un entorno rápido y moderno basado en Node.js.
#### La "solución temporal" explicada
Este comando obliga a la CLI a volver al compilador antiguo que todavía soporta Karma. Es un puente de compatibilidad, pero el mensaje es claro: deberías empezar a planificar tu migración a Jest or Vitest pronto.
```bash
npm install @angular-devkit/build-angular --save-dev
```
---
### 2. Prerrequisitos
Antes de comenzar el proceso de actualización, asegúrate de cumplir con los siguientes requisitos:
- **Node.js:** Versión `20.11.1` o posterior.
- **TypeScript:** Versión `5.8` o posterior.
- **Copia de seguridad del proyecto:** Confirma todos los cambios actuales en Git.
---
### 3. Cómo Actualizar: Comando CLI y Comparación
#### Comando de Actualización
Primero, asegúrate de que estás ejecutando Node.js v20.11.1 o posterior.
```bash
ng update @angular/cli @angular/core
```
Si usas Angular Material, inclúyelo en el comando de actualización:
```bash
ng update @angular/cli @angular/core @angular/material
```
#### Intervención Manual Requerida
Esto no era necesario en versiones anteriores, pero ahora es **obligatorio** if you want to keep using Karma. El comando reinstala el compilador antiguo con soporte para Karma.
```bash
npm install @angular-devkit/build-angular --save-dev
```
#### Comparación con Actualizaciones Anteriores
- **En v19:** `ng update` simplemente funcionaba.
- **En v20:** Debes reinstalar manualmente el compilador antiguo para Karma.
---
### 4. Flujo de Control(Control Flow): Más que Syntaxis Decorativo
La nueva sintaxis `@for` reemplaza a `*ngFor` y es una mejora importante.
**Sintaxis Antigua:**
```html
}
```
**Mejoras clave:**
- `track` ahora es obligatorio, lo que fomenta las mejores prácticas de rendimiento.
- `@empty` mejora la experiencia del desarrollador (DX) al eliminar la necesidad de un bloque `@if` separado para manejar listas vacías.
#### Migración Automatizada y Rendimiento
Usa la CLI para refactorizar automáticamente las plantillas a la nueva sintaxis de flujo de control, que ofrece mejoras de rendimiento y un código más mantenible.
```bash
ng generate @angular/core:control-flow
```
#### Mejores Prácticas Generales y Migraciones Adicionales
Considera migrar a otras características modernas de Angular junto con la actualización del flujo de control para una aplicación completamente optimizada. Esto puede incluir componentes standalone, signals como inputs y carga diferida (lazy loading) para rutas.
```bash
ng generate @angular/core:standalone
ng generate @angular/core:inject
ng generate @angular/core:route-lazy-loading
ng generate @angular/core:signal-input-migration
ng generate @angular/core:signal-queries-migration
ng generate @angular/core:output-migration
```
---
### 5. Standalone por Defecto: Un Cambio Arquitectónico Fundamental
Al listar explícitamente las dependencias usando el array `imports` a nivel de componente, cada componente se vuelve autocontenido. Esto clarifica tu arquitectura y mejora significativamente el tree-shaking, resultando en paquetes de aplicación más pequeños.
---
### 6. Adiós Zone.js (Zoneless): Escapando de la "Magia" de la Detección de Cambios
En un mundo sin zone.js, la interfaz de usuario solo se actualiza cuando se lo indicas explícitamente. Los Signals son la herramienta principal para esto. Cuando llamas a `mySignal.set()`, le estás diciendo directamente a Angular que actualice solo las partes del DOM que usan ese signal. Es un enfoque quirúrgico, predecible y de alto rendimiento.
---
### 7. Nueva Convención de Nombres: Por Qué Parece Complicado
Angular 20 introduce una nueva convención de nombres oficial que elimina los sufijos de tipo tradicionales.
**Nomenclatura Antigua:**
```typescript
user - profile.component.ts;
auth.service.ts;
highlight.directive.ts;
```
**Nomenclatura Nueva:**
```typescript
user - profile.ts;
auth - store.ts;
highlight.ts;
```
El nuevo enfoque está en la **intención** del archivo en lugar de su tipo:
- `user-api.ts` → Maneja peticiones HTTP
- `auth-store.ts` → Gestiona el estado reactivo
- `movie-card.ts`, `movie-details.ts` → Componentes de UI
**Reglas Clave de Nomenclatura:**
- Usa guiones para nombres de archivo de varias palabras (ej. `user-profile.ts`).
- Haz que el nombre de la clase coincida con el nombre del archivo.
- Mantén el sufijo `.spec.ts` para los archivos de prueba.
- Evita nombres genéricos como `utils.ts`.
- Ubica los archivos relacionados en la misma carpeta (co-locate) dentro de una estructura de carpetas basada en funcionalidades.
**Ejemplo de Estructura de Carpetas Basada en Funcionalidades:**
```
src/
├── core/
│ └── auth/
│ ├── auth-store.ts
│ ├── login.ts
│ └── register.ts
└── features/
└── users/
├── user-profile.ts
├── user-api.ts
└── user-settings.ts
```
**Beneficios:**
- Diffs en Git más limpias al refactorizar.
- Promueve un código orientado a la intención.
- Facilita la incorporación de nuevos desarrolladores.
---
### 8. Detalle Importante: `browserslist` y Soporte de Navegadores
Angular 20 ya no soporta oficialmente Opera. Si tienes Opera en tu archivo `.browserslistrc`, puede que necesites eliminarlo. Otros navegadores no convencionales también pueden perder soporte, lo que podría provocar advertencias o problemas de compilación.
---
*¿Ya estás en Angular 20? Continúa con [Angular 21: Guía de Actualización](https://www.yeou.dev/articulos/angular21/), o consulta todas las rutas de migración en el [Hub de Migraciones Angular](https://www.yeou.dev/migraciones-angular/).*
---
# Angular 20: Signals Estables, Control Flow y Nuevas APIs
- **URL**: https://www.yeou.dev/articulos/angular-20-que-hay-de-nuevo
- **Published**: 2025-05-01
- **Updated**: 2026-06-08
- **Language**: Spanish
- **Tags**: angular, angular-20, typescript, signals, zoneless, cli, ssr, frontend, vitest
- **Author**: Antonio Cárdenas (Google Developer Expert in Angular)
Signals estables, @angular/build sin Webpack, Zoneless en developer preview y ngIf deprecated. Todo lo que cambia en Angular 20 y cómo afecta tu proyecto.
### Nuevos requisitos: TypeScript v5.8 y Node v20
Angular v20 no es nada ambiguo con sus nuevos requisitos. Ahora _tienes_ que estar en **TypeScript v5.8** (que, por cierto, ya era compatible desde v19.2), así que es hora de decir adiós a las versiones más antiguas de TypeScript).
Y para Node, dale la bienvenida a **Node v20** como el nuevo mínimo. Angular v19 fue la gira de despedida para Node 18. ¡Es hora de actualizar esos entornos, colegas!
### Guía de estilo 2025: ¡Una bocanada de aire fresco!
¡La Guía de Estilo de Angular ha recibido una renovación importante! Muchas recomendaciones se han reducido para centrarse en lo que _realmente_ importa.
- **Nombres de archivo recortados:** Olvídate de `UserComponent` en `user.component.ts`. Ahora es simplemente `User` en `user.ts`. Lo mismo para directivas, pipes, etc. La CLI ya está aplicando esto para cosas nuevas. ¿Cuánto tardará tu memoria muscular en adaptarse?
- **Estructura de carpetas más ligera:** La carpeta `app` de nivel superior podría desaparecer pronto (aunque la CLI aún no ha llegado a ese punto).
- **Visibilidad de propiedades:** `protected` es ahora la forma para las propiedades que solo se usan en tu plantilla, y `readonly` para todas esas propiedades inicializadas por Angular (`input()`, `output()`, etc.). ¡Tiene sentido!
- **Bindings de Clases y Estilos:** ¡Es oficial! `[class.something]` y `[style.something]` son los campeones recomendados sobre `ngClass` y `ngStyle`.
Esto es un cambio _grande_. Los nuevos proyectos lo adoptarán por defecto. ¿Los existentes? Bueno, o migras o te quedas con las viejas costumbres (la CLI ayuda con una configuración para eso, ¡uf!).
### APIs de Signals: ¡Mayormente Luz Verde y Estables!
¡Las Signals son el futuro, y las APIs se están consolidando! La mayoría ahora son **estables**:
- `effect()`
- `toSignal()`
- `toObservable()`
- `afterRenderEffect()`
- `afterNextRender()`
- `linkedSignal()`
- `PendingTasks`
**¡Ojo con esto!** `afterRender()` ha sido **renombrado a `afterEveryRender()`** y es estable. Crucialmente, el nombre antiguo _desapareció_ sin migración automática. ¡Uf, eso podría doler!
Además, `TestBed.flushEffects()` (esa API en developer preview un poco escurridiza) está obsoleta. Usa `TestBed.tick()` ahora, que ejecuta todo el proceso de sincronización, mucho más cercano al comportamiento real de la aplicación. `effect()` perdió su opción `forceRoot` (¿alguien la usaba mucho?), y `toSignal()` eliminó `rejectErrors` (¡bien pensado, mejores prácticas al poder!). `pendingUntilEvent()` todavía se está calentando en developer preview.
### Zoneless: ¡Fuera de Experimental, entra en Developer Preview!
Si las signals son el futuro de la reactividad, ¡Zoneless es el futuro de la detección de cambios! Ya no es "experimental", ahora está oficialmente en **developer preview**.
- `provideExperimentalZonelessChangeDetection` ahora es simplemente `provideZonelessChangeDetection`.
- El flag de la CLI `--experimental-zoneless` ahora es simplemente `--zoneless`.
La CLI incluso te preguntará si quieres habilitarlo para nuevos proyectos. ¿Listos para el #NoZone?
### Que se va, que se queda y que puede romper nuestro código:
Como en toda versión mayor, algunas cosas se van a la basura:
- **Las directivas `ngIf`, `ngFor`, `ngSwitch` están oficialmente obsoletas.** El control de flujo incorporado (`@if`, `@for`, `@switch`) es el rey ahora. Empieza a migrar; ¡probablemente desaparecerán en v22! `ng update` te echará una mano.
- `fixture.autoDetectChanges(boolean)`: El parámetro booleano ha desaparecido. Simplemente usa `fixture.autoDetectChanges()`. ¿Usar `fixture.autoDetectChanges(false)` en un test zoneless? Eso ahora lanzará un error.
- **`TestBed.get()`: ¡Finalmente, _finalmente_ DESAPARECIÓ!** Estuvo obsoleto desde allá por Angular v9. `TestBed.inject()` es tu amigo (desde hace mucho). Una migración automática se encargará de esto.
- Enum `InjectFlags`: Eliminado. Los objetos de opciones para las APIs de DI (como `inject()`) han sido la norma desde v14.1.
- Token `DOCUMENT`: Se movió de `@angular/common` a `@angular/core`. Una migración actualizará tus imports.
- `@angular/platform-browser-dynamic`: Obsoleto en favor de `@angular/platform-browser`. Tendrás que actualizar manualmente los imports para este por ahora.
- `@angular/platform-server/testing`: También obsoleto, sin reemplazo. Las pruebas E2E son ahora la forma recomendada para verificar aplicaciones SSR.
- **Integración con HammerJS: Obsoleta.** HammerJS no ha visto una actualización en 8 años. Es hora de decir adiós a esas entidades en el framework.
- **Atributos `ng-reflect-*`:** Desaparecen por defecto en modo desarrollo. Eran para antiguas devtools. Si dependías de ellos (¡probablemente no deberías!), puedes rehabilitarlos con `provideNgReflectAttributes()`. Pero quizás... ¿mejor no?
### Plantillas: ¡Nuevos trucos bajo la manga!
Tus plantillas se han vuelto un poco más expresivas:
- **Exponenciación:** `{{ 2 ** 3 }}` ahora es posible. ¡Por lo que podemos hacer cálculos de manera más fácil!.
- **Tagged Template Literals:** Sí, `{{ translate\`app.title\` }}` está aquí (técnicamente desde v19.2, pero ahora está asentado).
- **Operador `void`:** Úsalo como `